💬 Prashant’s Note
When I first set up a popup for a restaurant client in Melbourne, the part that confused her most was the difference between Display Conditions and Triggers — she kept thinking they were the same thing. Here is how I explain it to all my clients: Conditions control *where* the popup shows up on your site, and Triggers control *when* it fires based on what the visitor does. Once you understand that simple split, everything else clicks into place.
Table of Contents
What Is an Elementor Popup and Why Does Your Business Website Need One?
A popup is a modal window that appears on top of a page to grab your visitor’s attention at a specific moment. They are used for promotions, lead capture forms, announcements, and calls to action. Unlike a static banner buried in your sidebar, a well-timed popup cannot be ignored — it sits right in the centre of the screen and asks the visitor to take action. For the kind of local business websites I build — salons, clinics, gyms, coaches, restaurants — popups work really well for things like: – Offering a first-visit discount to new visitors – Collecting email addresses in exchange for a free resource or coupon – Promoting a limited-time seasonal special – Showing a contact form when someone is about to leave the page – Announcing a new service or location opening The key is not to overdo it. One well-targeted popup on the right page at the right moment is powerful. Ten popups firing all over your site will drive visitors away. I always tell my clients: one popup, one goal.
What You Need Before You Start (Elementor Pro Required)
The built-in popup builder in Elementor is a Pro-only feature. It is not available in the free version of Elementor. So before you follow any of the steps below, make sure you have Elementor Pro installed and activated on your WordPress website. If you are still on the free version of Elementor and are not ready to upgrade, there are some third-party plugins that can add basic popup functionality — but honestly, for the level of control and the clean results you get, Elementor Pro is worth it. I use it on every single client site I build. Here is what you need: – WordPress website (any decent hosting will do) – Elementor (free version) installed and active – Elementor Pro licence purchased and activated – A page or post on your site that you want to show the popup on
Step 1 — Create a New Popup Template in Elementor
The popup builder lives inside the Elementor Templates section, not inside a regular page. Here is how to get there: – Go to your WordPress Dashboard – Navigate to Elementor > Templates – Click on the Popups tab (you will only see this if Elementor Pro is active) – Click the Add New Popup button at the top of the screen – A dialog box will appear asking you to name your popup — give it a clear name like “Homepage Offer Popup” or “Exit Intent Lead Capture” so you can find it easily later – Click Create Template Once you click Create Template, Elementor will open the popup template library. This is a collection of professionally designed popup templates you can use as a starting point. You can browse by category — email opt-ins, promotions, announcements — and simply click Insert to load the template into the editor. If you prefer to build from scratch, just close the library by clicking the X in the top right corner.
Step 2 — Design Your Popup Using the Elementor Editor
Once you are inside the Elementor editor, designing your popup works exactly the same way as designing any page or section. You drag widgets from the left panel and drop them onto the popup canvas. For a typical local business popup, I usually recommend keeping it very simple: – A short headline (what the offer is) – One or two lines of supporting text – A form widget (if collecting emails or enquiries) OR a button (if promoting a page or deal) – Your business logo if appropriate – A close button so visitors can dismiss it easily Avoid the temptation to pack too much into the popup. The smaller and cleaner it is, the better it converts. A popup crammed with text, images, and multiple buttons just looks messy on mobile and confuses visitors about what to do next. For clients who want a newsletter signup popup, I typically use Elementor’s built-in Form widget connected to their email marketing tool. For a simple offer or announcement, a heading, a short sentence, and a button is all you need.
Step 3 — Configure Popup Layout and Size Settings
Before you publish, click the Page Settings icon (the gear icon) in the bottom-left corner of the Elementor editor. This opens the popup layout settings panel, where you can control how and where the popup appears on screen. The key settings to know: – Width and Height: Set the size of the popup in px or vh. For a standard modal, something around 600px wide works well on desktop. Use 100vh for both width and height if you want a full-screen popup. – Horizontal and Vertical Position: Choose where the popup is anchored on screen — centre is the most common for modals, but top or bottom positions work well for notification bars. – Entrance Animation: You can choose how the popup enters the screen — fade in, zoom in, slide in from the top, and so on. I always keep this subtle. A simple fade or zoom looks professional. Avoid anything too flashy — it slows down perceived performance and looks cheap on a local business site. – Overlay: Toggle whether the background behind the popup is darkened. I always leave this on — it focuses attention on the popup. – Close Button: Make sure you give visitors an easy way to close the popup. Hiding or delaying the close button is one of the fastest ways to frustrate visitors and increase your bounce rate.
Step 4 — Set Display Conditions (Where the Popup Appears)
This is where a lot of people get confused, so pay attention here. Display Conditions control which pages of your website the popup is eligible to appear on. Think of it as the geographic boundary for your popup. To access Display Conditions, click the small arrow next to the Publish button and select Display Conditions. You will see options to include or exclude specific areas of your site: – Entire Site: The popup can appear on every page. Use this carefully — it is usually only appropriate for site-wide announcements. – Front Page Only: Great for a homepage welcome offer. – Singular > Pages: You can target one specific page, like your Services page or Contact page. – Archives: Target category or tag archive pages. – WooCommerce: Target shop pages, product pages, or the cart. For most local business sites, I set the condition to either the front page only or specific landing pages. If a gym client is running a January special, I only want that popup on the homepage — not on the About page or Blog. Always be specific with your conditions. The more targeted your display conditions are, the better your conversion rate will be.
Step 5 — Set Popup Triggers (When the Popup Fires)
Triggers are the visitor actions that cause your popup to appear. After setting your display conditions, click Next to reach the Triggers tab. All triggers are disabled by default — you toggle on the ones you want. Here are the main trigger options and when I use each one: – On Page Load: The popup fires automatically after the page loads, with a time delay you can set in seconds. I usually set this to at least 5–8 seconds — give the visitor time to actually read something on the page first before interrupting them. – On Scroll: The popup fires after the visitor scrolls a certain percentage down the page. This is a great option because it means the visitor is already engaged with your content before the popup appears. – On Scroll to Element: The popup fires when a specific element comes into view. You assign a CSS ID to any element on the page, and the popup fires when the visitor reaches it. – On Exit Intent: The popup fires when Elementor detects the visitor is about to leave — specifically when their mouse moves toward the browser’s address bar. This is one of my favourite triggers for local businesses because you are only interrupting someone who was going to leave anyway. Exit intent only works on desktop. – On Inactivity: The popup fires after the visitor has been inactive for a set period of time. Useful for re-engaging someone who has stopped scrolling. My standard recommendation for most local business sites: use On Exit Intent as your primary trigger, with a backup of On Scroll at around 60–70%. This way you are only showing the popup to people who are genuinely engaged or about to leave — not blasting it in the face of every visitor the moment they land.
Step 6 — Set Advanced Rules (Who Sees the Popup)
After the Triggers tab, click Next again to reach the Advanced Rules section. This is where you get granular control over exactly who sees the popup and how often. The most useful Advanced Rules for local business sites: – Show Up To X Times: Set a limit on how many times the same visitor sees the popup. I always set this to 1 — once a visitor has seen the popup and dismissed it, do not show it to them again on every return visit. It is just annoying. – Hide for Logged-In Users: If your site has a member area or client portal, you can hide the popup for anyone who is already logged in. They are already customers — no need to pitch them. – Show on Devices: Control whether the popup appears on desktop, tablet, mobile, or all three. For some clients I disable the popup on mobile entirely if the popup design does not translate well to a small screen, or if mobile load speed is a concern. – Referrer URL Conditions: Show the popup only to visitors coming from a specific source — for example, visitors arriving from a Facebook ad campaign. Once you are happy with all three tabs — Conditions, Triggers, and Advanced Rules — click Save and Close. Then click Publish. Your popup is now live.
Step 7 — Trigger a Popup from a Button Click
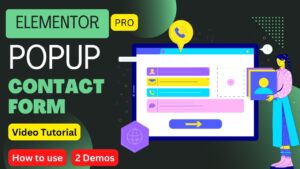
One of the most common things clients ask me is how to make a popup open when someone clicks a button — for example, a “Get a Free Quote” button or a “Claim Offer” button in the navigation. This is called a manual trigger and it works slightly differently from the automatic triggers above. Here is how to set it up: – First, create and publish your popup as described above. Make sure you set the Display Conditions to include the page where your button lives. – Go to the Triggers tab for the popup and make sure no automatic triggers are set — leave them all off. – In the Advanced tab of the popup settings, find the Open By Selector field and enter a CSS class or ID (for example: #quote-popup). – Now, go to the button on your page that should open the popup. Click on the button widget to open its settings. – Under the Link field, click the Dynamic Tags icon and select Actions > Popup. Choose the popup you just created from the list. – Save and preview your page — clicking the button should now open the popup. This method is great for contact forms, quote request forms, and any situation where you want the visitor to explicitly choose to see the popup rather than having it fire automatically.
Best Practices for Popup Design on Local Business Websites
After building popups for hundreds of local business sites — salons, physio clinics, real estate agents, personal trainers — here are the things that consistently make a difference: – Keep it short. One headline, one short line of copy, one action. That is it. – Always include an easy close button. Visitors who feel trapped will leave your site entirely. – Use exit intent over page load triggers where possible. You are not interrupting the visitor mid-read — you are giving them one last reason to stay. – Match the popup design to your website. Use the same fonts, colours, and button styles as the rest of your site so it looks intentional, not like an afterthought. – Test on mobile. Most local business traffic is mobile. Make sure your popup does not cover the entire screen and is easy to dismiss on a phone. – Do not show the same popup to repeat visitors. Use the Advanced Rules to limit frequency — once per visitor is usually the right call. – Have one popup, one goal. Do not try to collect an email address AND promote a sale AND announce a new service all in the same popup. Pick one thing and do it well.
Frequently Asked Questions
Do I need Elementor Pro to create a popup in Elementor?
Yes, the popup builder is an Elementor Pro feature and is not available in the free version of Elementor. You need to purchase and activate an Elementor Pro licence to access it. If you are on the free version, some third-party plugins can add basic popup functionality as an alternative.
How do I make an Elementor popup appear only on one specific page?
When publishing your popup, go to Display Conditions and click Add Condition. Select Singular, then choose Pages, and search for and select your specific page. This ensures the popup only fires on that one page and nowhere else on your site.
What is the difference between Display Conditions and Triggers in Elementor popups?
Display Conditions control *where* the popup is eligible to appear — which pages or sections of your site. Triggers control *when* the popup fires based on visitor behaviour, such as page load, scrolling, or exit intent. You need both set correctly for the popup to work as expected.
How do I stop an Elementor popup from showing to the same visitor more than once?
In the Advanced Rules tab of your popup settings, find the Show Up To X Times option and set it to 1. This means each visitor will only see the popup on their first visit and it will not reappear on return visits, preventing it from becoming annoying.
Can I trigger an Elementor popup when a visitor clicks a button?
Yes. After publishing your popup, go to the button widget settings, click the dynamic tags icon on the Link field, and select Actions > Popup. Choose your popup from the list. Make sure the Display Conditions for the popup include the page where the button is placed and that no automatic triggers are set.
Does an Elementor exit intent popup work on mobile devices?
No, exit intent only works on desktop browsers because it relies on detecting mouse movement toward the browser’s address bar. On mobile devices, you should use time-based triggers (On Page Load after a delay) or scroll-based triggers instead to achieve a similar result.
How do I connect an Elementor popup form to Mailchimp or another email tool?
Add a Form widget inside your popup, then in the Form widget settings go to Actions After Submit. Add the Mailchimp action, enter your API key, select your audience list, and map your form fields to the correct list fields. Submissions from the popup will then go directly to your Mailchimp account.
Final Thoughts
That is everything you need to know to create a professional, properly targeted popup in Elementor from start to finish. The process sounds like a lot of steps written out, but once you have done it once, it takes about 15–20 minutes to have a popup live on any site. If you are a visual learner, make sure you watch the video tutorial embedded above — seeing each step in action makes it much easier to follow along. If you have a question or got stuck somewhere in the process, drop it in the comments below and I will do my best to help you out. And if you would rather have someone set this up properly on your website for you, feel free to reach out to me directly through the contact page — this is exactly the kind of thing I help local business owners with every day.
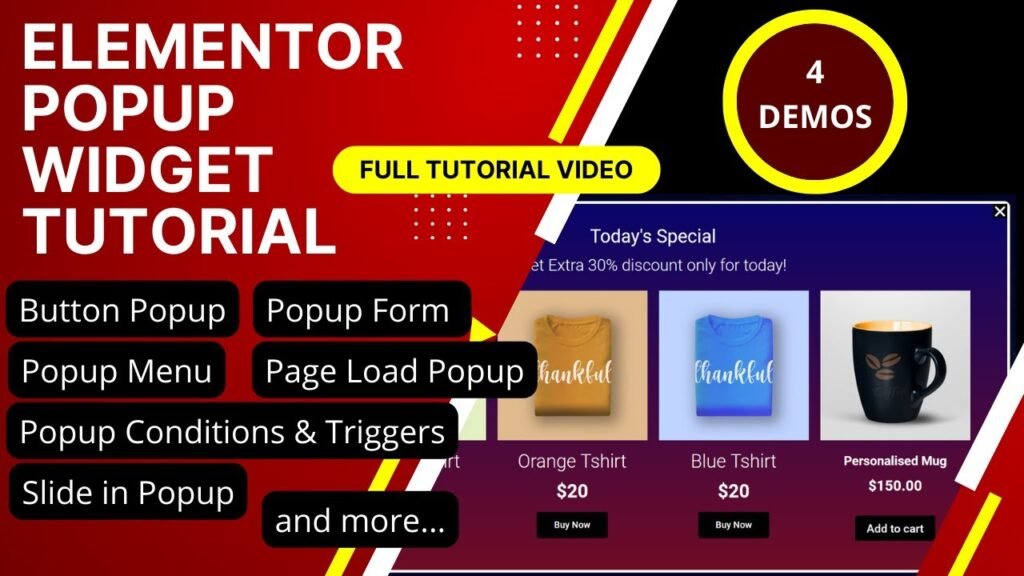
I hope that this article on How to Create Popup in Elementor. Read more articles on Elementor Tutorials.
Do not forget to subscribe to our Quick Tips Youtube Channel for upcoming videos on Website Design, WordPress Tutorials, Elementor, and WooCommerce tutorials.