Table of Contents
What Is the Elementor Pricing Table Widget?
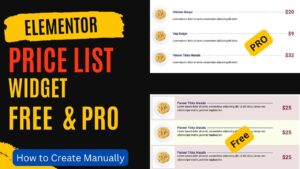
The Elementor Pricing Table Widget is a drag-and-drop element that lets you display structured pricing plans on your WordPress website — complete with a plan title, price, features list, call-to-action button, and even a highlighted ribbon badge. It’s purpose-built to help visitors compare your packages at a glance and click through to book, buy, or enquire. This widget is ideal for: – Service businesses with tiered packages (e.g. Basic, Standard, Premium) – Coaches or consultants offering different session bundles – Gyms, salons, or clinics with membership or treatment plans – SaaS products or online course creators Rather than building a pricing layout manually with columns and text widgets (which is messy and hard to maintain), the Pricing Table Widget gives you a structured, ready-to-style component. It looks great out of the box and is fully responsive, so it looks clean on mobile devices too — which matters a lot since a large chunk of your visitors will be browsing on their phones.
Requirements: Do You Need Elementor Pro?
Yes — the Pricing Table Widget is an Elementor Pro exclusive. You will not find it in the free version of the Elementor plugin. So before you go hunting for it in your widget panel, make sure you have Elementor Pro installed and activated on your WordPress site. If you are not ready to invest in Elementor Pro, there are a few alternatives worth knowing: – Free third-party addon plugins like Essential Addons for Elementor or HT Mega offer their own pricing table widgets at no cost. – You can manually build a pricing layout using columns, text widgets, icon list widgets, and a button — though this takes longer to set up and maintain. For most of my clients running local business websites, I recommend Elementor Pro because the pricing table widget alone — combined with the theme builder and popup builder — makes the investment worthwhile. That said, if budget is a concern, the free addon approach is a solid workaround I have used many times.
How to Add the Pricing Table Widget to Your Page
Getting the widget onto your page is straightforward. Here’s how to do it: – Step 1: Open the page you want to edit inside the Elementor editor (Pages > All Pages > Edit with Elementor). – Step 2: In the Elementor widget panel on the left, type ‘Price Table’ in the search bar. Under the Pro Elements section, you will see the Price Table widget. – Step 3: Drag and drop the widget onto your page — ideally into a section with two or three equal columns, depending on how many plans you want to show. – Step 4: A default pricing card will appear on the canvas with placeholder content. From here, click on the widget to open its settings in the left panel. One important tip: before you create multiple pricing cards, fully style and configure the first one. Once it looks exactly how you want it, right-click on the widget and select ‘Duplicate’ to copy it across your other columns. Then just swap the text and colours for each plan. This approach saves a significant amount of time.
Configuring the Content Tab: Header, Pricing, Features, Footer & Ribbon
When you click on the Pricing Table Widget, the settings panel on the left opens to the Content tab. This tab is divided into five sections — Header, Pricing, Features, Footer, and Ribbon — and each controls a specific part of your pricing card.
Header
The Header section is where you set the plan name and a short subtitle. Enter your plan title (e.g. ‘Starter’, ‘Professional’, ‘Enterprise’) in the Title field. You can also add a brief description beneath the title in the Description field — something like ‘Perfect for small teams’ works well here. The Title HTML Tag lets you choose an HTML heading level from H2 through H6 for SEO and accessibility purposes. For most pricing pages, H3 is a good choice since your page title will typically be an H1 or H2.
Pricing
The Pricing section is where you enter the actual cost of the plan. Select your currency symbol (e.g. $, £, €) from the Currency Symbol dropdown, or type a custom symbol if needed. Enter the price in the Price field — you can include decimal points for cents. The Currency Format field lets you choose how large numbers display (e.g. with comma separators). In the Period field, type the billing cycle label — for example ‘/month’, ‘/year’, or ‘/session’. If you’re running a sale, toggle the Sale switch to Yes and enter both the original price (which will display with a strikethrough) and the discounted sale price. This is great for promotional pricing pages.
Features
The Features section is where you list what is included in each plan. Click ‘Add Item’ to add individual feature rows. For each feature, you can type the feature text, choose an icon (like a checkmark), and toggle it on or off. You can drag and drop the features to reorder them. A practical tip: keep your feature list consistent across all plans — even if some plans don’t include a feature, add it with a strikethrough or an X icon rather than omitting it entirely. This makes comparison much easier for your visitors.
Footer
The Footer section contains your call-to-action button — arguably the most important element on the entire pricing card. Enter your button text (e.g. ‘Get Started’, ‘Book Now’, ‘Choose Plan’) and set the button link to your checkout page, contact form, or booking page. You can also add a short additional text line beneath the button for things like ‘No contract required’ or ‘Cancel anytime’ — these small reassurance lines can meaningfully increase click-through rates on local business sites.
Ribbon
The Ribbon is the small diagonal badge that appears in the corner of a pricing card — typically used to highlight your most popular or best-value plan. Enable the Ribbon by toggling it on, then type your ribbon text (e.g. ‘Most Popular’, ‘Best Value’, ‘Recommended’). You can set its position to either the top-left or top-right corner of the card. The ribbon is a subtle but very effective visual cue that guides visitors toward the plan you most want them to choose — I always enable it on the middle or recommended plan for my clients.
Styling Your Pricing Table: Colors, Fonts & Layout
Once your content is set up, switch to the Style tab to control how everything looks. The Style tab mirrors the structure of the Content tab — you have separate styling sections for the Header, Pricing area, Features list, Footer, and Ribbon. Key styling options to focus on: – Header background color: Use your brand’s primary color here to make the plan title section stand out. – Price text color and typography: Make the price the most visually prominent number on the card. Increase the font size and use a bold weight. – Features list: Set a background color for the list area (a light grey works well) and choose a clean, readable font size — typically 14–16px. – Footer background and button: Style the CTA button with your brand’s accent color. Make sure there is enough contrast between the button color and text for readability. – Ribbon color: The ribbon background should be a contrasting color to the header — a bright accent or a darker shade works well. My general advice: keep it simple. You don’t need gradient backgrounds and shadow effects on every element. A clean white or light grey card with a bold header color and a clear CTA button converts much better than an over-designed one. I see this consistently across the 1,800+ sites I have built.
Using the Advanced Tab to Polish the Look
The Advanced tab in the Elementor Pricing Table Widget plays a surprisingly important role in the final look of your pricing cards. Don’t skip it. Here’s what I typically adjust in the Advanced tab for pricing tables: – Padding: Adding generous padding (e.g. 40px top and bottom, 30px left and right) gives the card breathing room and makes it look premium rather than cramped. – Border: A subtle border (1px solid, light grey) helps separate the pricing card from the background, especially if you’re using a white card on a white page. – Border Radius: Rounding the corners (8–12px) gives pricing cards a modern, clean look that works well for most local business websites. – Box Shadow: A subtle box shadow adds depth and makes individual cards pop off the page — especially effective on the ‘featured’ plan you want to highlight. Once you have one card looking exactly how you want it in both the Style and Advanced tabs, that’s when you clone it.
How to Create Multiple Pricing Plans Side by Side
Most pricing pages display two, three, or four plans side by side in equal-width columns. Here is the cleanest way to set this up in Elementor: – Step 1: Before adding any widgets, create a new section on your page and set it to two or three equal columns (depending on how many plans you need). – Step 2: Drag the Pricing Table Widget into the first column. Configure and fully style this first card as described above. – Step 3: Right-click on the styled widget and choose ‘Duplicate’. Drag the duplicate into the second column. – Step 4: Repeat for the third column if needed. – Step 5: Edit each duplicate card’s content — change the plan name, price, features, and button link. Adjust the header color or ribbon visibility per plan. The card you want visitors to choose most should have the ribbon enabled and ideally a slightly different header color or a box shadow to make it stand out. This ‘featured plan’ treatment is one of the simplest ways to nudge visitors toward the plan that is best for your business.
Tips for High-Converting Pricing Tables on Local Business Websites
After building pricing pages for salons, clinics, gyms, coaches, and restaurants across the USA, UK, and Australia, here are the practical lessons I have learned: – Keep your plan names simple and intuitive. ‘Basic’, ‘Standard’, ‘Premium’ works. Clever names like ‘Hustle Mode’ or ‘Zen Package’ confuse people and slow down decision-making. – Limit your feature list to 5–8 items per plan. More than that and people stop reading. Focus on the most meaningful benefits, not every single detail. – Always highlight one plan with the ribbon. Having a ‘recommended’ option removes the paralysis of choice and increases conversions. – Put the price where visitors expect to find it — clearly visible, not buried. Make it the biggest number on the card. – Your CTA button text matters more than you think. ‘Get Started’ is fine. ‘Book a Free Consultation’ is better if that is your actual next step. Match the button text to the action you want them to take. – Add a short reassurance line below the button (‘No lock-in contract’, ‘Cancel anytime’, ‘Free setup included’). This reduces hesitation, especially for first-time visitors. – Always check your pricing table on mobile before publishing. Elementor’s responsive preview (tablet and phone icons at the bottom of the editor) lets you do this instantly.
Frequently Asked Questions
Is the Elementor Pricing Table Widget free?
No, the Pricing Table Widget is part of Elementor Pro and requires a paid subscription. If you need a free option, third-party addon plugins like Essential Addons for Elementor or HT Mega offer free pricing table widgets that work with the free version of Elementor.
How do I add multiple pricing plans in Elementor?
Create a multi-column section in Elementor, then drag the Pricing Table Widget into the first column and fully style it. Once done, duplicate the widget into the remaining columns and update the content (plan name, price, features, button link) for each one.
What is the Ribbon in the Elementor Pricing Table Widget?
The Ribbon is a small diagonal badge that appears in the top corner of a pricing card, typically used to highlight your most popular or recommended plan with a label like ‘Most Popular’ or ‘Best Value’. It is a simple but effective visual cue that guides visitors toward a specific plan.
Can I show a sale price or discounted price in the Elementor Pricing Table?
Yes. In the Pricing section of the Content tab, toggle the Sale switch to ‘Yes’. You can then enter the original price — which will appear with a strikethrough — and the discounted sale price below it.
How do I make the Elementor Pricing Table mobile responsive?
The Elementor Pricing Table Widget is mobile responsive by default. However, you should always preview your pricing page in Elementor’s responsive preview mode (tablet and phone icons at the bottom of the editor) before publishing to make sure the layout stacks cleanly on smaller screens.
Can I add a call-to-action button to the Elementor Pricing Table?
Yes. The Footer section in the Content tab lets you add a CTA button with custom text and a link to any page on your site, such as a checkout page, contact form, or booking calendar. You can also add a short reassurance text line beneath the button.
Do I need coding skills to use the Elementor Pricing Table Widget?
No coding is required at all. The Pricing Table Widget is a fully visual, drag-and-drop element inside the Elementor page builder. All settings for content, styling, and layout are controlled through the Elementor editor panel on the left side of the screen.
Final Thoughts
That’s everything you need to know to set up a clean, professional pricing table using the Elementor Pricing Table Widget. From adding the widget and configuring your plans, to styling the cards and highlighting your best offer with a ribbon — it is honestly one of the most satisfying widgets to build with because the results look great and it genuinely helps local businesses convert more visitors into paying customers. If you prefer to follow along visually, make sure you watch my video tutorial on this topic — I walk through the entire setup on screen so you can see exactly where every setting lives. The link is above in this post. If you have any questions or run into any issues while setting up your pricing table, drop a comment below — I read every one and I am happy to help. And if you would rather have someone set this up for you, feel free to reach out to me directly through the contact page on paramfreelance.com. I build websites for local businesses every day and I would be glad to help you get your pricing page looking exactly the way you want it.
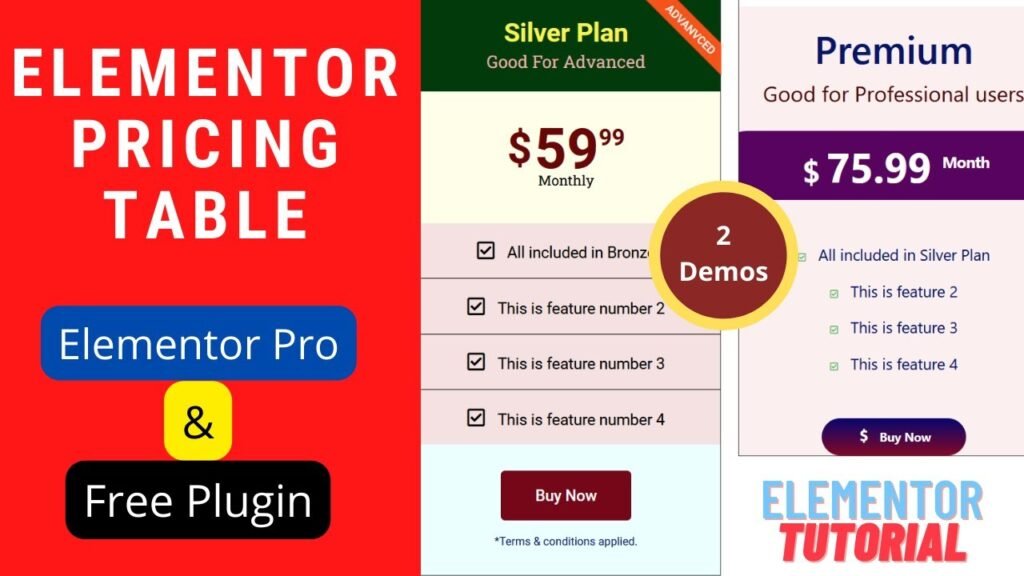
hope that this article on How to use Elementor Pricing Table Widget. Read more articles on Elementor Tutorials.
Do not forget to subscribe to our Quick Tips Youtube Channel for upcoming videos on Website Design, WordPress Tutorials, Elementor, and WooCommerce tutorials.