Want to show multiple videos on a single page — without it looking like a mess? That’s exactly the problem the Elementor video playlist widget solves. Whether you’re a fitness coach with a library of workout videos, an online tutor with a full course, or a local business wanting to showcase client testimonials — this widget lets you organise everything into one clean, interactive, scrollable playlist that looks great and keeps visitors on your page longer. The best part? It’s built right into Elementor Pro. No extra plugins, no embed hacks, no coding required. In this tutorial, I’ll walk you through everything: how to find the widget, how to add YouTube and Vimeo videos, how to customise the layout and style, and a few smart tips I’ve picked up building sites for clients over the years. Let’s get into it.
Table of Contents
What Is the Elementor Video Playlist Widget?
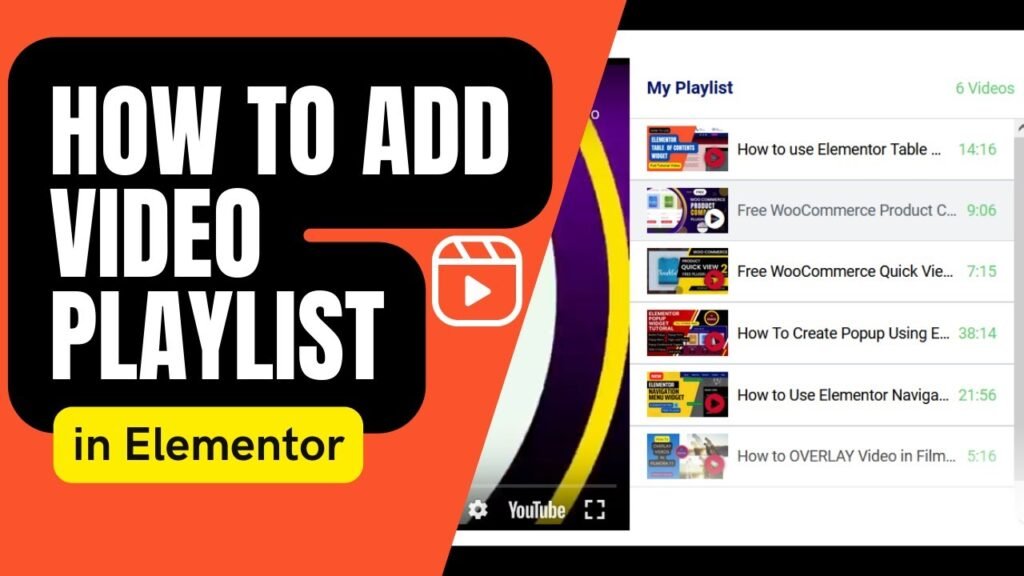
The Elementor Video Playlist widget is a built-in Pro feature that lets you display a curated collection of videos in a structured, side-by-side layout — a large video player on the left and a scrollable list of video thumbnails on the right. Visitors can click any video in the list to play it instantly, without leaving the page. This is perfect for: – Online tutors or coaches who want to display a course or lesson library – Fitness studios showing different class types – Businesses with explainer videos, FAQs, or product demos – Anyone who has built up a library of YouTube or Vimeo videos The widget supports YouTube, Vimeo, and self-hosted video files. It is a significant upgrade over embedding videos one by one, which clutters pages and hurts load times. Everything is contained within one compact, professional-looking widget.
What You Need Before You Start (Requirements)
Before you can use this widget, there are a couple of non-negotiables: – **Elementor Pro** – The Video Playlist widget is an Elementor Pro-exclusive feature. It is not available in the free version of Elementor. If you have not yet upgraded, you will need Elementor Pro installed and activated on your WordPress site. – **Elementor (free) base plugin** – Elementor Pro runs on top of the free Elementor plugin, so both need to be active. – **Your video URLs ready** – Have your YouTube or Vimeo links handy before you start. For self-hosted videos, they should already be uploaded to your WordPress Media Library or hosted externally. That’s it. No extra add-ons or third-party plugins are needed. The widget is built natively into Elementor Pro, which means it won’t slow down your site with unnecessary bloat.
How to Add the Video Playlist Widget to Your Page
Once Elementor Pro is active, adding the widget to a page is simple: 1. Open the page you want to edit and click **Edit with Elementor** to launch the Elementor editor. 2. In the left-hand panel, go to the **Elements** tab and type “Video Playlist” in the search bar. 3. When the widget appears, drag and drop it into any section or column on your page. 4. Elementor will automatically populate the widget with some sample videos as a starting point, so you can see what the layout looks like right away. You’ll notice the widget has three columns on the left panel: **Content**, **Style**, and **Advanced**. Most of your setup work happens in the Content tab. Styling and layout adjustments happen in the Style tab. Keep reading — I’ll walk through each.
How to Add Videos to Your Playlist
This is where you replace the sample content with your own videos. Here’s how to do it step by step: 1. In the left panel under the **Content** tab, click on **Playlist** to expand it. 2. You’ll see a list of sample video items. Click on the first one to expand its settings. 3. Under **Type**, choose your video source: – **YouTube** – for YouTube videos – **Vimeo** – for Vimeo videos – **Self Hosted** – for videos stored in your WordPress Media Library or via an external URL 4. Paste your video link into the **Link** field. 5. Click the **Get Video Data** button. This is a really handy feature — Elementor will automatically pull the video title, duration, and thumbnail directly from YouTube or Vimeo. You don’t have to type anything manually. 6. You can still edit the **Title**, **Duration**, and **Thumbnail** manually if you want to customise them. 7. To add more videos, scroll to the bottom of the Playlist section and click **Add Item**. Repeat the process for each video. 8. To reorder your videos, simply drag and drop the items in the list to the order you want them to appear. For self-hosted videos, you can either choose a file from your WordPress Media Library or turn on the **Share External URL** toggle and paste an external video link.
How to Use Sections to Organise Your Playlist
If you have a lot of videos, dumping them all into one long list makes it hard to navigate. The **Section** item type is your solution — it acts as a heading or divider within your playlist, so visitors can jump straight to the category of videos they want. Here’s how to add a section divider: 1. Click **Add Item** in the Playlist block. 2. Under **Type**, select **Section** instead of YouTube or Vimeo. 3. Enter a title for the section — for example, “Beginner Workouts” or “Module 1: Foundations”. 4. Drag and drop the section item to the position in your playlist where you want the label to appear. This is one of those features that makes a real difference on content-heavy pages. I always recommend it to clients who have more than five or six videos — grouping them into named sections makes the whole thing feel like a proper course or resource library rather than a random pile of clips.
How to Use Content Tabs for Extra Video Info
Content Tabs are an optional feature that lets you add extra information below the video player — things like a description, notes, a call to action, or resources related to a specific video. This is particularly useful for tutors or coaches who want to provide context alongside each lesson. To enable Content Tabs on a video: 1. Click on the video item in the Playlist to expand its settings. 2. Find the **Content Tabs** toggle and switch it to **Show**. 3. By default, two tabs will appear. You can name each tab and add text, images, or dynamic content inside. 4. Use the **Read More Label** and **Read Less Label** fields to control the expand/collapse link text if you want to limit how much text is visible by default. Content Tabs are great for adding links to related resources, PDF downloads, or a summary of what each video covers — without cluttering the page.
How to Style Your Video Playlist
Once your videos are set up, switch to the **Style** tab to make the playlist match your website’s branding. Here’s what you can customise: **Layout** – Set the overall **height** of the widget in pixels, viewport height, or viewport width. A height of around 400px–500px works well for most desktop layouts. – You can set different height values for tablet and mobile separately. **Top Bar** – The top bar is the strip at the top of the widget that shows your playlist title. – Change the background colour, text colour, and typography to match your brand. **Videos List** – Control the background colour and text styling of the video list panel on the right side. – Adjust the colour of the active/selected video highlight. **Sections** – Style the section title dividers you added earlier — change their colour and font to make them stand out. **Tabs** – If you enabled Content Tabs, style their background, border, and text here. The Elementor visual editor means every change is visible in real time — so just experiment until it looks right for your brand. There’s no right or wrong here, as long as it’s clean and readable.
Additional Options: Autoplay, Lazy Load, Video Count & More
Back in the **Content** tab, scroll past the Playlist items and look for the **Additional Options** block. This is where you can fine-tune the behaviour of your playlist: – **Autoplay** – Turns on auto-playing when the page loads. Useful for landing pages, but I’d suggest being careful with this one. Autoplaying videos can be annoying for visitors who didn’t ask for sound. Use it only if it genuinely suits the page purpose. – **Play Next Video** – Automatically queues up the next video in the playlist once the current one ends. Great for course or tutorial pages where you want visitors to keep watching. – **Lazy Load** – This one I always recommend switching on. It prevents all the video thumbnails and iframes from loading until they’re needed, which can significantly improve your page load speed — especially important when you have a large playlist. – **Video Count** – Toggle whether to show the total number of videos in the playlist header. – **Play Icon** – Customise the icon that appears over each video thumbnail in the list. – **Image Overlay** – Add a custom image that sits over the main video player area before a video is clicked. When a video starts playing, the overlay disappears automatically. Useful if you want to display your logo or a branded cover image. For most client sites, I enable Lazy Load and Play Next Video, and leave Autoplay off.
Tips for Using This Widget on Local Business Websites
In my experience building websites for local businesses — salons, clinics, gyms, coaches, restaurants — video is one of the most underused assets. Most of them have a YouTube channel with decent content but no good way to show it on their website. The Video Playlist widget is a simple fix for that. Here are a few practical tips: – **Coaches and tutors**: Use sections to divide your playlist by topic or difficulty level. It makes your free content feel like a proper curriculum and encourages people to sign up for paid courses. – **Salons and clinics**: Create a playlist of before-and-after transformations or treatment explainers. Group them by service type using section dividers. – **Restaurants and cafes**: Add a playlist of your chef cooking videos, event highlights, or behind-the-scenes clips. People love seeing the story behind a business. – **Keep the playlist focused**: Don’t dump everything you’ve ever uploaded. Curate a tight selection of 6–15 videos that are relevant to the page’s purpose. A focused playlist converts better than an overwhelming library. – **Always use a custom thumbnail**: Even if you let Elementor pull the auto-thumbnail from YouTube, consider uploading a branded custom thumbnail for each video. It looks far more professional and consistent. – **Name your playlist with an H2 tag**: In the Content tab, you can assign an HTML heading tag to the playlist title. Setting it to H2 helps search engines understand the content, which is a small but worthwhile SEO boost.
Frequently Asked Questions
Is the Elementor Video Playlist widget free?
No, the Video Playlist widget is an Elementor Pro-exclusive feature. You need an active Elementor Pro licence to use it. The free version of Elementor does not include this widget.
Can I add YouTube videos to the Elementor video playlist?
Yes, absolutely. YouTube is the most commonly used source. Just paste the YouTube video URL into the Link field and click ‘Get Video Data’ — Elementor will automatically pull in the title, duration, and thumbnail from YouTube. Vimeo and self-hosted videos are also supported.
Will adding a video playlist slow down my website?
Not if you enable the Lazy Load option in the Additional Options section. With Lazy Load switched on, videos only load when a visitor is about to view them, which keeps your page speed fast even with a large number of videos in the playlist.
Can I organise videos into categories or groups within the playlist?
Yes. You can add a ‘Section’ item type within the playlist, which acts as a labelled divider. This lets you group videos under headings like ‘Module 1’ or ‘Beginner Workouts’, making the playlist much easier to navigate for visitors.
Can I use self-hosted videos instead of YouTube or Vimeo?
Yes. When adding a video item, set the Type to ‘Self Hosted’ and either choose a file from your WordPress Media Library or paste in an external video URL. This is useful if you have proprietary videos you don’t want publicly posted on YouTube.
How do I change the height of the Elementor video playlist?
Go to the Style tab inside the widget settings and open the Layout block. You can set the height in pixels, viewport height, or viewport width. You can also set different height values for tablet and mobile devices separately.
Can the video playlist play videos automatically one after another?
Yes. In the Content tab under Additional Options, enable the ‘Play Next Video’ toggle. Once a video finishes, the next one in the playlist will start automatically. You can also enable Autoplay to have the first video start playing when the page loads.
Final Thoughts
That’s everything you need to know to get the Elementor Video Playlist widget set up and looking great on your WordPress site. It’s honestly one of the most underused widgets in Elementor Pro — and once you start using it, you’ll wonder why you weren’t embedding videos this way all along. If you want to see the full setup process in action, I’ve put together a video tutorial you can watch on my YouTube channel — it covers everything in this post step by step, which a lot of people find easier to follow than written instructions. Go ahead and check that out, and if you have any questions, drop them in the comments below — I read and reply to every one. And if you’d like help setting this up on your own website, feel free to reach out to me directly through paramfreelance.com. I’m always happy to help.
I hope that this article on How to use Elementor Video playlist Widget. Read more articles on Elementor Tutorials.
Do not forget to subscribe to our Quick Tips Youtube Channel for upcoming videos on Website Design, WordPress Tutorials, Elementor, and WooCommerce tutorials.