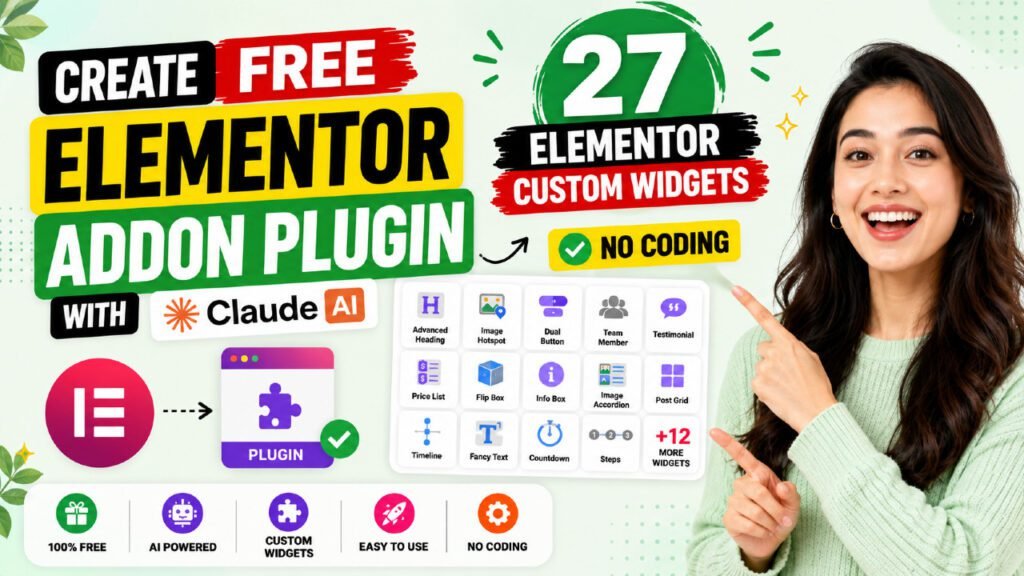
If you have ever wished you could build your own Elementor addon plugin with custom widgets — without touching a single line of PHP — this guide is exactly what you need. Using Claude AI, you can now create a fully working, installable Elementor addon plugin packed with custom widgets in a matter of hours, completely free. In this step-by-step tutorial, we will walk you through exactly how we built the QT Elementor Add-on plugin with 27 custom widgets using nothing but Claude AI and a clear set of instructions.
Elementor powers over 31% of all WordPress websites globally, and the addon ecosystem that surrounds it is worth millions of dollars in annual subscriptions. Tools like Essential Addons, ElementsKit, and Ultimate Addons charge between $39 and $199 per year, per site. But what if you could skip those fees entirely and build a custom Elementor addon plugin tailored exactly to your needs — for free? That is precisely what this tutorial teaches you.
Table of Contents
What Is an Elementor Addon Plugin?
An Elementor addon plugin is a WordPress plugin that extends the native functionality of the Elementor page builder by adding custom widgets, modules, or extensions. These widgets appear directly inside the Elementor panel, just like the default Elementor widgets, and are fully drag-and-drop compatible.
When you install an Elementor addon plugin, your new widgets show up under a custom category in the Elementor widget panel. You can drag any widget onto your page and customize it through the Content tab, Style tab, and Advanced tab — without writing a single line of CSS or JavaScript.
How Elementor Addon Plugins Work
Elementor addon plugins are built on top of the Elementor API. Each widget is a PHP class that extends Widget_Base and defines:
- Controls — the settings available in the Elementor panel (text fields, color pickers, toggles, repeaters)
- Render — the HTML output that appears on the front end
- Scripts and styles — any custom CSS and JavaScript the widget needs
Traditionally, building these plugins required knowledge of PHP, WordPress hooks, Elementor API documentation, CSS, and JavaScript. That barrier is now gone, thanks to Claude AI.
Elementor Addon vs. Elementor Pro
Elementor Pro adds powerful features like theme builder, popup builder, and WooCommerce integration. But if your main need is additional custom widgets, a custom Elementor addon plugin gives you exactly what you need without paying for a Pro subscription. You can also sell your custom plugin to clients or use it across unlimited sites.
Why Build Your Own Elementor Addon Plugin?
Most web designers and WordPress freelancers rely on third-party Elementor addon plugins to access advanced widgets. The problem is that these addons come with recurring annual costs, bloated widget libraries, and features you will never use — yet you pay for all of them.
The Real Cost of Premium Elementor Addons
Plugin | Annual Cost (1 site) |
Essential Addons for Elementor | $39.97/year |
ElementsKit | $39/year |
Ultimate Addons for Elementor | $69/year |
The Plus Addons | $39/year |
Happy Addons Pro | $39/year |
Crocoblock JetPlugins | $199/year |
If you manage multiple client sites, these costs multiply quickly. A freelancer running 10 client sites could easily spend $400–$1,000 per year just on Elementor addon plugin licenses. Building your own plugin eliminates that cost entirely.
Why a Custom Plugin Is Better for Freelancers
- You own the plugin — no license restrictions, no renewal fees
- You only include the widgets you actually use
- You can brand it with your own name and sell it as part of your service
- You can install it on unlimited client sites for free
- You can customize it further whenever your clients need new features
Benefits of a Custom Elementor Addon Plugin
Beyond cost savings, building a custom Elementor addon plugin with Claude AI offers significant advantages for designers, developers, and agencies.
Full Customization Control
Every widget in your custom plugin is designed exactly the way you want it. Unlike third-party plugins that lock certain design options behind Pro plans, your custom plugin has every control you define. Every color, every font, every spacing option is available in the Elementor panel from day one.
Lightweight and Performance-Optimized
Premium Elementor addon plugins often load hundreds of widgets and dozens of scripts — even if you only use five or six widgets. Your custom plugin loads only the widgets you include, making your pages significantly faster. A lighter plugin means better Core Web Vitals scores, improved SEO rankings, and happier visitors.
Brand Value for Freelancers and Agencies
When you deliver a website to a client, handing them a custom-branded Elementor addon plugin — “ABC Agency Widget Pack” — adds tremendous perceived value. It positions you as a professional who builds custom solutions, not someone who simply assembles third-party tools.
Complete Ownership
You are not dependent on a plugin vendor’s roadmap, pricing changes, or business decisions. Third-party plugin companies change their pricing, discontinue products, or get acquired. Your custom plugin will always work, because you control the code.
Works With Both Elementor Free and Elementor Pro
Your custom Elementor addon plugin works with the free version of Elementor. You do not need Elementor Pro to use custom widgets. This is a significant advantage when working with clients who have not purchased Elementor Pro.
What Is Claude AI and Why Use It for Plugin Development?
Claude AI is a large language model developed by Anthropic. Unlike other AI tools, Claude excels at understanding complex, multi-step technical instructions and generating clean, well-structured code across multiple files. When it comes to WordPress plugin development, Claude stands out because it understands the Elementor API, WordPress coding standards, PHP class structure, and even browser JavaScript in a single conversation.
Why Claude AI Is Ideal for Elementor Plugin Development
- Handles long, complex codebases without losing context across a conversation
- Understands Elementor-specific API concepts like Widget_Base, register_controls(), and Icons_Manager::render_icon()
- Generates complete, installable plugin files — not just code snippets
- Fixes bugs when you describe the issue in plain English
- PHP-lints all files before delivering the final zip
- Works directly in your browser — no local setup or terminal required
Claude AI vs. Other AI Tools for WordPress
While ChatGPT and GitHub Copilot can generate WordPress code, Claude has a key advantage: it handles very large context windows and complex multi-file projects. When we asked Claude to build 27 widgets across 31 files simultaneously, it maintained consistency across the entire project — a task that quickly overwhelms other AI tools.
The 27 Widgets We Built
Our QT Elementor Add-on plugin includes 27 custom widgets organized into five categories. Here is the complete list:
Content & Display Widgets
- Pricing Table — plans, features list, highlighted featured plan, CTA button
- Team Member Card — photo, name, role, bio, social media links
- Testimonial / Review Card — avatar, quote, star rating, source
- Portfolio Card — image, category, title, hover overlay with icon
- Service Card — icon, title, description, CTA link
- FAQ / Accordion — custom styled beyond native Elementor accordion
- Statistics / Counter Card — animated number counter with icon and label
Layout & Navigation Widgets
- Tabbed Content — icon tabs with animated panel switching
- Timeline — vertical work history or process steps
- Comparison Table — side-by-side feature comparison with checkmarks and crosses
- Steps / Process Widget — numbered steps with icons and connectors
- Breadcrumb Widget — dynamic WordPress-aware breadcrumb navigation
Marketing & CTA Widgets
- CTA Banner — headline, subtext, dual buttons, gradient background
- Notification Bar — dismissible announcement bar with session memory
- Countdown Timer — deadline timer with expired message
- Badge / Ribbon — pill, square, and ribbon styles
- Social Proof Bar — stacked avatars with star rating and trust text
Forms & Interactive Widgets
- Custom Search Bar — styled WordPress search with icon or text button
- Newsletter Signup Box — email capture with admin email delivery or custom action URL
- Star Rating Display — static half-star rating display
- Cookie Notice Bar — GDPR-style dismissible bar with cookie persistence
Visual & Decorative Widgets
- Icon Box Grid — responsive icon feature grid
- Logo Grid / Client Logos — grayscale-to-color hover logos
- Progress / Skill Bar — animated progress bars with IntersectionObserver
- Image Hotspot — clickable points on an image with tooltip popups
- Gradient Text Widget — CSS gradient fill on any heading tag
- Divider with Text/Icon — styled section separator
Step-by-Step: How We Created the Plugin Using Claude AI
Here is the exact process we followed to build the complete QT Elementor Add-on plugin using Claude AI. You can replicate this process to build your own custom plugin.
Step 1 — Define Your Plugin Requirements
The first step was to decide what the plugin would contain and establish the branding details. We gave Claude the following information upfront:
- Plugin name: QT Elementor Add-on
- Author: Quick Tips
- Author URI: YouTube channel link
- Text domain, class prefix, widget name prefix, constants
- Custom widget category name and slug
- Complete list of all 27 widgets with descriptions
The more specific you are at this stage, the better the output. We described each widget — its purpose, the controls it needed, and the behavior it should have. This gave Claude a complete blueprint before generating any code.
Step 2 — Start the Build Conversation
We opened a fresh Claude conversation and provided the full plugin specification in a single detailed prompt. Claude then began building the plugin systematically:
- Created the main plugin file (qt-elementor-addon.php) with the singleton class, Elementor dependency checks, version constants, and widget registration map
- Created each of the 27 widget PHP files — one at a time — each with Content tab controls, Style tab controls, and a proper render() method
- Created the shared CSS file (qt-widgets.css) styling all 27 widgets
- Created the JavaScript file (qt-widgets.js) handling all interactive behaviors
- PHP-linted every file using php -l to catch syntax errors before delivery
- Packaged everything into a downloadable qt-elementor-addon.zip
Step 3 — Install and Test on a Live Website
We installed the plugin on a real Elementor website using WordPress Admin > Plugins > Add New > Upload Plugin. After activation, all 27 widgets appeared immediately under the “QT Widgets” category in the Elementor panel. We tested every widget on a live page.
Step 4 — Report Bugs to Claude in Plain English
After testing, we identified several issues and reported them to Claude in plain conversational language. For example:
“FAQ Accordion — each FAQ item shows a border which I cannot remove. The item shows a hover color I cannot customize. I need an option to customize hover color, border color, toggle icon size, and answer font size.”
Claude analyzed the root cause of each issue and delivered a v1.1 plugin with all fixes applied, including:
- Fixed SVG icon sizing across all widgets by adding dual CSS selectors for both font icons and inline SVG icons
- Fixed CTA Banner background — changed CSS default from a hardcoded gradient to a solid color so Elementor’s Background control could override it
- Fixed Gradient Text by adding color fallbacks and disabling Elementor global color linking which was returning empty values
- Added missing FAQ controls: border color, border width, hover background, hover border, toggle icon size, answer typography
- Added AJAX newsletter submission with admin email delivery
Step 5 — Continue Iterating Until Perfect
After v1.1, we discovered one more issue: the FAQ accordion button had a red border coming from the active WordPress theme’s global button styles. Claude v1.2 fixed this by using high-specificity CSS selectors with !important on border, outline, box-shadow, and background — making the button completely theme-proof.
The entire process — from initial prompt to final working plugin — took three iterative conversations. No PHP knowledge, no CSS debugging in browser DevTools, and no JavaScript writing was required.
How to Install Your Custom Elementor Addon Plugin
Installing your Claude-built Elementor addon plugin is identical to installing any WordPress plugin.
- Download the qt-elementor-addon.zip file from Claude
- Log in to your WordPress admin dashboard
- Go to Plugins > Add New
- Click Upload Plugin at the top of the page
- Click Choose File, select your .zip file, and click Install Now
- Click Activate Plugin once installation is complete
- Open any page in Elementor — your widgets appear under the QT Widgets category in the panel
Fixing Bugs and Issues with Claude AI
One of the most powerful aspects of using Claude AI for plugin development is how easy bug fixing becomes. Instead of spending hours in browser DevTools or Stack Overflow, you simply describe the problem to Claude in plain English.
How to Report a Bug Effectively
The more specific your bug report, the faster Claude fixes it. Follow this format:
- Widget name — which widget has the issue
- What you expected — what the widget should do
- What actually happens — the exact problem you see
- Screenshot — attach a screenshot if possible (Claude can see images)
Example: “Counter Card — the icon size control is not working. There is a slider in the Style tab to change the icon size, but the icon always displays at full size regardless of the value I set.”
Claude will analyze the code, identify the root cause (in this case, Elementor was rendering the icon as an inline SVG instead of a font icon, and the CSS only targeted font-size), and deliver a fix.
Version Control Through Conversation
Claude maintains version numbers automatically when you ask. We went from v1.0 to v1.1 to v1.2 across three conversations. Each version included a changelog documenting exactly what was fixed. This gives you a professional versioned plugin with full history — the same workflow used by commercial plugin developers.
How to Export a Reusable Prompt for the Same Plugin
One of the most valuable things we did was ask Claude to write a detailed prompt document that anyone could use to recreate the exact same plugin from scratch. This prompt document includes:
- All plugin branding details and constants
- The complete file structure
- Every widget’s Content controls, Style controls, and render requirements
- Critical CSS rules that prevent theme conflicts
- JavaScript behavior specifications for all interactive widgets
- All bug fixes and their root causes
- Final packaging and validation steps
We then asked Claude to convert this prompt into a downloadable Word document. The result is a comprehensive technical specification that anyone — even without any WordPress or PHP knowledge — can hand to Claude AI to get the same working plugin built from scratch.
This is a powerful workflow for agencies and freelancers: write the specification once, use it to generate the plugin for unlimited clients.
Tips for Getting the Best Results from Claude AI
After building this plugin through multiple iterations, we discovered several techniques that dramatically improve Claude’s output quality.
Be Specific About Every Control
Instead of saying “add color options,” specify exactly which elements need color controls and what the default colors should be. For example: “Add a Star Color control with default #FFB400, selector: color on .qtea-testimonial__stars.” The more precise your instructions, the more accurate the generated code.
Always Ask for PHP Linting
Include this instruction in your prompt: “PHP-lint all files using php -l before packaging. Zero errors allowed.” Claude will catch syntax errors that would otherwise prevent the plugin from activating.
Specify the SVG Icon Rule Explicitly
Elementor renders icons as inline SVGs on many themes, but also as font icons on others. To support both, always include this instruction: “All icon size and color selectors must target both the font-icon element AND the SVG element. For example, selector: font-size on .widget__icon AND width/height on .widget__icon svg.”
Test on a Staging Site First
Always install and test your Claude-generated plugin on a staging site before deploying it to a live production website. This gives you the freedom to test, find issues, and iterate without risking your live site.
Use Iterative Conversations
Do not try to get a perfect plugin in a single prompt. Build it, test it, report specific issues, and iterate. Three to four focused conversations will produce a much better result than one enormous prompt.
Common Mistakes to Avoid
Skipping the Testing Phase
Never assume the plugin works perfectly without testing every single widget on a live Elementor page. Some issues — like icon rendering differences between themes, or CSS being overridden by the active theme — only appear in a real browser environment.
Not Describing Your Brand Details
If you do not specify plugin name, author, text domain, and widget category upfront, Claude will use placeholder values. Always provide complete branding details before Claude begins writing any code.
Ignoring the CSS Specificity Issue
WordPress themes apply global button styles that can override widget styles. Always ask Claude to add high-specificity CSS resets for any interactive elements like buttons inside your widgets. This was the root cause of the red border appearing on our FAQ accordion button.
Using a Single Giant Prompt for Everything
If your plugin has many widgets, breaking the build into logical groups produces better results. Build the foundation (main plugin file + first group of widgets), test them, then build the next group. This approach catches structural issues early before they affect all 27 widgets.
Frequently Asked Questions
Do I need to know PHP or coding to create an Elementor addon plugin with Claude AI?
No. You do not need any coding knowledge. Claude AI writes all the PHP, CSS, and JavaScript for you. You only need to describe what you want in plain English and Claude generates the complete plugin files, zips them, and delivers a downloadable .zip file ready to install in WordPress.
Is the custom Elementor addon plugin free to use?
Yes. The plugin Claude generates is 100% free to use, install, and distribute. There are no license fees, no annual renewals, and no restrictions. You can install it on unlimited websites — including client sites — without any additional cost.
Will the custom plugin work with Elementor Free or do I need Elementor Pro?
Your custom Elementor addon plugin works with the free version of Elementor. You do not need Elementor Pro. The plugin uses the standard Elementor Widget API which is fully available in Elementor Free.
How long does it take to build an Elementor addon plugin with Claude AI?
Building a plugin with 27 widgets took approximately three conversation sessions with Claude, totaling around two to three hours of total time — including testing and bug fixing. A simpler plugin with five to ten widgets could be ready in under an hour.
Can I add more widgets to the plugin later?
Absolutely. You can return to Claude at any time and ask it to add new widgets to your existing plugin. Simply paste your current main plugin file into the conversation and describe the new widget you want to add. Claude will create the new widget file and update the widget registration map.
What happens if Elementor updates and breaks my plugin?
The plugin uses Elementor’s standard Widget_Base API which is stable and backward-compatible. However, if a future Elementor update does cause issues, you simply describe the problem to Claude and ask it to fix the affected widgets. The process is the same as reporting any other bug.
Can I sell the custom plugin I build with Claude AI?
Yes. The code Claude generates is yours to use commercially. You can sell the plugin to clients, include it in a website package, or even distribute it on marketplaces. There is no licensing restriction from Claude or Anthropic on code you generate.
Does this work with any WordPress theme?
Yes. The plugin is a standard WordPress plugin and works with any theme. However, some themes apply aggressive global CSS styles — particularly on button elements — that can interfere with widget styling. Claude can add high-specificity CSS overrides to handle theme conflicts when you report them.
Conclusion
Building a custom Elementor addon plugin used to require months of learning PHP, deep knowledge of the Elementor API, and significant development time. With Claude AI, the entire process is now accessible to any WordPress designer or freelancer — regardless of coding experience.
In this tutorial, we walked through how we built the QT Elementor Add-on plugin with 27 fully customizable widgets using nothing but Claude AI and clear plain-English instructions. We covered the benefits of owning a custom plugin, the step-by-step build process, how to fix bugs through conversation, and how to package a reusable prompt so you can rebuild the same plugin anytime.
The next time you consider purchasing a premium Elementor addon plugin subscription, remember: you can build exactly what you need, own it completely, and deploy it on unlimited sites — for free — using Claude AI.
Ready to build your own Elementor addon plugin? Watch the full video tutorial on the Quick Tips YouTube channel for a live walkthrough of every step in this guide.