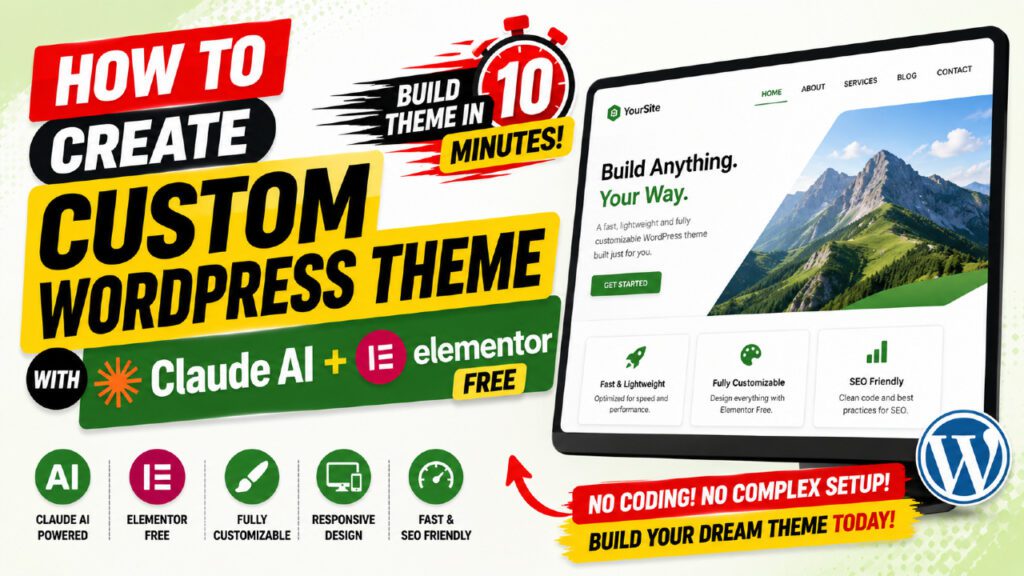
Building a custom WordPress theme from scratch used to mean weeks of PHP coding, hiring expensive developers, or settling for a generic premade template. Not anymore. In this guide you will learn exactly how to create a custom WordPress theme with Claude AI — fully coded, professionally designed, and ready to install on WordPress in minutes. No coding experience required whatsoever.
Whether you are a freelancer building client sites, a small business owner who wants full control over your brand, or a digital agency looking to speed up your workflow, this method changes everything. By the end you will have a complete installable WordPress theme with every page pre-built and editable in Elementor Free — the world’s most popular WordPress page builder.
Table of Contents
What Is Claude AI and Why Use It for WordPress Themes?
Claude AI is an advanced artificial intelligence assistant developed by Anthropic. While most people use it for writing and research, it is also a remarkably capable developer — able to write complete, working PHP, CSS, and JavaScript code from a well-structured prompt.
When you combine Claude AI with a detailed, step-by-step theme-building prompt, the result is something genuinely impressive: a fully functional custom WordPress theme, complete with all required files, page templates, Elementor layouts, a working quote form, a Claude-powered AI chat widget, and niche-specific demo content — all generated in one session and packaged as a downloadable .zip file.
Why Claude AI Instead of Other AI Tools?
Most AI coding tools generate code snippets you still need to piece together yourself. Claude AI is different because it can hold an entire complex project in context and produce complete, interconnected files that work together as a system. It understands WordPress theme structure, PHP template hierarchy, Elementor data formats, and CSS architecture — all at once.
It is also free to start with at claude.ai, making this one of the most accessible methods to build a professional WordPress theme ever created.
What Does the Custom WordPress Theme Include?
This is not a basic template — it is a feature-complete, professional WordPress theme.
Pages Included (Auto-Created with Elementor Layouts)
- Home page — hero banner with CTA buttons, services grid, why choose us, testimonials, quote form, blog preview, emergency CTA
- About Us page — business story, stats, team values, and call-to-action
- Services overview page — all services in a card grid with links
- Individual service pages — one per service with description, checklist, FAQ accordion, and sidebar
- Contact page — contact details, Google Maps embed, and quote form
- Blog archive and single blog post pages with sidebar
- Three niche-specific demo blog posts with full content
Features and Design Elements
- Real stock photos from Unsplash and Pexels embedded in every section
- Native Elementor widgets — heading, icon-list, accordion, button, image
- Sticky header with top bar, logo, navigation, and CTA button
- Four-column footer with services, links, contact info, and social icons
- Full WordPress Customizer — colors, fonts, header, footer, hero
- Claude AI chat widget powered by the Anthropic API
- Free quote request form with email notification
- Google Maps integration on the contact page
- Mobile responsive design on all screen sizes
- HTTPS enforced on all image URLs — no Chrome security warnings
Tools You Need Before Getting Started
You only need three things:
Tool | Cost / Where to Get It |
Claude AI account | Free — claude.ai |
WordPress website | From ~$5/month — any hosting provider |
Elementor Free plugin | Free — WordPress plugin repository |
Step 1 — Write the Right Prompt for Claude AI
The most important part of this entire process is the prompt you give to Claude AI. A vague prompt produces a generic result. A detailed, structured prompt produces a complete, professional theme.
The prompt covers nine major sections:
- Requirement gathering — instructs Claude to ask about niche, colors, design style, services, and features one question at a time
- Stock image search — tells Claude to find real images from Unsplash and Pexels before writing any code
- Build plan confirmation — Claude shows a full summary and waits for your approval
- File structure — defines exactly which PHP, CSS, and JS files to create
- Technical rules — enforces PHP compatibility, HTTPS on all URLs, and correct Elementor data injection
- Widget reference — specifies exactly which Elementor widget to use for every content type
- Page layouts — defines widget-by-widget what goes in every column of every section
- Blog posts — instructs Claude to create three niche-specific demo posts
- Delivery — packages everything as a .zip file and presents it for download
The Key Technical Rules Baked Into the Prompt
Through building and iterating on this theme across multiple versions, we discovered several critical technical requirements:
💡 The wp_slash() rule: When WordPress saves Elementor’s page data to the database, it automatically strips backslashes from the JSON. Elementor then strips them again when reading. Without wp_slash(), pages appear completely blank — this is the most common cause of blank Elementor pages when injecting data programmatically.
💡 No arrow functions: PHP arrow functions (fn() =>) require PHP 7.4+. Many shared hosts run older versions. Arrow functions cause a fatal error that can make the theme impossible to delete.
💡 Screenshot size limit: WordPress theme screenshots must be under 300KB. Larger files cause theme deletion to fail.
Step 2 — Answer the Requirement Questions One by One
Claude asks 17 questions one at a time — never all at once. This is intentional. Rushing straight to code without gathering requirements is why most AI-generated websites look generic.
Question Area | What Claude Asks |
Business niche | Roofing, Plumbing, Dental, Law, Landscaping, Gym, and more |
Business name | Used as theme name and throughout all content |
Author details | Your name and website for theme metadata |
Services list | 6 to 10 specific services — each gets its own page |
Color scheme | Orange/Dark, Blue/White, Green/Dark, Red/Black, Custom hex |
Design style | Bold Corporate, Modern Minimalist, Warm Friendly, Dark Premium |
Header style | Sticky (recommended) or static |
Sidebar | Right sidebar or full-width content |
Homepage sections | Hero, stats, services, why us, testimonials, form, blog, CTA |
Features | AI chat, Google Maps, quote form, business hours |
Contact details | Phone, email, address, hours for placeholder content |
Logo image | Upload your logo or use default for theme screenshot |
Step 3 — Claude Searches for Real Stock Images
After gathering requirements, Claude uses its image search capability to find real professionally shot stock photos from Unsplash, Pexels, and Pixabay — all free to use commercially — before writing a single line of PHP.
It searches specifically for:
- A wide landscape hero background image showing professionals performing your service
- An About Us team or professional portrait photo
- A Why Choose Us quality-result or detail shot
- One unique image for each service page specified
- Three blog post featured images — one per post topic
Every URL is verified to use HTTPS before being embedded. This prevents the mixed content warnings that cause Chrome to display your site as “Dangerous” or “Not Secure.”
✅ Images are embedded directly into Elementor’s native Image widget — not as HTML img tags inside a text editor — so you can click any image in Elementor and swap it for your own photo in seconds.
Step 4 — Confirm the Build Plan
Before writing any code, Claude presents a complete build plan showing: theme name, niche, author, version and primary color; all stock images found; every page to be created; three blog post titles; features included; and which Elementor widgets will be used.
You review the plan and type YES to confirm. This is your final chance to request changes before the build begins — want a different color, need to add a service, prefer a different style? Say so now.
Step 5 — Claude Builds the Complete WordPress Theme
After confirmation, Claude AI builds the entire theme — typically 5 to 15 minutes. It creates every required WordPress theme file:
- css — theme header with metadata plus complete CSS with custom properties, responsive breakpoints, Elementor overrides
- php — theme setup, AJAX handlers for quote form and AI chat, helper functions, Customizer output
- php — top bar with contact info, sticky navigation, logo, phone, CTA button
- php — multi-column footer with widget areas, business info, service links, AI chat widget
- php — blog archive with correct function names and sidebar
- php — individual blog post template with featured image fallback
- php — generic page wrapper for Elementor
- inc/customizer.php — all Customizer panels and settings
- inc/elementor-data.php — Elementor page layout generator with all image URLs
- inc/elementor-compat.php — Elementor compatibility and HTTPS enforcement
- inc/theme-setup.php — one-click page creator admin page
How Elementor Layouts Are Injected Automatically
Normally when you install a WordPress theme and create a new page, it is blank. You build every section from scratch in Elementor. This theme works differently.
When you click “Create All Pages” in the admin setup screen, the theme programmatically creates each page and injects a complete Elementor layout directly into the WordPress database — including every section, column, and widget, with all settings, colors, image URLs, and content already configured.
When you click “Edit with Elementor” on any page, you see the full layout ready to edit — not a blank canvas.
Widget Usage — Why It Matters for Editability
Content Type | Widget Used |
Page titles, section headings | Heading widget |
Paragraphs, body text | Text Editor widget |
CTA buttons | Button widget |
Feature lists, checklists | Icon List widget |
FAQ sections | Accordion widget |
Photos, standalone images | Image widget |
Section separators | Divider widget |
When your FAQ section uses the Accordion widget, you click it in Elementor and edit questions directly. When it is built as HTML inside a text editor — the wrong way — you have to find and edit raw HTML code, defeating the entire purpose of Elementor.
Step 6 — Download and Install Your Custom Theme
When Claude finishes building, it presents the theme as a downloadable .zip file. Download it, then:
- Navigate to Appearance → Themes → Add New in your WordPress dashboard
- Click Upload Theme
- Choose the .zip file you downloaded
- Click Install Now
- After installation, click Activate
⚠ Elementor Free must be installed and activated before creating pages. If Elementor is not active, the page creator shows a warning and refuses to proceed. Install from Plugins → Add New and search “Elementor.”
Step 7 — Create All Pages with One Click
Go to Appearance → [Your Business Name] Theme Setup in your WordPress admin. You will see a green notice confirming Elementor is active. Click the orange “Create All Pages with Elementor” button.
The theme then:
- Creates every page — Home, About Us, Services, Contact, Blog, and all individual service pages
- Injects complete Elementor layouts into each page with all sections, widgets, images, and content
- Sets the Home page as your WordPress front page automatically
- Sets the Blog page as your posts page automatically
- Creates three niche-specific demo blog posts with full content
Confirm in Settings → Reading that your front page is set to Home and your posts page is set to Blog.
Step 8 — Edit Your Pages with Elementor Free
Go to any page and click Edit with Elementor. Every section is fully laid out and ready to edit. Click any element to select it and edit its content, color, size, or style in the Elementor panel on the left.
Priority edits after installation:
- Replace the placeholder phone number +1 (555) 000-0000 — find it in the hero, quote form, and sidebar widgets on each page
- Replace the About Us placeholder image — click the Image widget and upload your real team photo
- Update testimonials — click each testimonial card to add real customer reviews
- Customize service descriptions — update with your actual offerings and pricing
Step 9 — Customize Colors, Fonts, and Business Info
Go to Appearance → Customize to access the full set of theme controls:
Customizer Panel | What You Can Change |
Colors and Style | Primary accent color, dark bg, header bg, footer bg, top bar color |
Typography | Heading font, body font (Google Fonts), base font size 14–18px |
Header Settings | Show/hide top bar, logo tagline, height, sticky, CTA button text+url |
Footer Settings | About text, copyright, show/hide columns, number of columns |
Hero Section | Badge text, headline, subtitle, button text+url, background image, height, stats |
Business Information | Phone, email, address, hours, license/certification number |
Social Media | Facebook, Instagram, Twitter, YouTube, LinkedIn |
Google Maps | Embed URL for contact page map |
AI Chat Widget | Show/hide, widget title, intro message |
✅ To enable the Claude AI chat widget, go to Settings → [Business Name] Settings and enter your Anthropic API key. Visitors can then ask questions about your services and get intelligent, context-aware answers powered by Claude AI.
Common Mistakes to Avoid
Using a Vague Prompt
Giving Claude a simple instruction like “build me a roofing website” produces a generic result. The 17-question prompt exists for a reason — answer every question thoughtfully.
Skipping the Elementor Installation
Clicking “Create All Pages” before installing Elementor creates pages with no Elementor data injected, leaving them blank. Always install Elementor Free first.
Not Setting Reading Settings
After creating pages, confirm in Settings → Reading that your front page and posts page are set correctly — especially on existing WordPress sites with previous content.
Ignoring the HTTPS Requirement
The theme enforces HTTPS on all embedded image URLs, but your WordPress site itself needs an SSL certificate at the hosting level. Contact your host to enable Let’s Encrypt if you have not already.
Editing PHP Files Instead of Elementor
All page content lives in Elementor database records, not in PHP template files. Always edit through the Elementor interface — not through PHP template files.
Frequently Asked Questions
Q: Can I create a WordPress theme with Claude AI for free?
A: Yes. Claude AI is free at claude.ai. Elementor Free is free from the WordPress plugin repository. You only need paid hosting, which starts around $5 per month with shared hosting providers.
Q: Does this work for any business niche?
A: Yes. The prompt works for roofing, plumbing, HVAC, electrical, landscaping, cleaning, dental, legal, real estate, restaurant, gym, salon, veterinary, tutoring, photography, and many more. Claude generates niche-specific content, images, FAQs, and blog posts for whatever niche you specify.
Q: Do I need to know PHP or coding?
A: No. The entire theme is generated by Claude AI. Your only job is to answer the requirement questions, confirm the plan, then use Elementor’s visual interface to edit text and images after installation.
Q: What if I want to add more pages later?
A: Any additional pages can be created in WordPress using Pages → Add New. Because the theme supports Elementor, you can design new pages however you want. You can also duplicate existing service pages and edit the content for a new service.
Q: Why are some Elementor pages blank?
A: This is caused by missing the wp_slash() wrapper when saving Elementor’s JSON data to the WordPress database. The prompt in this tutorial enforces this rule explicitly, which is why themes generated with it work correctly.
Q: Can I change the primary color after installation?
A: Yes. Go to Appearance → Customize → Colors and Style and use the color picker. The change applies instantly across every section, button, icon, and highlight on the entire site.
Q: Is Elementor Pro required?
A: No. This entire theme is built to work with Elementor Free. All layouts use only free-version widgets: heading, text editor, button, icon list, accordion, image, and divider.
Q: How long does Claude AI take to build the theme?
A: Typically 5 to 15 minutes depending on the number of services and features selected. The image search adds a couple of minutes at the start, and packaging the .zip file takes a moment at the end.
Conclusion
Creating a custom WordPress theme with Claude AI represents a genuine step change in how websites get built. What used to require a developer, weeks of work, and thousands of dollars in budget can now be done in an afternoon — by anyone — for free.
With the right prompt, Claude AI produces a complete, interconnected WordPress theme system with proper file structure, working AJAX handlers, programmatically injected Elementor layouts, real stock photography, niche-specific content, and a full suite of Customizer controls.
Every page opens in Elementor with a professional layout already built. Every widget is individually clickable and editable. Every color is controlled by a CSS variable that flows through the entire site. The quote form works. The AI chat widget connects to the Anthropic API. Nothing is broken or half-finished.
✅ If you are a freelancer or agency owner, this workflow can dramatically reduce the time you spend on initial theme setup for client sites — freeing you to focus on strategy, copywriting, and the work that actually requires your expertise.
Ready to build your first custom WordPress theme with Claude AI? Watch the video tutorial above for the complete walkthrough!