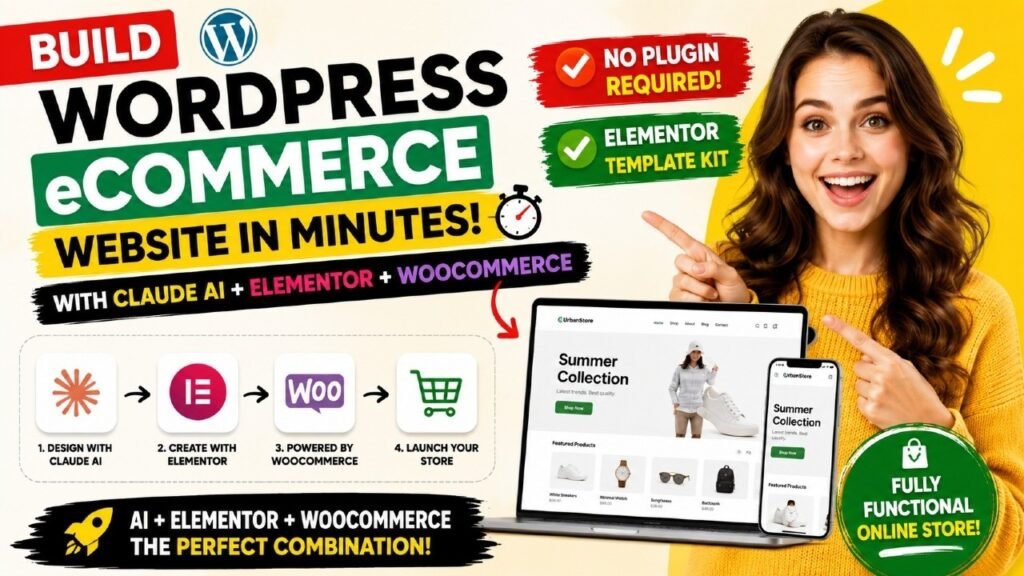
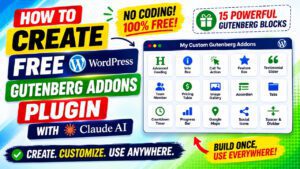
What if you could create a complete eCommerce website in WordPress — including custom page designs, a WooCommerce store, header, footer and product templates — without writing a single line of code by hand?
In 2026, that’s not a fantasy. It’s exactly what Claude AI makes possible when you pair it with Elementor Pro and WooCommerce on WordPress. In this guide, you’ll learn the full end-to-end workflow: from generating a professional HTML website layout with Claude AI, to converting that layout into a working Elementor template kit, to importing it into WordPress and launching a fully functional online store.
Whether you’re a freelancer building client sites faster, a small business owner launching your first store, or a developer looking to streamline your Elementor workflow, this tutorial covers every step in detail. We’ll build a real fashion eCommerce store — Param Fashion Store — as a live example throughout.
Table of Contents
Below is the prompt I used to create eCommerce website HTML layout using Claude
Role – you are a professional wordpress website developer.
I want to create a complete website for a eCommerce Fashion Store.
The name of the business is “Param Fashion Store”.
The business is about Selling Clothes online.
Products will have Mens and Women’s clothes categories.
Selling shirts, tshirts, pants, jeans, formal wear, casual wear, summer wear and accessories.
I also want to add Home, About us, Shop, & Contact Page.
The website will be created in WordPress using Elementor Free and Pro plugins.
I do have Elementor Pro plugin.
The eCommerce store will be created using WooCommerce plugin.
I want you first create a basic layout for website with all the pages.
Add 10 demo products to the website.
Use stock images.
Common header and footer sections for all pages.
Once the website layout is ready, I want you to create Elementor template kit that I can upload to my WordPress website using Elementor Pro plugin.
Elementor template kit will include, header, footer, golbal styles, home page, about us page, services page and contact page templates.
To create eCommerce store using WooCommerce, include Single product page and shop archive page templates to the elementor template kit.
Also create global.json file that contains Global style settings for the Elementor Site settings.
Global style file will include:
Global colors – primary, secondary, text. accent and custom colors if required
Global Font – primary, secondary, text. accent.
Use the same colors and fonts throughout the layout as per Elementor site settings.
I am attaching sample global.json file for details.
All the templates should use the proper elementor widgets and not only html content.
You can use AK Elementor Studio skill that I already have in Skills section.
Home page layout must include:
Attractive Hero section with call to action buttons and images animations.
Why choose use section.
4 Popular products listings in 4 columns.
Sliding testimonials – 6 testimonials – 3 testimonials in view
Call to action section
Header section includes:
Logo or business name in left side
Navigation Menu
Call Now button in right side
Footer section includes 4 columns
Business name and short description
Links to other pages
Quick links to product categories
Contact information
Color scheme – Use light color theme.
User yellow, red, blue and black colors.
Font – Use modern fonts.
Try using gradient background colors for each section on the page.
Use stock images to display on each page.
Business name – ——-
Location – ———–
Phone: ———
Email ———–
First create a layout for the website. Create unique, modern style layout for the business website.
Once the layout is finalized, I will ask you to create Working Elementor template kit based on the layout.
What Is Claude AI and Why Use It for WordPress?
Claude AI is an advanced large language model developed by Anthropic. Unlike general-purpose AI chatbots, Claude can generate structured code, understand complex multi-step instructions and produce complete file sets — including JSON-based Elementor template files — in a single conversation.
For WordPress professionals, Claude AI is rapidly becoming one of the most powerful tools available. It can design and code an entire website layout, generate Elementor-compatible JSON templates, write WooCommerce product data, and even produce Schema markup for SEO — all without leaving the chat window.
Why Claude AI Stands Out for Web Designers
- Generates full multi-page website layouts from a simple text descriptionGenerates full multi-page website layouts from a simple text description
- Produces native Elementor widget JSON — not just raw HTMLProduces native Elementor widget JSON — not just raw HTML
- Understands Elementor Pro Theme Builder structure (header, footer, single product, archive)Understands Elementor Pro Theme Builder structure (header, footer, single product, archive)
- Creates WooCommerce-ready templates including Cart, Checkout and My Account pagesCreates WooCommerce-ready templates including Cart, Checkout and My Account pages
- Outputs structured files like global.json, kit.json and CSV product importsOutputs structured files like global.json, kit.json and CSV product imports
- Works iteratively — you can refine, fix errors and add pages in the same conversationWorks iteratively — you can refine, fix errors and add pages in the same conversation
Tools and Plugins You Need
Before you start, make sure you have the following set up. All tools except Elementor Pro are free:
Tool / Plugin | Cost | Purpose |
Claude AI (claude.ai) | Free / Pro | Generate layout and Elementor template kit |
WordPress | Free | Website platform |
Elementor (Free) | Free | Page builder plugin |
Elementor Pro | Paid | Theme Builder, WooCommerce widgets, Pro templates |
WooCommerce | Free | eCommerce store engine |
Template Kit Import | Free | Import the ZIP kit into WordPress |
Benefits of Using Claude AI to Create Elementor Template Kits
Most Elementor template kits on the market are either generic, overpriced or built for a completely different niche. When you use Claude AI to build a kit, every template is designed specifically for your business from the ground up. Here’s why this approach is transforming how web designers and business owners launch WordPress sites.
Save 80% of Design and Development Time
A custom Elementor template kit built from scratch typically takes a skilled developer 20–40 hours. Claude AI can generate a complete 12-template kit — including global styles, header, footer, all pages and WooCommerce templates — in a single chat session. What used to take days now takes under an hour.
100% Niche-Specific Design
Generic kits require heavy customization to fit your business. Claude builds around your exact brand: your colors, your fonts, your business name, address, phone number and content. The Param Fashion Store kit we built in this tutorial came out with the real business name in the header, real contact details in the footer and real product categories — right out of the box.
Native Elementor Widgets Only
A common issue with AI-generated Elementor content is the use of raw HTML widgets — which break when Elementor updates and offer no visual editing. Claude AI, when properly prompted with the AK Elementor Studio skill, generates templates using only native Elementor widgets: Heading, Text Editor, Image, Icon Box, Button, Nav Menu, Testimonial Carousel, Counter, WooCommerce Cart, Checkout, My Account, and more. Every element is fully editable inside the Elementor drag-and-drop editor.
Global Styles Baked In
Claude generates a global.json file that maps directly to Elementor Site Settings. This sets your brand colors (Primary, Secondary, Text, Accent plus custom colors), typography (H1–H6, body, buttons) and spacing — all in one import. Every template in the kit references these global settings, so changing your brand color once updates the entire site instantly.
WooCommerce Theme Builder Templates Included
This is the biggest advantage over most commercial template kits. Claude generates proper Elementor Pro Theme Builder templates for Single Product, Shop Archive, Cart, Checkout and My Account pages — all using native WooCommerce widgets like woocommerce-product-images, woocommerce-product-price, woocommerce-cart, woocommerce-checkout-page and woocommerce-my-account. These are the same widgets Elementor Pro’s own WooCommerce Builder uses.
Iterative and Error-Correctable
If a template has an error — like an invalid document type (we fixed the single-product template type from ‘single-product’ to ‘product’ during this project) — you simply tell Claude what went wrong and it fixes it in seconds. This feedback loop makes Claude far more practical than a one-time template purchase.
Step 1 — Create the HTML Website Layout with Claude AI
The first step is designing the website layout. Rather than jumping straight to Elementor JSON (which is complex to visualize), the smarter approach is to have Claude generate an HTML preview first. This gives you a fully interactive browser preview that you can review, share and get approved before building the Elementor kit.
Write a Detailed Website Brief
The quality of Claude’s output depends on the quality of your prompt. Give Claude a complete brief that covers:
- Business name, type and locationBusiness name, type and location
- Products or services offeredProducts or services offered
- Pages required (Home, About, Shop, Contact, Services)Pages required (Home, About, Shop, Contact, Services)
- Color scheme and font preferencesColor scheme and font preferences
- Section-by-section layout instructions (hero, testimonials, products, CTA)Section-by-section layout instructions (hero, testimonials, products, CTA)
- Header and footer contentHeader and footer content
- WooCommerce requirements (product categories, demo products)WooCommerce requirements (product categories, demo products)
- Contact details (address, phone, email)Contact details (address, phone, email)
For the Param Fashion Store, the brief included a light theme with Yellow (#FFC820), Red (#E63946), Blue (#2743E0) and Black (#101014), Sora for headings and Manrope for body text, gradient backgrounds on every section, and specific sections including an animated hero, sliding testimonials (6 reviews, 3 in view), a 4-column product grid and a WooCommerce shop setup.
Request the HTML Layout Preview
Ask Claude to generate a complete multi-page HTML file with all pages — Home, About, Shop, Single Product, Contact — in a single file with JavaScript-powered page switching. This lets you preview the full site in a browser without any server setup.
Claude will produce a self-contained HTML file with:
- Sticky header with logo, navigation menu and call buttonSticky header with logo, navigation menu and call button
- Hero section with floating image animations and animated badgeHero section with floating image animations and animated badge
- Category grid, Why Choose Us cards, popular products and testimonial carouselCategory grid, Why Choose Us cards, popular products and testimonial carousel
- Gradient CTA bannerGradient CTA banner
- Common footer with 4 columnsCommon footer with 4 columns
- All inner pages (About, Shop with 10 products, Single Product with gallery tabs, Contact with form)All inner pages (About, Shop with 10 products, Single Product with gallery tabs, Contact with form)
- CSS variables mapped to your brand colors and fontsCSS variables mapped to your brand colors and fonts
- A preview switcher bar at the bottom to flip between pagesA preview switcher bar at the bottom to flip between pages
Review and Finalize the Layout
Open the HTML file in your browser. Navigate through all pages using the switcher bar. Check the hero animations, testimonial slider, product grid, single product gallery, contact form layout and footer. Request any changes directly in the same Claude conversation — adjust colors, swap sections, add content or tweak spacing. Once you’re happy, confirm the layout and move on to building the Elementor kit.
Step 2 — Convert the HTML Layout into an Elementor Template Kit
With the layout approved, the next step is converting it into a proper Elementor template kit. This is where Claude AI really earns its place — it generates every template file in the exact JSON structure Elementor Pro’s Template Kit Import plugin expects.
Use the AK Elementor Studio Skill
The AK Elementor Studio skill is a custom instruction set that teaches Claude the exact Elementor container, widget and setting schema. When this skill is active, Claude generates templates using valid Elementor elements: containers (elType: container), widgets (elType: widget) with correct widgetType values, and settings objects with proper Elementor property keys like background_background, border_radius, padding, typography_font_family and more.
Request the Full Template Kit
Ask Claude to generate the Elementor template kit with the following files:
- global-styles.json — Elementor Site Settings (colors, typography, H1–H6, body, buttons)global-styles.json — Elementor Site Settings (colors, typography, H1–H6, body, buttons)
- json — Elementor Pro Theme Builder header templateheader.json — Elementor Pro Theme Builder header template
- json — Elementor Pro Theme Builder footer templatefooter.json — Elementor Pro Theme Builder footer template
- json — Full home page templatehome.json — Full home page template
- json — About Us page templateabout.json — About Us page template
- json — Services page templateservices.json — Services page template
- json — Contact page with Pro Form widget and Google Mapscontact.json — Contact page with Pro Form widget and Google Maps
- single-product.json — WooCommerce Single Product theme builder template (type: “product”)single-product.json — WooCommerce Single Product theme builder template (type: “product”)
- shop-archive.json — WooCommerce Shop/Archive theme builder template (type: “product-archive”)shop-archive.json — WooCommerce Shop/Archive theme builder template (type: “product-archive”)
- json — Cart page template with woocommerce-cart widgetcart.json — Cart page template with woocommerce-cart widget
- json — Checkout page template with woocommerce-checkout-page widgetcheckout.json — Checkout page template with woocommerce-checkout-page widget
- my-account.json — My Account page template with woocommerce-my-account widgetmy-account.json — My Account page template with woocommerce-my-account widget
- json — Template Kit manifest listing all templateskit.json — Template Kit manifest listing all templates
- woocommerce-demo-products.csv — 10 demo products for WooCommerce importwoocommerce-demo-products.csv — 10 demo products for WooCommerce import
Global Styles Setup
The global.json (global-styles.json) is the most important file in the kit. It maps directly to WordPress Admin → Elementor → Site Settings. It defines:
- System Colors: Primary (Yellow), Secondary (Blue), Text (Muted Grey), Accent (Red)System Colors: Primary (Yellow), Secondary (Blue), Text (Muted Grey), Accent (Red)
- Custom Colors: Brand Black, Deep Blue, soft tints (Yellow Soft, Blue Soft, Red Soft), Border, WhiteCustom Colors: Brand Black, Deep Blue, soft tints (Yellow Soft, Blue Soft, Red Soft), Border, White
- System Typography: Primary (Sora 800 48px), Secondary (Sora 700 24px), Text (Manrope 400 16px), Accent (Manrope 800 13px uppercase)System Typography: Primary (Sora 800 48px), Secondary (Sora 700 24px), Text (Manrope 400 16px), Accent (Manrope 800 13px uppercase)
- H1–H6 colors and typographyH1–H6 colors and typography
- Body font, link colors, button defaults (background, text, hover, border radius, padding)Body font, link colors, button defaults (background, text, hover, border radius, padding)
All page templates reference these global settings using Elementor’s __globals__ linking syntax — for example, __globals__: { typography_typography: ‘globals/typography?id=primary’ }. This means editing the global style automatically updates every template.
Important: Correct Document Types
A critical technical detail: the ‘type’ field in each template JSON must match Elementor Pro’s registered document types exactly. Use these values:
- “page” — for standard pages (Home, About, Services, Contact, Cart, Checkout, My Account)”page” — for standard pages (Home, About, Services, Contact, Cart, Checkout, My Account)
- “header” — for Theme Builder header”header” — for Theme Builder header
- “footer” — for Theme Builder footer”footer” — for Theme Builder footer
- “product” — for WooCommerce Single Product (NOT “single-product”)”product” — for WooCommerce Single Product (NOT “single-product”)
- “product-archive” — for WooCommerce Shop Archive”product-archive” — for WooCommerce Shop Archive
Using the wrong type (e.g., ‘single-product’ instead of ‘product’) triggers an ‘Invalid template type’ error on import. If you encounter this, simply tell Claude the exact error message and it will fix the file and rebuild the ZIP.
ZIP the Kit
Claude packages everything into a ZIP file with the structure expected by the Template Kit Import plugin: kit.json at the root, all template JSON files inside a /templates/ folder. It also validates all template JSON for duplicate IDs, correct element structures and native widgets before building the ZIP.
Step 3 — What the Elementor Template Kit Includes
The complete Param Fashion Store Elementor Template Kit contains 12 templates covering every page and WooCommerce screen:
Template | Type | Key Sections / Widgets |
Global Styles | Kit Styles | Colors, fonts, H1–H6, body, buttons |
Header | Theme Builder | Logo, Nav Menu, Call Now button |
Footer | Theme Builder | Brand info, links, categories, contact info, socials |
Home Page | Page | Hero, ticker, categories, why choose us, products, testimonials, CTA |
About Us | Page | Story section, counters, values cards, CTA |
Services | Page | Services grid, how it works steps, CTA |
Contact | Page | Info cards, Pro Form, Google Maps |
Single Product | WooCommerce | Product images, price, add-to-cart, tabs, related products |
Shop Archive | WooCommerce | Archive title, WC products grid, pagination |
Cart | Page | WooCommerce Cart widget, trust strip, CTA |
Checkout | Page | WooCommerce Checkout widget, trust strip |
My Account | Page | WooCommerce My Account widget with styled tabs |
Step 4 — Set Up WordPress and Install WooCommerce
Before importing the kit, your WordPress environment needs to be ready. Here’s the setup order:
Install WordPress and Required Plugins
- Install WordPress on your hosting (most hosts offer 1-click install)
- Install and activate Elementor (free) from WordPress.org plugins
- Upload and activate your Elementor Pro license
- Install and activate WooCommerce from WordPress.org plugins
- Run the WooCommerce Setup Wizard — this creates the Shop, Cart, Checkout and My Account pages automatically
- Install the Template Kit Import plugin (free, WordPress.org — search “Template Kit Import”)
Configure Elementor Basic Settings
Go to Elementor → Settings → Style. Set the content width to 1200px and enable Flexbox Containers if prompted. Under Features, enable the Theme Builder. These settings ensure the kit templates import correctly and display at the intended widths.
Step 5 — Install the Elementor Template Kit in WordPress
With WordPress and all plugins set up, you’re ready to import the kit.
8.1 — Import via Template Kit Import Plugin
- Go to WordPress Admin → Tools → Template Kit
- Click “Upload Kit” and select the param-fashion-store-kit.zip file
- The importer lists all 12 templates — import Global Styles FIRST
- After Global Styles imports, import Header, Footer, then all page and WooCommerce templates
- Each template imports with a green checkmark when successful
Alternative: Direct Template Import
If you prefer not to use the Template Kit Import plugin, every JSON file in the /templates/ folder can also be imported individually via Elementor → Templates → Saved Templates → Import Templates. Upload each file one by one. This method also works if only a single template needs updating — for example, re-importing a fixed single-product.json without touching the rest of the kit.
Step 6 — Assign Theme Builder Templates (Elementor Pro)
Page templates import to your Saved Templates library, but Theme Builder templates (Header, Footer, Single Product, Shop Archive) need to be assigned display conditions before they take effect on your site.
Header and Footer
- Go to Elementor → Templates → Theme Builder
- Find “Header — Param Fashion Store” and click Edit
- Click “Add Condition” → Choose “Entire Site” → Save & Close
- Repeat for “Footer — Param Fashion Store”
WooCommerce Templates
- In Theme Builder, find “Single Product” → Edit → Add Condition → “All Products” → Save & Close
- Find “Shop Archive” → Edit → Add Condition → “All Product Archives” → Save & Close
- The Cart, Checkout and My Account templates are page templates — not Theme Builder — so assign them next
Assign Page Templates to WooCommerce Pages
For Cart, Checkout and My Account, open each page in the WordPress editor, click Edit with Elementor, then click the folder icon → My Templates → find and insert the matching template. Do not change the pages WooCommerce created — they must remain assigned under WooCommerce → Settings → Advanced.
Step 7 — Import Demo Products and Set Up WooCommerce
Import the 10 Demo Products
- Go to WooCommerce → Products → Import
- Upload woocommerce-demo-products.csv
- Keep the default column mapping (all columns match automatically)
- Click “Run the Importer”
- All 10 products import with names, prices, categories, tags and Unsplash demo images
The 10 demo products cover all planned categories:
- Men — Classic Oxford Shirt, Essential Crew T-Shirt, Slim Fit Denim Jeans, Tailored Formal Blazer, Linen Summer ShirtMen — Classic Oxford Shirt, Essential Crew T-Shirt, Slim Fit Denim Jeans, Tailored Formal Blazer, Linen Summer Shirt
- Women — Floral Summer Dress, High-Waist Skinny Jeans, Silk Formal Blouse, Casual Knit CardiganWomen — Floral Summer Dress, High-Waist Skinny Jeans, Silk Formal Blouse, Casual Knit Cardigan
- Accessories — Leather Tote BagAccessories — Leather Tote Bag
Configure Product Categories
WooCommerce creates categories from the CSV automatically: Men, Women, Men > Shirts, Men > T-Shirts, Men > Jeans, Men > Formal Wear, Men > Summer Wear, Women > Jeans, Women > Formal Wear, Women > Casual Wear, Women > Summer Wear, Accessories. These match the navigation categories set up in the footer template.
Set the Home Page and Menu
- Go to Settings → Reading → A static page → set Home as the front page
- Go to Appearance → Menus → create “Main Menu” with Home, About Us, Shop, Services, Contact
- In the Header template inside Elementor, select this menu in the Nav Menu widget
- Replace Unsplash demo images with your own product photos before going live
Common Mistakes to Avoid
Importing Templates Before Global Styles
Always import the global-styles.json first. If you import page templates first, their typography and color references point to globals that don’t exist yet — resulting in broken or default styling.
Wrong Single Product Template Type
Elementor Pro’s Single Product document type is ‘product’, not ‘single-product’. If you get an ‘Invalid template type’ error on import, this is the cause. Ask Claude to fix the type field and rebuild the ZIP.
Deleting WooCommerce’s Auto-Created Pages
The Cart, Checkout and My Account pages that WooCommerce creates during setup must not be deleted or renamed. Insert the Elementor template into those existing pages — do not create new pages.
Not Setting Display Conditions on Theme Builder Templates
Header, Footer, Single Product and Shop Archive templates do nothing until you assign display conditions in Theme Builder. This is the most common reason these templates appear not to work after import.
Using HTML Widgets Instead of Native Widgets
If an AI generates content inside HTML widgets, the output isn’t editable in the Elementor visual editor and breaks on plugin updates. Verify every template uses native Elementor widgets by checking the widget panel after import.
Frequently Asked Questions (FAQ)
Do I need coding skills to create an eCommerce website with Claude AI and Elementor?
No coding skills are required. Claude AI generates all the code and template files — you just copy and paste the prompt, review the HTML preview, and import the ZIP into WordPress. Elementor’s drag-and-drop editor handles all visual customization after import.
Is Claude AI free to use for generating Elementor template kits?
Claude AI has a free tier that handles straightforward tasks. For generating a complete 12-template Elementor kit with WooCommerce support — which involves long, complex conversations — a Claude Pro or higher plan is recommended for longer context windows and faster responses.
Which Elementor plan do I need to use the template kit?
You need Elementor Pro (any paid plan). The free version of Elementor does not include Theme Builder, which is required for assigning the Header, Footer, Single Product and Shop Archive templates. The WooCommerce Cart, Checkout and My Account widgets also require Elementor Pro.
Can I edit the templates after importing the kit?
Yes — fully. Every template opens in the Elementor visual editor and every element is built with native Elementor widgets, so you can click any heading, image, button or section and edit it directly. The global colors and fonts are editable in Elementor → Site Settings.
Why am I getting an “Invalid template type” error on the Single Product template?
This error occurs when the ‘type’ field in the template JSON is set to ‘single-product’ instead of the correct Elementor value ‘product’. Ask Claude to fix the type field in the JSON file and rebuild the ZIP. The corrected template imports without errors.
Can I add more pages or templates to the kit after importing?
Yes. You can ask Claude to generate additional templates (e.g., a Blog page, a Wishlist page or a Thank You page) using the same prompt style, then import those individual JSON files via Elementor → Templates → Saved Templates → Import Templates.
Do the WooCommerce Cart, Checkout and My Account templates require Theme Builder?
No — these three are standard page templates, not Theme Builder templates. You insert them into the WooCommerce-created pages (Cart, Checkout, My Account) via My Templates inside the Elementor editor. Only Header, Footer, Single Product and Shop Archive use Theme Builder.
Can I use this workflow for other business types, not just fashion stores?
Absolutely. The same workflow works for any business: restaurants, real estate, SaaS, health and wellness, home services and more. Just change the business brief you give Claude — the color scheme, sections, products and content — and Claude generates a completely different kit tailored to that niche.
Conclusion
Building a professional eCommerce website in WordPress no longer requires weeks of design work, expensive freelancers or one-size-fits-all theme kits. With Claude AI and Elementor Pro, you can go from a business brief to a fully working WooCommerce store — complete with custom-branded templates, global styles, 12 Elementor Pro templates and 10 demo products — in a single afternoon.
The workflow is simple: describe your business to Claude, review the HTML layout preview, ask Claude to convert it into an Elementor template kit, import the ZIP into WordPress, assign your Theme Builder conditions and you’re live. Every step in this guide has been tested on a real project — the Param Fashion Store — so you can follow it with confidence.
Ready to build your store? Start a new Claude conversation, paste your business brief, and generate your first Elementor template kit today. If you run into any errors or want to add new pages, just describe the issue to Claude — it iterates as fast as you can type.