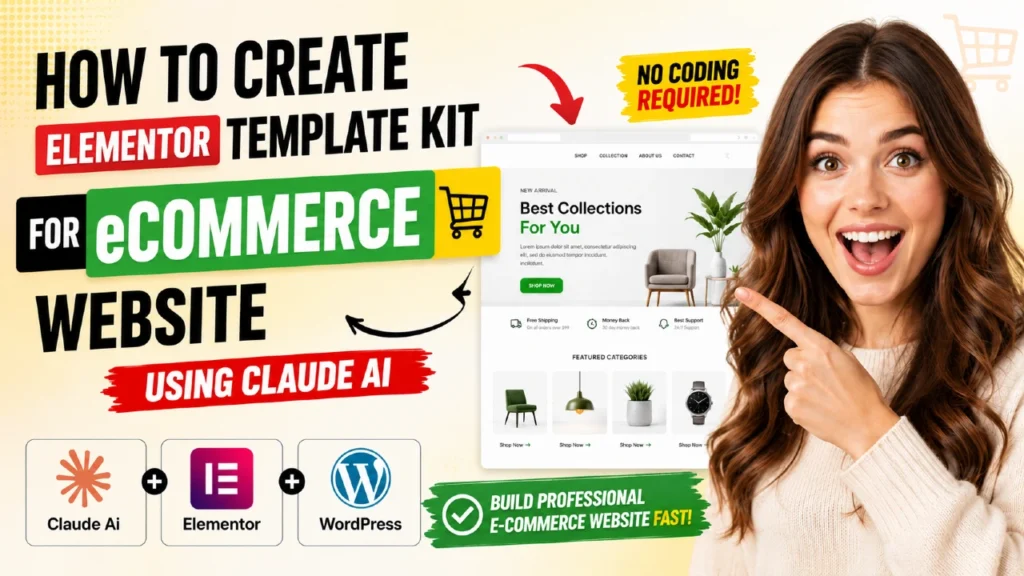
Want to launch an online store without paying $50–$500 for premium designs? You can create your own eCommerce Elementor template kit — and in 2026, AI makes it faster than ever. In this guide, I’ll walk you through the exact process I use: planning the store layout, building global styles, generating every template with native Elementor widgets, and importing the finished kit into WordPress with WooCommerce. I’ll also show you how Claude AI can generate the entire kit from a single prompt, so you can go from idea to working store in an afternoon. By the end, you’ll have a reusable, fully branded kit you can deploy on unlimited projects.
Table of Contents
Detailed Prompt to create eCommerce Elementor template kit
Role – you are a professional wordpress website developer.
I want to create a complete website for a eCommerce electronics Store.
The name of the business is “Your business name”.
[explain your business details]
The business is about Selling electronic devices online.
Selling mobile, mobile accessories, LED TV, washing machines, dish washers, refridgerators, etc.
I also want to add Home, About us, Shop, & Contact Page.
The website will be created in WordPress using Elementor Free and Pro plugins.
I do have Elementor Pro plugin.
The eCommerce store will be created using WooCommerce plugin.
I want you first create a basic layout for website with all the pages.
Add 10 demo products to the website.
Use stock images.
Common header and footer sections for all pages.
Once the website layout is ready, I want you to create Elementor template kit that I can upload to my WordPress website using Elementor Pro plugin.
Elementor template kit will include, header, footer, golbal styles, home page, about us page, services page and contact page templates.
To create eCommerce store using WooCommerce, include Single product page and shop archive page templates to the elementor template kit.
Also create global.json file that contains Global style settings for the Elementor Site settings.
Global style file will include:
Global colors – primary, secondary, text. accent and custom colors if required
Global Font – primary, secondary, text. accent.
Use the same colors and fonts throughout the layout as per Elementor site settings.
All the templates should use the proper elementor widgets and not only html content.
You can use AK Elementor Studio skill that I already have in Skills section.
Home page layout must include:
Attractive Hero section with call to action buttons and sliding product images.
Why choose use section.
Product categories.
8 Popular products listings in 4 columns.
Sliding testimonials – 6 testimonials – 3 testimonials in view
Call to action section
Header section includes:
Logo or business name in left side
Navigation Menu
Call Now button in right side
Footer section includes 4 columns
Business name and short description
Links to other pages
Quick links to product categories
Contact information
Color scheme – Use light color theme.
User white, yellow, red, green and blue colors.
Font – Use modern fonts.
Try using gradient background colors for each section on the page.
Use stock images to display on each page.
Business name –
Location –
Phone:
Email –
First create a layout for the website. Create unique, modern style layout for the business website.
Once the layout is finalized, I will ask you to create Working Elementor template kit based on the layout.
What Is an eCommerce Elementor Template Kit?
An eCommerce Elementor template kit is a matched set of Elementor templates — header, footer, global styles, core pages, and WooCommerce store templates — that share one cohesive design and import together into WordPress. Instead of designing each page separately, you import the kit once and every part of your online store instantly matches.
Think of it as a design system in a box. The global colors and fonts live in Elementor’s Site Settings, while individual JSON templates control each page and theme part. Because everything references the same design tokens, changing your brand color once updates the entire store.
Template Kit vs. WordPress Theme: What’s the Difference?
This confuses many beginners, so let’s clear it up. A WordPress theme controls your site’s underlying framework, while a template kit controls the visual design layer inside Elementor. In fact, most template kits are designed to run on a minimal base theme such as Hello Elementor, which stays out of the way so the kit can do the styling.
Feature | WordPress Theme | Elementor Template Kit |
What it controls | Core framework, PHP templates | Visual design of pages and theme parts |
Editing method | Code or Customizer | Drag-and-drop Elementor editor |
Portability | Tied to the theme | Import/export as JSON or kit ZIP |
Best used with | Any setup | Hello theme + Elementor Pro |
What’s Inside a Complete eCommerce Kit
A store-ready kit needs more than a pretty home page. At minimum, a complete eCommerce Elementor template kit should include the following templates:
- Global styles — global colors, global fonts, buttons, and body background
- Header and footer theme builder templates
- Core pages — Home, About, Services, and Contact
- WooCommerce theme templates — single product and shop archive
- WooCommerce pages — Cart, Checkout, My Account, and a Thank You page
- Demo products with images, so the store isn’t empty on day one
[Suggested image: Diagram showing all 13 templates that make up a complete eCommerce kit]
What You Need Before You Start
The good news: the toolkit for an eCommerce Elementor template kit is short. You only need four things installed on your WordPress site before creating or importing an eCommerce Elementor template kit.
Required Plugins and Theme
- Elementor (free) — the core page builder
- Elementor Pro — required for Theme Builder, WooCommerce widgets, forms, and nav menus
- WooCommerce — powers the products, cart, and checkout
- Hello Elementor theme — a lightweight base theme that won’t fight your kit’s styling
Recommended Settings
Before importing anything, open Elementor → Settings → Features and confirm Flexbox Containers are enabled. Modern kits are built with containers rather than legacy sections, which load faster and give you cleaner responsive control. Additionally, set your permalinks to “Post name” so category links like /product-category/mobiles/ resolve correctly.
Why Use Claude AI to Create Your Template Kit
Here’s where 2026 changes the game. Traditionally, building a full kit meant days of design work in the editor. Now, an AI assistant like Claude can design the layout, generate every template as importable JSON, and even create your demo product data — all from a text prompt.
Design and Code From One Prompt
You describe your business, pages, color scheme, and layout requirements. Claude first produces a clickable visual layout preview so you can approve the design direction. Once you’re happy, it converts that exact design into Elementor JSON templates, ready to import.
Native Widgets, Not HTML Blocks
This is the detail that separates a professional kit from a throwaway one. Cheap AI outputs often dump raw HTML into a single widget, which breaks Elementor’s responsive controls and makes editing impossible. A properly generated kit uses only native widgets — Heading, Text Editor, Button, Icon Box, Nav Menu, Form, Testimonial Carousel, and the full WooCommerce widget set. Every element stays fully editable in the Elementor editor.
Consistent Global Styles Automatically
Claude can generate a global.json file containing your Global Colors (primary, secondary, text, accent, plus custom colors) and Global Fonts. Templates then reference those globals, so your brand stays consistent across all 13 templates — and recoloring the whole store takes one click in Site Settings.
Real Cost and Time Savings
A premium eCommerce kit costs $50–$500, and custom design work costs far more. Generating your own kit with AI costs a fraction of that and takes hours, not weeks. For freelancers, that margin goes straight into your pocket on every client project.
Step 1: Plan Your Store Layout
Great kits start with a clear plan, not a blank canvas. Spend ten minutes defining these three things before you prompt the AI or open Elementor.
Define Your Pages and Sections
List every page your store needs and the sections on each. For a typical electronics store, that’s a Home page with a hero slider, trust strip, “why choose us” cards, category grid, popular products, testimonials, and a call-to-action band — plus About, Services, Contact, Shop, and the WooCommerce pages.
Choose a Color Scheme and Fonts
Pick 4–5 brand colors and two fonts before generating anything. For example, my demo store used a dark theme: deep navy backgrounds with blue, yellow, green, and red accents, headings in Sora, and body text in Plus Jakarta Sans. Dark themes work especially well for electronics stores because product photos pop against navy.
Write a Detailed AI Prompt
If you’re using Claude, include your business name, contact details, page list, section-by-section layout requirements, color scheme, fonts, and the number of demo products. The more specific the prompt, the less revision you’ll need. Ask for a layout preview first, then request the template kit only after you approve the design.
[Suggested image: Screenshot of the Claude AI prompt and the generated dark-theme layout preview]
Step 2: Create Global Styles (global.json)
Global styles are the foundation of the entire kit — create them first, import them first. In Elementor, these live under Site Settings and control your Global Colors and Global Fonts.
Set Up Global Colors
Define the four system colors — Primary, Secondary, Text, and Accent — then add custom colors for backgrounds, cards, borders, and states. Here’s the palette from my dark electronics kit as a working example:
Color Role | Hex Value | Used For |
Primary (Blue) | #4C8DFF | Buttons, links, prices |
Secondary (Yellow) | #FFC53D | Highlights, active states, ratings |
Text (Light) | #EAF0FB | Headings and body text |
Accent (Green) | #2EDC82 | Success states, badges |
Custom: Red | #FF5D5D | Sale badges, call buttons |
Custom: BG Dark | #0B1120 | Site background |
Set Up Global Fonts
Assign Primary (headings), Secondary (sub-headings), Text (body), and Accent (labels) fonts. Stick to two font families maximum — for instance, Sora for headings and Plus Jakarta Sans for everything else. Both load from Google Fonts inside Elementor automatically.
Why Globals Matter So Much
When templates reference global values instead of hard-coded hex colors, your kit becomes a true design system. Rebranding a client site takes minutes: change the globals, and every template updates instantly. This is also what makes one kit reusable across unlimited projects.
Step 3: Build the Header and Footer Templates
The header and footer appear on every page, so build them as Theme Builder templates rather than page sections.
Header Essentials
Keep it simple and conversion-focused: logo or business name on the left, a Nav Menu widget in the center, and a high-contrast “Call Now” button on the right. Make the header sticky with a slightly transparent background so navigation stays available as visitors scroll.
The Four-Column Footer Formula
A proven eCommerce footer layout uses four columns: your brand name with a short description and social icons, quick links to pages, quick links to product categories, and contact information with icons. Finish with a bottom bar showing your copyright line and accepted payment methods — a small trust signal that genuinely helps checkout confidence.
Step 4: Create the Core Page Templates
With globals, header, and footer done, build the standalone pages. Each page is its own JSON template in the kit.
Home Page Sections That Convert
Structure the home page as a story: a hero with sliding product images and two call-to-action buttons, a trust strip (free shipping, secure payment, returns, support), a “why choose us” grid, a linked category grid, a products section pulling 8 popular items in 4 columns, a testimonial carousel showing 3 of 6 reviews at a time, and a final gradient call-to-action band.
About, Services, and Contact Pages
Give inner pages a consistent banner with breadcrumbs. The About page needs your story, a stats band with animated counters, and value cards. The Services page works well as six icon-box cards plus a three-step “how it works” row. The Contact page should combine an Elementor Pro Form widget (wired to your business email), a Google Maps widget, and clickable phone and email cards.
[Suggested image: The finished dark-theme home page with hero slider and product grid]
Step 5: Add the WooCommerce Templates
This is what turns a website kit into an eCommerce Elementor template kit. Elementor Pro ships dedicated WooCommerce widgets for every store surface — use them instead of styling WooCommerce’s default output.
Single Product Template
Build it in Theme Builder as a Product template using native widgets: Product Images, Product Title, Rating, Price, Short Description, Stock, Add to Cart, Meta, Data Tabs, and Related Products in four columns. Apply the condition “All Products” so every product page inherits the design.
Shop Archive Template
Create a Products Archive template with an Archive Products widget set to 3 columns with sorting, result counts, and pagination enabled. Add a sidebar with category links, a “deal of the day” box, and a help card with your phone number — sidebars still convert well on desktop shoppers.
Cart, Checkout, My Account, and Thank You
Elementor Pro includes dedicated widgets for each: the Cart, Checkout, My Account, and Purchase Summary widgets. Style them to match your kit — card backgrounds, dark form fields, branded buttons — and insert them into the pages WooCommerce created during setup. Keep the original page slugs so WooCommerce continues to recognize them. Add trust badges near the cart and a secure-checkout reassurance strip above the checkout form.
[Suggested image: Styled WooCommerce cart page with trust badges]
Step 6: Import Your Kit and Add Demo Products
Import order matters more than most tutorials admit. Follow this sequence to avoid broken styles and missing conditions.
- Import global.json first via Elementor → Templates → Saved Templates, then verify your colors and fonts arrived in Site Settings.
- Import your demo products CSV via Products → Import — this also creates the product categories your menus link to.
- Import the header and footer in Theme Builder and publish each with the “Entire Site” condition.
- Import the core pages, then insert each template into a WordPress page and set Home as your front page.
- Import the single product and shop archive templates with “All Products” and “All Product Archives” conditions.
- Insert the Cart, Checkout, and My Account templates into WooCommerce’s existing pages.
Finally, create your navigation menu under Appearance → Menus and assign it inside the header’s Nav Menu widget. Test the full purchase flow — product page, add to cart, checkout — before launch.
Benefits of Using an eCommerce Elementor Template Kit
Why build an eCommerce Elementor template kit at all? Because a kit-based workflow compounds. Here’s what you gain compared to designing page by page.
- Launch speed — a complete store design deploys in hours instead of weeks
- Brand consistency — global colors and fonts flow through every template automatically
- Lower costs — skip premium kit purchases and reduce designer hours dramatically
- Reusability — rebrand and redeploy the same kit for unlimited client projects
- Conversion-ready store pages — matching product, cart, and checkout pages build buyer trust
- Full editability — everything remains native Elementor, so future edits are drag-and-drop
- Easier maintenance — one design system means fewer inconsistencies to fix later
For freelancers and agencies, the reusability point is the business case: build one excellent kit, then sell customized versions of it repeatedly. That’s exactly the model premium kit sellers use — except now you own the kit.
Common Mistakes to Avoid
I’ve seen each of these derail an otherwise good eCommerce Elementor template kit build. Steer around them and your first kit will import cleanly.
- Importing templates before global styles — pages arrive without their colors and fonts
- Using HTML blocks instead of native widgets — kills responsiveness and editability
- Creating new Cart/Checkout pages instead of editing WooCommerce’s existing ones — breaks store functionality
- Forgetting Theme Builder display conditions — templates import but never appear
- Hard-coding colors everywhere — makes rebranding painful and defeats the purpose of globals
- Skipping the demo product import — you can’t test product, cart, or checkout templates on an empty store
- Leaving hotlinked stock images in production — download them to your Media Library before launch
Frequently Asked Questions
What is an eCommerce Elementor template kit?
It’s a coordinated set of Elementor templates — global styles, header, footer, core pages, and WooCommerce templates — that share one design and import together to create a complete online store in WordPress.
Do I need Elementor Pro to create an eCommerce template kit?
Yes, for a complete store kit. Elementor Pro provides the Theme Builder (header, footer, product, and archive templates), the WooCommerce widget set, the Form widget, and the Nav Menu widget. The free version alone can’t build store templates.
Can Claude AI really generate working Elementor templates?
Yes. Claude can output Elementor’s JSON template format directly, including a global.json for Site Settings and templates built from native widgets. You import the files through Elementor’s Saved Templates or kit import, then fine-tune anything visually in the editor.
How many templates does a complete eCommerce kit need?
Plan for around 13: global styles, header, footer, four core pages (Home, About, Services, Contact), single product, shop archive, and the Cart, Checkout, My Account, and Thank You pages.
Is a template kit better than buying a WordPress theme?
For Elementor users, usually yes. A kit keeps every part of the design editable in the same drag-and-drop editor, stays portable as JSON files, and pairs with the lightweight Hello theme for better performance than heavy multipurpose themes.
How do I add demo products to my store?
Use a WooCommerce-format CSV with product names, prices, sale prices, categories, descriptions, and image URLs, then run Products → Import. The importer creates the products and categories in one pass — Claude can generate this CSV alongside your kit.
Can I sell the template kits I create?
You can absolutely reuse kits commercially on client projects. If you plan to sell kits on marketplaces, check each marketplace’s submission standards and make sure your images are properly licensed for redistribution.
Final Thoughts: Build Once, Launch Forever
Creating an eCommerce Elementor template kit used to be a job for design teams. Today, one person with WordPress, Elementor Pro, WooCommerce, and an AI assistant can plan, generate, and launch a complete branded store in a single day — and keep the kit forever.
Start with the plan, lock in your global styles, generate templates with native widgets, and import in the right order. Then reuse that kit on every project that follows.
Ready to try it? Open Claude, describe your dream store, and ask for a layout preview. Your first eCommerce Elementor template kit is one good prompt away — and if you get stuck, drop a comment below or watch the full video tutorial where I build this exact kit step by step.