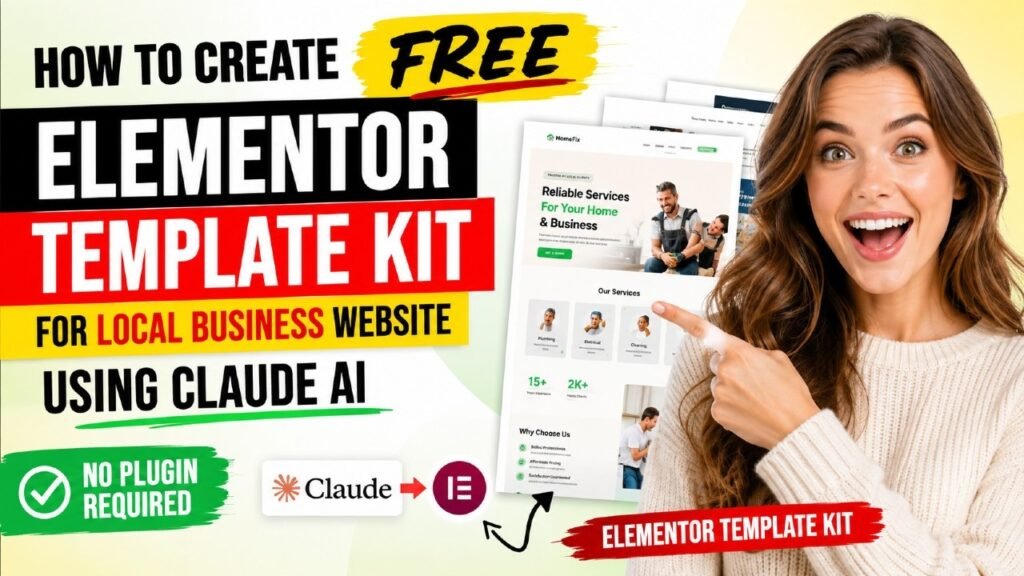
Want to know how to create an Elementor template kit without spending days designing every page by hand? In this guide, I’ll show you exactly how I used Claude AI to build a complete, ready-to-import Elementor template kit for a local cleaning business — including global styles, a sticky header, a footer, and five full page templates. Best of all, the entire process took less than an hour, required zero coding, and produced templates made from proper Elementor widgets, not messy HTML blocks. Whether you’re a freelancer building client sites, an agency looking to speed up delivery, or a small business owner creating your own WordPress website, this step-by-step tutorial will change the way you build with Elementor.
What Is an Elementor Template Kit?
An Elementor template kit is a matching set of pre-designed templates — pages, headers, footers, and global style settings — that work together to build a complete WordPress website. Instead of designing each page from scratch, you import the kit, insert the templates, and customize the content. Every template shares the same colors, fonts, spacing, and design language, so your finished website looks professional and consistent.
A complete template kit typically includes global colors and fonts (applied through Elementor Site Settings), a header and footer built with Elementor Pro’s Theme Builder, and page templates for the homepage, about page, services page, and contact page. Traditionally, kits like these are purchased from marketplaces such as Envato or downloaded from Elementor’s kit library. But there’s now a third option: generating your own custom Elementor template kit with an AI assistant like Claude.
Under the hood, every Elementor template is simply a structured JSON file. It describes containers, widgets, colors, typography, and responsive settings in a format Elementor’s importer understands. That’s exactly why AI works so well here — Claude can write that JSON directly, which means it can design an entire website kit the same way a developer would export one.
Why Use Claude AI to Build Your Elementor Template Kit
Claude AI can design a website layout, write all the copy, and then convert everything into valid Elementor JSON templates that import directly into WordPress. Here’s why this AI website builder workflow beats starting from a blank canvas.
Save Hours of Design Time
Manually building a five-page business website in Elementor can take one to three days. With Claude AI, you describe the business, review a layout, and receive a finished template kit in under an hour. The AI handles section structure, spacing, color application, and even placeholder content — leaving you with light customization instead of heavy production work.
A Fully Custom Design, Not a Recycled Theme
Marketplace kits are used by thousands of websites. When Claude generates your kit, the layout, color palette, and copy are created specifically for your business. A local cleaning company gets cleaning-specific sections — service cards, a booking process, trust badges — not a generic corporate design with swapped photos.
No Coding Required
You never touch PHP, CSS, or JavaScript. Claude outputs standard Elementor JSON files, and you import them through the WordPress dashboard exactly like any purchased template. Everything remains editable in the visual Elementor editor afterward.
Reusable for Client Projects
Freelancers and agencies can reuse the same workflow for every niche: describe the client’s business, generate a fresh kit, import, and customize. It’s a repeatable production system for small business websites — one of the biggest time savers in modern AI web design.
Here’s how an AI-generated Elementor template kit compares with the two traditional options:
Factor | Claude AI Kit | Marketplace Kit | Manual Build |
Design uniqueness | Fully custom for your business | Shared by thousands of sites | Fully custom |
Time to complete | 30–60 minutes | 1–3 hours to adapt | 1–3 days |
Cost | Claude plan only | $16–$60 per kit | Your time or a designer’s fee |
Content included | Written for your niche | Lorem ipsum placeholders | You write everything |
Revisions | Ask Claude in plain English | Manual editing | Manual editing |
Editable in Elementor | Yes — native widgets | Yes | Yes |
The takeaway: an AI-built Elementor template kit combines the speed of a marketplace kit with the uniqueness of a manual build — at a fraction of the cost of either.
What You Need Before You Start
The requirements are minimal. Here’s the full checklist:
- A WordPress website — a live site or a local/staging install works fine.
- Elementor (free) + Elementor Pro — Pro unlocks the Theme Builder (header and footer templates), the Nav Menu widget, the Form widget, and the Testimonial Carousel used in this build.
- A Claude AI account — available at claude.ai. The template kit generation works best with file downloads enabled.
- Your business details — business name, services list, contact information, and preferred colors. The more detail you provide, the better the result.
- Optional: an Elementor conversion skill — a reusable instruction set (like AK Elementor Studio) that teaches Claude the exact Elementor JSON format and import methods.
Prompt that I used to create Elementor template kit for a local business:
Role – you are a professional wordpress website developer.
I want to create a complete website for a Local business.
The name of the business is “[ Enter your business name ]”.
The business is about residential and commercial cleaning services.
I want to add Home, About us, Services, Contact Page.
Use cleaning services such as carpet cleaning, House Cleaning, kitchen cleaning, window cleaning, office cleaning, garage cleaning, etc. [replace this with the services for the local business]
Use stock images to display on the pages.
The website will be created in WordPress using Elementor Free and Pro plugins. I do have Elementor Pro plugin.
I want you first create a basic layout for website with all the pages.
Common header and footer sections for all pages.
Once the website layout is ready, I want you to create Elementor template kit that I can upload to my WordPress website using Elementor Pro plugin.
Elementor template kit will include, header, footer, golbal styles, home page, about us page, services page , single service page, and contact page templates.
All the templates should use the proper elementor widgets and not only html content.
You can also use AK Elementor Studio skill that I already have in Skills section.
Home page layout must include:
Attractive Hero section with call to action buttons and images animations.
Why choose use section.
Services brief description sections with images and short description. Add color or image animation.
How It Work – Steps to book appointment and get work done.
Sliding testimonials – 6 testimonials – 3 testimonials in view.
Our Professional Team – Add 4 team memebers.
Call to action section.
Header section includes:
Logo or business name in left side
Navigation Menu – It will use Elementor Nav Menu widget
Call Now button in right side
Footer section includes 3 columns
Business name and short description
Quick links to other pages
Contact information
Color scheme – Use light color theme.
User blue, yellow and green colors.
Font – Use modern fonts.
Try using gradient background colors for each section on the page.
Use stock images to display on each page.
First create a layout for the website. Create unique, modern style layout for the business website.
Once the layout is finalized, I will ask you to create Working Elementor template kit based on the layout.
Key Features of an AI-Generated Template Kit
Before we get into the steps, here’s what a properly generated kit contains — and what you should ask for. My cleaning-business kit included eight templates:
Template | Type | What It Contains |
Global Kit Styles | Site Settings | System colors (Primary, Secondary, Text, Accent), custom colors, global fonts, button and link defaults |
Header | Theme Builder | Logo, Elementor Nav Menu widget, Call Now button, sticky-on-scroll behavior |
Footer | Theme Builder | Three columns: brand + social icons, quick links, contact info |
Home | Page | Hero, why choose us, services grid, how it works, testimonial carousel, team, CTA |
About Us | Page | Banner, story section, animated counters, values, CTA |
Services | Page | Banner, full services grid, booking process, CTA |
Single Service | Page | Service content, what’s-included list, sidebar with services menu and offers |
Contact | Page | Info cards, Elementor Pro Form widget, Google Maps, business hours |
Global Colors and Fonts in Site Settings
The global styles template populates Elementor Site Settings directly. My kit used a light theme with Primary Blue (#1273EB), Secondary Green (#16B364), Accent Yellow (#FFC531), and slate text — plus custom soft background colors. For typography, it set Outfit for headings and Manrope for body text, both free Google Fonts that Elementor loads automatically. Because these are true global settings, changing a color once updates it across every template.
Native Elementor Widgets Only
This is the most important quality marker. A good AI-generated kit uses real Elementor widgets — Heading, Text Editor, Button, Icon Box, Image Box, Icon List, Counter, Social Icons, plus Pro widgets like Nav Menu, Form, and Testimonial Carousel. Kits built from raw HTML blocks look right at first but can’t be edited visually, break responsiveness, and defeat the purpose of using a page builder. My final kit contained 251 elements and zero HTML widgets.
Design Details That Map to Elementor Features
Claude can use Elementor’s own design tools when you ask for them: gradient section backgrounds, wave-shaped dividers (Elementor’s native Shape Divider), entrance animations like fade-in-up, hover effects on cards, and absolutely positioned floating badges. Choosing effects that Elementor supports natively means nothing gets lost between the design and the import.
How to Create an Elementor Template Kit Using Claude AI
Here’s the exact process I followed, step by step. You can copy this workflow for any local business website — a dentist, a landscaper, a gym, or in my case, a cleaning company.
Write a Detailed Prompt for Claude
Open Claude and describe everything: the business name and niche, the pages you need, the sections on each page, the header and footer layout, your color scheme, and your fonts. My prompt specified a home page with a hero section, a why-choose-us section, services with images, a how-it-works process, sliding testimonials (six reviews with three visible), a four-member team section, and a call-to-action band. I also asked for a light theme using blue, yellow, and green, gradient backgrounds, and modern fonts.
One instruction matters more than any other: tell Claude that all templates must use proper Elementor widgets, not HTML content. This single line determines whether your kit is truly editable.
[Suggested image: The full prompt written in the Claude chat interface]
Review the Website Layout First
Don’t jump straight to JSON. Ask Claude to build a clickable HTML layout of all pages first. I received a five-page mockup with a shared header and footer that I could open in a browser and click through. This preview stage is where you request design changes — colors, sections, wording — cheaply, before any Elementor conversion happens.
Ask Claude to Convert the Layout Into a Template Kit
Once the layout is approved, request the conversion. Specify the full deliverable list: global styles, header, footer, and each page template. If you have an Elementor conversion skill installed, Claude follows its rules automatically — unique element IDs, valid JSON structure, correct responsive settings, and the right file envelope for importing.
Generate the Global Styles File
The global styles JSON maps to Elementor Site Settings. Ask for the four system colors (Primary, Secondary, Text, Accent), any custom colors your design needs, and the four system fonts (Primary, Secondary, Text, Accent) matching your layout. Import this file first — it sets the design foundation for everything else.
Generate the Header and Footer Templates
With Elementor Pro, the header and footer export as Theme Builder templates. My header used a logo on the left, the Elementor Nav Menu widget in the center, and a yellow Call Now button on the right, with sticky scrolling enabled. The footer used three columns: business description with social icons, quick links, and contact information.
Generate the Page Templates
Each page exports as its own JSON file. Claude rebuilt every section of the approved layout with matching widgets: Icon Box grids for features, Image Box cards for services, Counter widgets for statistics, the Testimonial Carousel for sliding reviews, and the Pro Form widget for the contact page. Gradient backgrounds and wave shape dividers carried over exactly as designed.
Download and Verify the Kit Files
Claude delivers the Elementor template kit as downloadable files — in my case, both a native kit ZIP and a set of individual JSON files, plus an import guide. Before importing, a good workflow validates the output: no duplicate element IDs, valid JSON in every file, and zero HTML widgets. Claude ran these checks automatically and reported the results, including a full inventory of every widget used across the kit.
My finished kit came out to eight files covering the entire website. If you’re following along, keep them together in one folder — you’ll import them in a specific order in the next section.
How to Import Your Template Kit Into WordPress
Generating the kit is only half the job — now let’s install it. You have two import routes for an Elementor template kit. The individual-file method works on every Elementor version, so I recommend it as the default.
Import the Individual JSON Templates
- Go to Templates → Saved Templates → Import Templates in your WordPress dashboard.
- Upload global-styles.json first — this applies your colors and fonts site-wide.
- Import the header and footer JSON files next, then each page template.
- Confirm every template appears under Saved Templates and Theme Builder.
Or Use the Native Kit ZIP
Alternatively, upload the single kit ZIP through Elementor → Tools → Import Export Kit, select all templates, and import in one action. If your Elementor version rejects the ZIP, fall back to the individual-file method — it never fails.
Publish the Header and Footer
Open Templates → Theme Builder, edit the imported header, click Publish, and add a display condition of Entire Site. Repeat for the footer. Your header and footer now appear on every page automatically — this is the Theme Builder feature that makes Elementor Pro worth it.
Create the Pages and Insert Templates
- Go to Pages → Add New and create Home, About Us, Services, and Contact.
- Open each page with Edit with Elementor.
- Click the folder icon (My Templates) and insert the matching template.
- Set your homepage under Settings → Reading → A static page.
Post-Import Checklist: Make the Kit Yours
A few five-minute tasks turn the imported kit into a launch-ready local business website:
- Connect the navigation menu. Create your menu under Appearance → Menus, then select it inside the header’s Nav Menu widget.
- Set the form email. Open the Form widget on the contact page and add your real address under Actions After Submit → Email.
- Replace stock images. AI kits use placeholder or hot-linked stock photos. Upload your own licensed images to the Media Library and swap them before launch.
- Update contact details. Search for the placeholder phone number and address in the header button, footer, and CTA sections.
- Check button links. Point every button to your real page slugs, such as /contact and /services.
- Enter your real address in the Google Maps widget.
Tips for Better Results With Claude AI
Always Approve a Layout Before Converting
The two-phase workflow — layout first, kit second — is the secret to quality. Revising an HTML preview takes seconds; revising eight JSON templates takes much longer. Finalize the design, then convert once.
Name Elementor Features in Your Prompt
Ask for things Elementor genuinely supports: shape dividers, gradient backgrounds, entrance animations, sticky headers, and specific widgets like the Testimonial Carousel. When your design vocabulary matches Elementor’s feature set, the conversion is nearly lossless.
Demand Native Widgets and Validation
Repeat the no-HTML-widgets rule and ask Claude to verify the output: unique IDs, valid JSON, and a widget inventory. My kit’s final report listed every widget type used — 37 headings, 21 icon boxes, 15 image boxes, 28 buttons, and so on — which made it easy to trust before importing.
Test on Staging First
Import to a staging site, click through every page on desktop and mobile, then migrate. Also run Elementor → Tools → Regenerate CSS if any styling looks off after import.
Common Mistakes to Avoid
- Skipping the global styles import. Import it first, or your templates won’t inherit the correct colors and fonts.
- Accepting HTML-widget templates. If sections can’t be clicked and edited in the Elementor panel, regenerate with native widgets.
- Leaving demo images live. Stock placeholders create copyright risk and an unfinished look.
- Forgetting Theme Builder conditions. An imported header does nothing until you assign it to Entire Site.
- Using vague prompts. “Make me a website” produces generic results; a detailed section-by-section brief produces a professional kit.
- Editing JSON by hand. Make change requests in Claude instead — manual JSON edits easily break the import.
Frequently Asked Questions
Can Claude AI really create Elementor templates?
Yes. Claude can generate valid Elementor JSON template files containing native widgets, containers, global styles, and responsive settings. You import them through Templates → Saved Templates or the Elementor kit importer, exactly like commercial templates.
Do I need Elementor Pro to use an AI-generated template kit?
You need Pro for Theme Builder headers and footers, the Nav Menu widget, the Form widget, and the Testimonial Carousel. With free Elementor only, ask Claude to build the header and footer as regular sections inside each page and use a form plugin shortcode instead.
Is it free to create an Elementor template kit with Claude AI?
Claude offers free and paid plans; template generation works on both, though longer projects benefit from a paid plan. Beyond Claude, you only pay for what you’d already have — WordPress hosting and your Elementor Pro license.
Will the templates be responsive on mobile?
Yes, when generated properly. The kit in this tutorial included tablet and mobile settings for widths, font sizes, and padding on every section. Always preview each template in Elementor’s responsive mode after importing.
Can I reuse one template kit for multiple websites?
Absolutely. The JSON files import into any WordPress site running Elementor. Agencies can also regenerate a fresh, niche-specific variation for each client in minutes, which keeps every project unique.
How long does the whole process take?
Roughly 30–60 minutes: a few minutes to write the prompt, a review pass on the layout, a few minutes for generation, and about fifteen minutes to import, publish the header and footer, and build the pages.
What if the kit ZIP fails to import?
Use the individual JSON files through Templates → Saved Templates → Import Templates instead. That route works on every Elementor version and requires no extra plugins.
Final Thoughts
Learning how to create an Elementor template kit with Claude AI turns a multi-day design project into an afternoon task. You get a custom-designed local business website — global styles, a sticky header, a three-column footer, and five polished page templates — built entirely from editable Elementor widgets. The workflow is simple: brief Claude in detail, approve the layout, convert to a kit, import, and customize.
Ready to try it? Open Claude, describe your business website section by section, and generate your first template kit today. And if you’d like to watch the entire build in real time, check out the full video tutorial on my YouTube channel — then subscribe for more AI web design and WordPress tutorials.