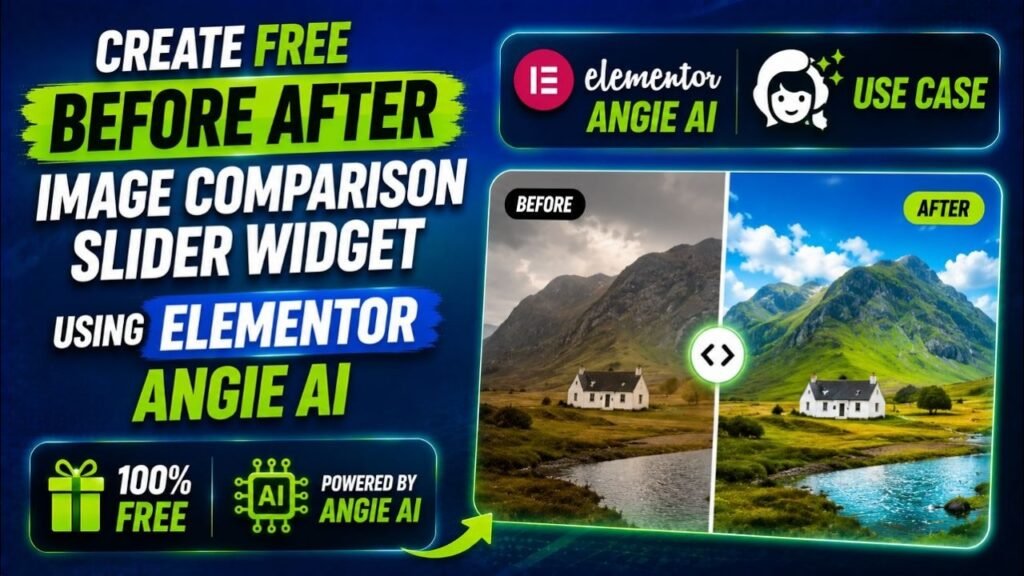
A before after image comparison slider is one of the most powerful visual tools you can add to a WordPress website. Whether you’re a photographer, designer, fitness coach, or e-commerce store owner, showing your audience the difference between two states—before and after—creates instant engagement and trust. But what if you could build a fully custom, production-ready Before After Image Comparison Slider in Elementor for free, using just a plain-English prompt? That’s exactly what Angie AI makes possible. In this step-by-step guide, you’ll learn how to use the Angie plugin by Elementor to generate a custom before after slider widget without writing a single line of code—in minutes.
Table of Contents
What Is a Before After Image Comparison Slider?
A before after image comparison slider is an interactive web element that layers two images on top of each other and lets users drag a handle—either horizontally or vertically—to reveal the difference between them. Unlike two static images placed side by side, a comparison slider creates an immersive, hands-on experience that visitors actively participate in.
You’ve likely seen this widget used across many types of websites:
- Photography and retouching portfolios showing the original vs. edited version of a photo
- Home renovation and interior design sites comparing before and after room makeovers
- Skincare and beauty brands demonstrating treatment results
- Web design agencies highlighting old vs. new website designs for clients
- Fitness and weight-loss coaches showing body transformation results
- E-commerce product pages demonstrating the impact of a product (e.g., stain remover, whitening strips, paint)
The key advantage of a before after slider is that it increases dwell time. Visitors naturally want to drag the divider and see both sides—turning passive viewers into active participants on your page.
Why Use a Before After Slider on Your WordPress Site?
Boosts User Engagement
Static content is easy to scroll past. An interactive slider demands attention and encourages exploration. Studies consistently show that interactive content generates two to three times more engagement than static alternatives, which directly signals to Google that your page is valuable.
Builds Credibility and Social Proof
Showing a real before-and-after comparison is far more convincing than written testimonials alone. It provides visual proof of your results, product, or service, building trust with visitors who might otherwise be skeptical.
Increases Conversions
For e-commerce stores, service providers, and professionals, a well-placed before after image comparison slider on a product page or landing page can significantly increase conversion rates. Visitors who can clearly see the transformation you offer are more likely to take action.
Adds Professional Polish
A smooth, responsive comparison slider gives your site a polished, high-end feel—without requiring expensive custom development. Visitors notice the extra effort, and it sets your site apart from competitors using basic layouts.
What Is Angie AI by Elementor?
Angie is a free agentic AI plugin developed by Elementor—the company behind the world’s most popular WordPress page builder, powering over 22 million websites. Unlike generic AI chatbots or code generators, Angie is built specifically for WordPress. It understands your site’s existing structure: your active theme, installed plugins, Elementor components, custom fields, and more—without requiring any manual setup or training.
There are two core modes in Angie:
Angie Code
This is the creative, developer-on-demand mode. You describe what you want to build—in plain English, or even by uploading a screenshot or pasting a URL as reference—and Angie generates production-ready code that integrates directly into your WordPress site. Angie Code operates in a secure test environment (Test Mode), so nothing goes live until you review and approve it.
Angie Super Admin Mode
This mode handles site-wide management tasks like bulk operations, debugging PHP errors, fixing SEO gaps, updating product prices, managing user roles, and more—all through a simple chat interface. Angie reads your real site data, confirms a plan with you before executing, and keeps you fully in control at every step.
Crucially, Angie is available on any WordPress website, regardless of whether you use the Elementor editor. All you need is a free Elementor account and the Angie plugin installed on your site.
What Is Angie Code and What Can It Build?
Angie Code is your on-demand AI developer. It transforms a plain-language prompt, a screenshot, or a URL into clean, integrated code that works seamlessly within your WordPress workflow. Here’s a full breakdown of what Angie Code can generate:
Custom Elementor Widgets
This is the standout feature for designers and web creators. Angie can create entirely new Elementor widgets from scratch, or extend existing widgets with new controls and behaviors. The widgets it generates are fully editable in the Elementor editor, just like any native widget—no shortcodes, no external settings pages.
WordPress Admin Snippets
Need a custom dashboard widget, a personalized admin settings panel, or a themed WP Admin experience? Angie Code can handle all of it through a simple chat prompt.
Website Snippets (CSS & JavaScript)
Angie can integrate custom CSS and JavaScript directly into your site. This covers interactive behaviors, custom mouse cursors, scroll animations, hover effects, and other immersive UI elements.
Visual Front-End Apps
Beyond simple widgets, Angie Code can build fully functional front-end applications—things like interactive quizzes, calculators, custom 404 pages with mini-games, store locators, and trivia apps—all delivered through a conversation.
Custom Post Types and Fields
Define and manage custom content structures with Angie. It can create Custom Post Types, custom fields, and metadata frameworks that give you complete control over how your site organizes and displays data.
Before You Start: Requirements
Setting up Angie is straightforward. Here’s what you need before creating your custom before after image comparison slider widget:
- A WordPress website (Angie works with any WordPress setup)
- The Elementor plugin installed and activated (free version is sufficient)
- The Angie plugin installed and activated (free, with daily-renewing AI credits)
- A free Elementor account (required for login and activation)
- Two images: your “Before” image and your “After” image, ready to upload
That’s it. You don’t need Elementor Pro, you don’t need coding skills, and you don’t need to restructure or retrain anything on your existing site. Angie automatically understands your WordPress environment the moment it’s activated.
How to Install Angie on Your WordPress Site
Step 1 – Download the Angie Plugin
You can install Angie directly from your WordPress dashboard. Navigate to Plugins → Add New, then search for “Angie” in the search bar. Alternatively, you can download the plugin directly from the WordPress plugin repository or from the official Elementor website at elementor.com/products/angie-ai-for-wordpress/.
Step 2 – Install and Activate
Click “Install Now” next to the Angie plugin, then click “Activate.” No configuration, coding skills, or special setup is required. Angie automatically connects to your Elementor account and begins understanding your site’s layout and installed plugins.
Step 3 – Connect Your Elementor Account
If you’re not already logged in, Angie will prompt you to connect your Elementor account. This is free and only takes a moment. Once connected, you’ll receive daily-renewing AI credits to start building with Angie immediately.
Step 4 – Open the Angie Panel
Once activated, you can access Angie from the WordPress admin dashboard, or directly from inside the Elementor Editor by clicking the Angie icon in the editor panel. The chat interface is intuitive—just describe what you want to build.
How to Create a Before After Image Comparison Slider Widget with Angie AI
Now for the exciting part. Follow these steps to generate your custom Before After Image Comparison Slider widget using Angie Code.
Step 1 – Open the Elementor Editor
Create a new page or open an existing one in WordPress. Click “Edit with Elementor” to launch the Elementor editor. You’ll see the Angie prompt panel available in the editor interface. You can also start a widget creation from the WordPress admin without opening any page, making the workflow even faster for developers.
Step 2 – Write Your Prompt
In the Angie prompt box, type a clear description of the widget you want to create. The more detail you provide, the better the result. Here is an example prompt you can use for a before after image comparison slider:
Create a custom Elementor widget called “Before After Comparison Slider”. The widget should display two images side by side with a draggable vertical divider handle between them. Users should be able to upload a Before image and an After image from the Elementor media library. Include controls to: set custom “Before” and “After” label text, adjust the initial slider position (as a percentage), choose between horizontal and vertical slider orientation, and toggle label visibility on or off. The widget must be fully responsive for mobile devices and touch-friendly.
You can also enhance your prompt by adding a screenshot, a URL reference, or an image of a design you want to replicate. Angie accepts all three input types—text, image upload, and URL—and works with them together or independently.
Step 3 – Review the Widget in Test Mode
After you submit your prompt, Angie generates the widget and places it directly on the canvas in Test Mode. This is a completely isolated environment—nothing is live on your site yet. You can see a real preview of how the slider looks and behaves, and you can interact with it to test the drag handle, check responsiveness, and verify the controls work as expected.
If you want to make changes, simply type a follow-up prompt in the Angie chat, such as:
- “Make the slider handle larger and add a double-arrow icon inside it.”
- “Change the label font to match my site’s global heading font.”
- “Add an option to set a custom background color for the widget container.”
Angie will iterate on the widget through conversation, giving you full creative control without any coding.
Step 4 – Publish the Widget
Once you’re satisfied with the result, click the Publish button to save the widget to your live site library. Alternatively, you can prompt Angie directly in the chat by typing: “Publish the widget to the live environment and exit test mode.” The widget is now part of your Elementor widget library and is ready to use on any page across your site.
How to Use Your Custom Slider Widget in Elementor
After publishing, your custom before after image comparison slider widget appears in the Elementor editor widget panel—right alongside all native Elementor widgets. Here’s how to add it to any page:
- Open any page or post in the Elementor editor
- In the widget search panel on the left, type the name of your widget (e.g., “Before After Comparison Slider”)
- Drag and drop the widget onto your canvas, just like any standard Elementor widget
- In the Content tab of the widget settings, upload your Before image and After image from the media library
- Set your custom label text, initial slider position, and orientation preference
- Switch to the Style tab to adjust colors, typography, handle size, and border styling to match your site’s design
- Preview the page and publish when ready
The entire process—from widget prompt to published page—typically takes less than ten minutes, even for users with no technical background.
Customizing and Refining Your Slider via Chat
One of the most powerful aspects of Angie is its iterative chat-based refinement. You’re never locked into the first version of your widget. At any point—even after publishing—you can reopen Angie, select your existing widget, and continue refining it through conversation.
Examples of Refinement Prompts
- “Add a toggle in the Content tab to enable or disable an overlay label on the Before side.”
- “Add a responsive control so the initial divider position can be set differently for mobile vs. desktop.”
- “Add a color picker control so users can customize the divider line color from within the Elementor editor.”
- “Make the widget handle animate with a subtle pulse effect to encourage users to drag it.”
Each refinement is previewed in Test Mode before going live, giving you a fully controlled and risk-free development environment for your custom widget.
Saving and Reusing Your Widget Across Multiple Sites
Angie Code integrates directly with Elementor’s Cloud Library. Once you’ve created and published a widget you’re happy with, you can save it to the Cloud Library with one click. From there, the widget is available for reuse across any WordPress site where you have Angie installed—no rebuilding, no re-prompting, no duplication of effort.
This is a game-changer for WordPress agencies and freelancers managing multiple client sites. Build a polished, fully customized Before After Image Comparison Slider once, then deploy it instantly across your entire client portfolio.
Best Use Cases for a Before After Image Comparison Slider
Photography and Photo Editing Portfolios
Show the dramatic difference between a RAW photo and the final edited version. Visitors dragging the slider handle develop a visceral appreciation for your editing skills—far more effectively than a side-by-side layout in a gallery grid.
Interior Design and Home Renovation
Showcase room transformations, renovation projects, or staging work. Before-and-after comparisons are deeply compelling for prospective clients who are imagining what their own home could look like after a project.
Beauty, Skincare, and Medical Aesthetics
Clinics, spas, and skincare brands can ethically and powerfully demonstrate treatment results. The interactive nature of the slider makes outcomes feel more transparent and genuine than static promotional images.
Web Design and Branding Agencies
Highlight website redesign projects by showing the old site versus the new one. This is an excellent addition to a portfolio or case study page that converts visitors into leads.
E-Commerce Product Pages
Demonstrate product effectiveness directly on the product page. A carpet cleaning solution, a whitening toothpaste, a hair color product—any transformation-based product benefits enormously from an interactive before-and-after comparison that visitors can control themselves.
Real Estate and Property Development
Show renovation potential, staging transformations, or development projects. Real estate marketers who use interactive comparison sliders on listing pages report higher inquiry rates compared to static photo galleries.
Tips for Getting the Best Results from Angie AI Prompts
Be Specific About Controls
The more detail you include about the controls and settings you want in the widget, the better Angie’s output. Instead of saying “create a before after slider,” specify: the control names, what each control does, the supported input types, and whether you want responsive controls for different breakpoints.
Reference Visual Examples
Upload a screenshot of a before after slider you like, or paste a URL as a design reference. Angie processes all three input types and will match the visual style and layout you’re aiming for, dramatically reducing the number of refinement iterations needed.
Use Follow-Up Prompts for Polish
Treat your first prompt as a starting draft. After reviewing the widget in Test Mode, use follow-up prompts to refine specific details: typography, handle styling, animation, responsive behavior, and color schemes. Angie remembers the context of your conversation and applies changes incrementally.
Leverage the Elementor Prompt Library
Angie’s prompt panel includes access to the Elementor Prompt Library—a curated collection of pre-built prompts for common widget types and scenarios. Browsing the library before writing your own prompt can give you inspiration and save significant time.
Iterate, Don’t Over-Engineer
Start with a solid core prompt, then iterate through conversation. Trying to specify every single detail in your first prompt can sometimes produce overly complex results. A two-to-three stage approach—core widget first, style refinements second, advanced controls third—tends to produce the cleanest final output.
Angie AI vs. Traditional Before After Slider Plugins
Before Angie AI existed, creating a before after image comparison slider in WordPress required installing a dedicated plugin—often one with significant limitations, paywalled features, or compatibility concerns. Here’s how the approaches compare:
Feature | Angie AI (Free) | Traditional Plugins |
Fully custom widget | ✅ Yes | ❌ No (fixed templates) |
No coding required | ✅ Yes | ✅ Yes |
Native Elementor integration | ✅ Deep integration | ⚠️ Via addon/shortcode |
Cloud Library reuse | ✅ Yes (any site) | ❌ Site-specific |
Iterative refinement | ✅ Chat-based | ❌ Manual settings only |
Test Mode (safe preview) | ✅ Isolated sandbox | ❌ Live site only |
Custom controls in editor | ✅ Full control | ⚠️ Limited to plugin settings |
Cost | ✅ Free (daily credits) | ⚠️ Often freemium / paywalled |
Plugin bloat | ✅ None (widget only) | ⚠️ Extra plugin per feature |
The conclusion is clear: for WordPress users who already use Elementor, Angie AI offers a fundamentally superior approach to creating a Before After Image Comparison Slider compared to installing a one-purpose plugin with limited customization and potential paywalls.
Frequently Asked Questions
Is Angie AI really free to use?
Yes. Angie offers a free plan with daily-renewing AI credits. This means you receive a fresh allocation of credits every day to create and refine widgets, snippets, and other assets. For most users, this is more than sufficient for building custom widgets like the before after image comparison slider.
Do I need Elementor Pro to use Angie?
No. Angie works with both the free version of Elementor and Elementor Pro. You need the free Elementor plugin installed and activated, along with the separate Angie plugin. A free Elementor account is required for activation. Elementor Pro adds additional features to the editor, but it is not required to create and use custom Angie Code widgets.
Can I use my custom before after slider widget on multiple pages?
Yes. Once Angie publishes your widget to the live site library, it appears in your Elementor widget panel and can be dragged onto any page or post. You can use it an unlimited number of times across your site. If you save it to Angie’s Cloud Library, you can even reuse it across multiple WordPress sites.
What images work best in a before after comparison slider?
For the best visual impact, use images that are identical in size, crop, and framing between the Before and After states. Images should ideally be the same dimensions (e.g., 1200x800px) and captured from the same angle. High-contrast transformations work especially well—dramatic differences in color, texture, or composition produce the most engaging comparisons.
Is the widget Angie generates mobile-responsive?
If you specify responsive behavior in your prompt (as shown in the example prompt in this guide), Angie will generate a widget with proper responsive controls. The widget will be touch-friendly for mobile users, with a draggable handle that works with swipe gestures on touchscreens. Always test your widget across device sizes using Elementor’s built-in responsive preview mode.
Can I edit the Angie-generated widget after publishing?
Yes, in two ways. First, you can use the standard Elementor editor controls for any settings exposed in the widget’s Content and Style tabs. Second, you can reopen Angie and continue refining the widget through conversation prompts. Angie will update the widget in Test Mode, and you approve and publish the changes—maintaining full control at every stage.
How is Angie different from other AI code generators?
Most AI tools generate generic code that you must then manually integrate into your WordPress site. Angie is different because it’s built specifically for WordPress—it understands your site’s theme, installed plugins, Elementor structure, and content architecture. The code it generates is production-ready, integrates natively with Elementor’s editor controls, and is tested in an isolated sandbox before anything touches your live site.
Can I use a before after image comparison slider without Elementor?
Angie Code widgets are designed specifically for the Elementor editor, so you’ll need Elementor installed to use widgets created by Angie. However, Angie itself works on any WordPress website for tasks like site management, snippets, and front-end apps. For non-Elementor sites, you would need an alternative plugin to create a comparison slider.
Conclusion: Build Smarter with Angie AI and Elementor
A before after image comparison slider is one of the most effective tools for demonstrating value, building credibility, and increasing engagement on any WordPress website. With Angie AI by Elementor, creating your own fully custom, production-ready slider widget is now entirely within reach—even if you’ve never written a line of code in your life.
In just a few minutes, you can go from a plain-English description to a live, reusable, fully editable Elementor widget that integrates natively with your site’s design system. No plugin bloat, no paywalls, no fragile shortcodes—just clean, purpose-built WordPress functionality generated on demand.
Whether you’re a freelance web designer, a WordPress agency owner, a solo entrepreneur, or a content creator, Angie AI changes the economics of custom WordPress development. Features that would have previously required hiring a developer or paying for premium addons are now accessible through a free chat interface.
Ready to try it yourself? Download Angie for free from the WordPress plugin repository or from elementor.com/products/angie-ai-for-wordpress/, and create your first before after image comparison slider widget today. Your visitors—and your conversion rate—will thank you.