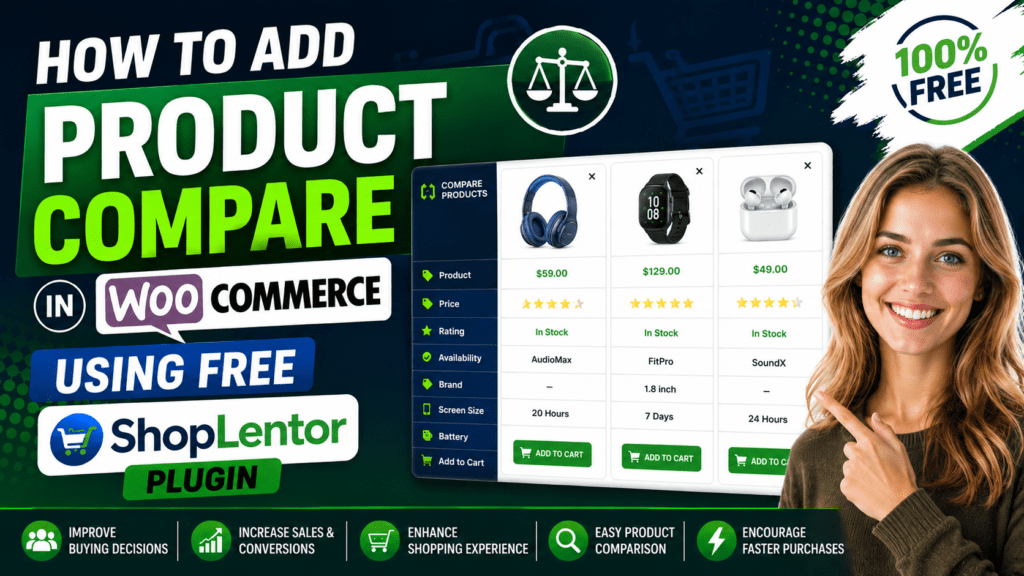
What Is WooCommerce Product Compare?
WooCommerce product compare is a feature that allows shoppers to place two or more products side by side and evaluate them based on attributes like price, weight, dimensions, ratings, and other specifications — all on a single comparison table.
By default, WooCommerce does not include any built-in product comparison feature. That means if you want to add this functionality to your store, you need a dedicated plugin. Fortunately, the free ShopLentor plugin makes it incredibly easy to set up — without writing a single line of code.
Watch Step by step video tutorial: https://youtu.be/Xeoun0-uWAg
Why You Need a Product Compare Feature in Your WooCommerce Store
Think about the last time you were unsure about which product to buy online. Chances are, you opened multiple browser tabs and manually compared specs. That’s frustrating — and it’s costing your store sales.
Adding a product compare feature directly solves that problem. Here’s why it matters:
- Reduces bounce rate: Shoppers stay on your site longer instead of leaving to compare elsewhere.
- Increases conversion rate: According to ShopLentor’s own data, side-by-side comparisons can boost conversion rates by up to 28%.
- Builds buyer confidence: When customers feel informed, they’re more likely to complete a purchase.
- Improves user experience: A clean, easy-to-use comparison table signals that your store is professional and customer-focused.
- Reduces product returns: Customers who compare carefully before buying are less likely to return items.
Moreover, product comparison is especially valuable for stores selling electronics, home appliances, clothing, software plans, or any product category where specifications matter.
Why Choose ShopLentor for WooCommerce Product Compare?
There are several WooCommerce product comparison plugins available, but ShopLentor stands out for multiple reasons.
ShopLentor (formerly WooLentor) is an all-in-one WooCommerce growth plugin with 100,000+ active installations across 120+ countries. It includes a Product Compare module in its free version — so you don’t need to pay anything to get started.
Here’s a quick comparison of why ShopLentor wins:
| Feature | ShopLentor (Free) | Other Free Plugins |
|---|---|---|
| Product Compare Module | ✅ Included | ❌ Often paid |
| No Coding Required | ✅ Yes | ✅ Varies |
| Elementor & Gutenberg Support | ✅ Both | ❌ Limited |
| Customizable Comparison Table | ✅ Yes | ⚠️ Limited |
| Additional Modules (Wishlist, Quick View, etc.) | ✅ 36+ built-in | ❌ Separate plugins |
| Active Support Community | ✅ Yes | ⚠️ Varies |
Additionally, ShopLentor is optimized for speed with selective script loading, which means adding the compare feature won’t slow down your store. Users report up to 18% faster mobile speeds after switching to ShopLentor.
Prerequisites Before You Start
Before diving into the setup, make sure you have the following ready:
- WordPress installed and running
- WooCommerce plugin activated with at least a few products added
- ShopLentor plugin installed and activated (free version from WordPress.org is enough)
- Admin access to your WordPress dashboard
That’s it. No premium subscription is required to use the Product Compare module.
How to Add Product Compare in WooCommerce Using ShopLentor (Step-by-Step)
Follow these steps to successfully add the WooCommerce product compare feature to your store.
Step 1: Install and Activate ShopLentor
- Go to your WordPress Dashboard → Plugins → Add New.
- Search for “ShopLentor” (you may also search for “WooLentor” as it was formerly known by that name).
- Click Install Now and then Activate.
Once activated, you’ll notice a new ShopLentor menu item appears in your WordPress sidebar.
Step 2: Navigate to the Modules Section
- Click on ShopLentor in the sidebar.
- Go to the Modules tab.
- Scroll through the list of available modules until you find Product Compare.
ShopLentor organizes its features into modules, which makes it easy to enable only what you need — keeping your site lightweight.
Step 3: Enable the Product Compare Module
- Locate the Product Compare module in the list.
- Toggle the switch to ON to activate it.
- Click Save Settings to apply the changes.
After enabling the module, a settings icon (or gear icon) will appear next to it. Click it to access the configuration options.
Step 4: Save and Review
Once you hit Save, the product compare button will automatically begin appearing on your WooCommerce product pages and shop pages. You can verify this by visiting your shop page on the frontend.
How to Configure the Product Compare Settings
After enabling the module, ShopLentor gives you several configuration options to tailor the compare feature to your store’s needs.
Key Settings You Can Configure:
- Compare Page: Select which page will display the comparison table. You can create a dedicated compare page or use an existing one.
- Compare Table Fields: Choose which product attributes to show in the comparison table (e.g., price, rating, SKU, stock status, dimensions, weight).
- Number of Products to Compare: Set a maximum limit for how many products a user can add to the comparison list.
- Button Text: Customize the text of the compare button (e.g., “Compare,” “Add to Compare,” “Compare This”).
- Button Position: Choose where the compare button appears on the product card.
- Remove Product on Page Change: Decide whether the compare list should persist when the user navigates to a different page.
These settings give you fine-grained control over the user experience, ensuring the feature feels native to your store design.
How to Display the Compare Button on Product Pages
By default, ShopLentor will add the compare button to your WooCommerce shop and product pages automatically once the module is enabled.
However, if you want more control over placement — especially if you use a custom page builder layout — here’s what you can do:
For Elementor Users:
- Open your product page template in Elementor.
- Search for the “Compare Button” widget in the Elementor panel.
- Drag and drop it to your desired location on the page.
- Customize button styles, colors, and text directly from the widget settings.
For Gutenberg Users:
- Open the page editor.
- Add the ShopLentor Compare Button block.
- Use the block settings on the right-hand panel to configure appearance.
For Default WooCommerce Themes:
No extra steps needed. The compare button will appear automatically in the product loop and on single product pages after the module is enabled.
How to Customize the Comparison Table {#customize-comparison-table}
The comparison table is the heart of the feature. ShopLentor lets you control its look and feel without touching any code.
Here are some customization options available:
- Table Columns: Add or remove product attributes shown in the table.
- Highlight Differences: Optionally highlight fields where products differ, making it easy for shoppers to spot distinctions.
- Add to Cart from Table: Allow customers to add a product to the cart directly from the comparison table — a powerful conversion booster.
- Remove Product from Table: Let users remove a product from the compare list with a single click.
- Share Comparisons: Enable social sharing so users can share specific product comparisons with friends or family before making a collaborative purchase decision.
- Mobile Responsiveness: The table adapts automatically to mobile screens.
A well-configured comparison table turns hesitation into action. Make sure you include the fields that your customers care about most.
Tips to Get More Out of the Product Compare Feature
Simply enabling the module is a great start. However, to maximize results, consider these expert tips:
1. Add the most relevant comparison fields. Don’t overwhelm customers. Choose 5–8 attributes that matter most for your product category. For electronics: price, battery, storage, warranty. For clothing: size, material, color options, care instructions.
2. Place the compare button prominently. If the button is hidden or too small, users won’t use it. Ensure it’s visible without scrolling, especially on mobile.
3. Create a dedicated Compare page. Give the comparison table its own page with a clean URL (e.g., /compare). This improves usability and makes it easy for users to bookmark or share.
4. Combine with the Wishlist module. ShopLentor also includes a free Wishlist module. Together, these two features significantly improve product discovery and keep users engaged longer.
5. Test on mobile. A significant portion of WooCommerce shoppers browse on smartphones. Test the compare feature on multiple devices to ensure a smooth mobile experience.
6. Use the Quick View module alongside Compare. When users can quickly preview product details without leaving the shop page, they’re more likely to add items to the compare list.
Common Mistakes to Avoid
Even with a great plugin, a few setup mistakes can undermine the feature’s effectiveness.
- Showing too many comparison fields: Overloading the table with irrelevant data confuses shoppers. Keep it simple.
- Not assigning a Compare page: If you skip this step, the comparison table may not display correctly.
- Forgetting to test after setup: Always visit your shop page as a logged-out user to see exactly what your customers see.
- Ignoring mobile responsiveness: Test the table on different screen sizes before going live.
- Not enabling “Add to Cart” in the comparison table: This is a missed conversion opportunity — always enable this option.
Frequently Asked Questions
Is the ShopLentor product compare feature really free?
Yes. The Product Compare module is available in the free version of ShopLentor. You can install it from WordPress.org at no cost.
How many products can a user compare at once with ShopLentor?
You can configure the maximum number of products allowed in a comparison. ShopLentor supports comparing multiple products simultaneously, and you can set your own limit in the module settings.
Does ShopLentor’s Product Compare work without Elementor?
Yes. ShopLentor supports both Elementor and Gutenberg. It also works with default WooCommerce themes without requiring any page builder.
Can I customize which product attributes appear in the comparison table?
Absolutely. You can select which fields (price, rating, SKU, stock, weight, dimensions, custom attributes, etc.) to display in the comparison table from the module settings.
Will the product compare feature slow down my WooCommerce store?
No. ShopLentor is built with selective script loading, meaning it only loads the scripts required for the modules you’ve enabled. Users report up to 18% faster mobile speeds with ShopLentor.
Does the compare feature work with variable products?
Yes. ShopLentor’s Product Compare module works with both simple and variable WooCommerce products.
Can customers share their comparison list with others?
Yes, ShopLentor includes a share comparison feature, which is particularly useful for collaborative purchasing decisions — for example, when customers want to consult a friend or family member before buying.
What happens to the compare list when a customer navigates away?
This depends on your settings. ShopLentor gives you the option to persist or clear the compare list when a user moves to another page.
Conclusion
Adding a product compare feature to your WooCommerce store is one of the most effective ways to improve the shopping experience and reduce purchase hesitation. With the free ShopLentor plugin, the process is straightforward — no coding required, no premium subscription needed.
To summarize how to add product compare in WooCommerce:
- Install and activate the ShopLentor plugin.
- Navigate to ShopLentor → Modules.
- Enable the Product Compare module.
- Configure the settings (compare page, table fields, button text).
- Test the feature on your live store frontend.
ShopLentor’s product compare module, combined with its other free features like Wishlist and Quick View, gives you a professional, conversion-optimized store without the need to install multiple separate plugins.
Ready to get started? Download ShopLentor for free from WordPress.org and add the product compare feature to your WooCommerce store today. Your customers — and your conversion rate — will thank you.