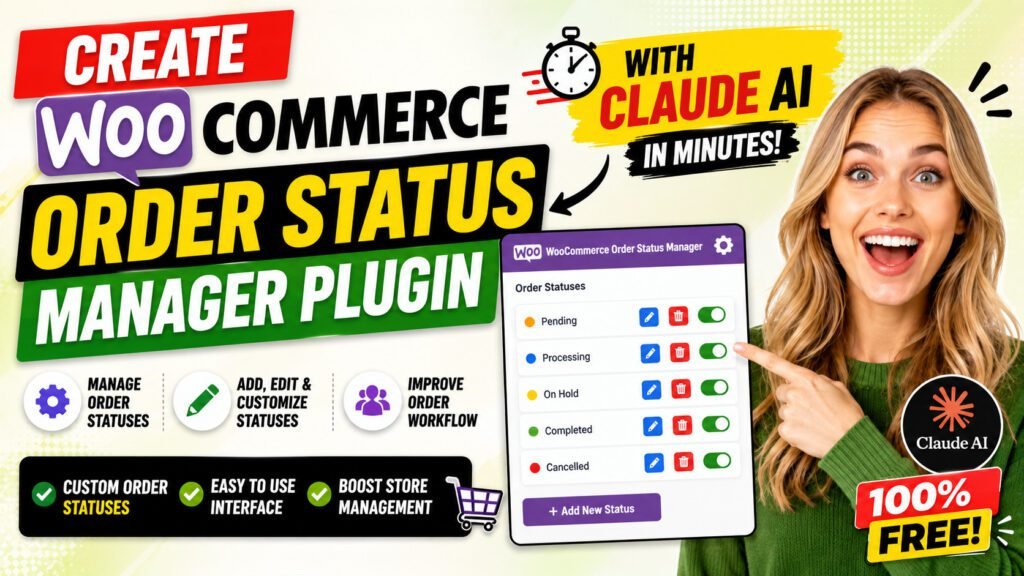
If you are running a WooCommerce store, the default order statuses — Pending, Processing, Completed, and Failed — rarely reflect how your business actually operates. A proper WooCommerce order status manager gives you unlimited custom statuses like Packed, Quality Check, or Awaiting Collection that match your real fulfillment workflow. The problem? The best premium WooCommerce order status plugins cost $79 to $99 per year and still miss critical features like audit logs, role-based access, and REST API support. In this guide, you will see exactly how to build a fully featured WooCommerce order status manager plugin from scratch using Claude AI — without writing a single line of code manually.
Table of Contents
What Is a WooCommerce Order Status Manager?
A WooCommerce order status manager is a tool — either a plugin or custom code — that lets store owners create, manage, and control order statuses beyond WooCommerce’s seven built-in defaults. It gives you full control over every stage an order passes through from placement to delivery.
WooCommerce ships with these default statuses out of the box:
- Pending Payment — order received but payment not yet confirmed
- Processing — payment confirmed, order being fulfilled
- On Hold — awaiting manual review or payment confirmation
- Completed — order fully fulfilled and delivered
- Cancelled — cancelled by customer or administrator
- Refunded — full refund issued to customer
- Failed — payment failed or declined
These seven statuses cover basic e-commerce but fall short for businesses with multi-stage fulfillment pipelines. A custom WooCommerce order status plugin extends this list with any stages your specific workflow requires.
Why Custom WooCommerce Order Statuses Matter for Your Business
Custom order statuses help your team and customers stay aligned throughout the order journey. Rather than keeping everything stuck in Processing for days, you move orders through meaningful, named stages that can trigger automated customer notifications, route tasks to the right staff, and create real-time order transparency.
Real-World Examples of Custom WooCommerce Order Statuses
- Dropshipping stores: Sent to Supplier, In Transit, Out for Delivery
- Manufacturers: In Production, Quality Control, Ready to Ship
- Local retailers: Ready for Pickup, Awaiting Collection, Handed Over
- Service businesses: Scheduled, Work In Progress, Awaiting Approval
- Print-on-demand: Design Approved, Printing, Packaged, Dispatched
Why Build Your Own WooCommerce Order Status Plugin?
Before jumping into the build process, it is worth understanding why creating your own WooCommerce plugin with Claude AI makes more sense than purchasing an existing solution.
The Real Cost of Premium WooCommerce Plugins
The most widely used paid WooCommerce order status management plugins all carry significant annual licensing costs:
Plugin | Annual Cost | Notable Limitation |
WooCommerce Order Status Manager (SkyVerge) | $79/year | Recent bug reports on current versions, no audit log |
YITH WooCommerce Custom Order Status | $99.99/year | Complex interface, premium-only email notifications |
Custom Order Status for WooCommerce (Pro) | $49/year | Limited role-based access control |
QT Order Status Manager (built with Claude) | FREE | Fully customizable, all enterprise features included |
Features Missing from Existing Solutions
After analyzing the top WooCommerce order status plugins available in 2026, most are missing at least one of these professional features:
- Audit Log — no full history of who changed what and when
- REST API — no programmatic endpoints for headless or integrated systems
- Role-Based Access Control — no restriction on which staff roles can apply each status
- Status Flow Enforcement — no rules preventing invalid status transitions
- Import/Export — no way to migrate configurations between sites as JSON
- WooCommerce HPOS Compatibility — many older plugins break with modern WooCommerce
The Case for Building with Claude AI
With Claude AI, you can generate a production-ready WordPress plugin in a single session of 60 to 90 minutes. You own every line of code outright, can customize any feature freely, and pay nothing ongoing. This guide documents exactly that process — from blank page to working ZIP file.
What You’ll Build: Complete WooCommerce Order Status Plugin Features
Here is the complete feature set of the WooCommerce order status manager plugin you will create in this tutorial:
Core Status Management Features
- Unlimited custom WooCommerce order statuses — no cap, no tiers, no restrictions
- Custom color-coded status badges — each status shows its own color in the WooCommerce orders list
- Custom dashicons per status — choose from 28 icons with a visual icon picker
- Drag-to-reorder interface — arrange statuses using jQuery UI Sortable
- Active / Inactive toggle — disable statuses without deleting them or losing history
Automation Features
- Automated HTML email notifications — fires when any order reaches a custom status
- Email placeholders — {order_id}, {order_number}, {customer_name}, {customer_email}, {total}, {site_name}
- Customer-visible order notes — auto-added note appears in My Account order history
Control and Security Features
- Status Flow Control — define which statuses must precede each custom status
- Role-Based Access Control — restrict which WordPress user roles can apply each status
- Full Audit Log — every change recorded with user, timestamp, old status, and new status
Developer and Integration Features
- Complete REST API — CRUD endpoints for statuses plus order status change and audit log
- Import / Export — one-click JSON export and bulk import for site migration
- Bulk Actions — change multiple orders to any custom status from the orders list
- WooCommerce HPOS Compatible — full support for High-Performance Order Storage
Admin Interface Pages
- All Statuses page — sortable table with color swatches, icon previews, and toggle switches
- Add / Edit Status form — color picker, icon grid, transitions, role access, email config, customer note
- Global Audit Log page — paginated history of all status changes across all orders
- Import / Export page — one-click JSON backup and restore
Prerequisites Before You Start
Before creating your WooCommerce order status manager plugin, confirm your environment meets these requirements:
Technical Requirements
- WordPress 5.8 or higher
- WooCommerce 6.0 or higher — tested and compatible up to WooCommerce 8.5
- PHP 7.4 or higher on your web server
- A Claude AI account at claude.ai — the free tier works; Pro gives faster, longer responses
- FTP access, cPanel File Manager, or a file upload plugin to install the finished ZIP
Recommended but Not Required
- A local WordPress development environment such as LocalWP or DevKinsta for safe testing
- A staging site to validate the plugin before pushing to production
- Basic familiarity with WordPress plugin installation and activation
Step 1 — Plan Your Plugin with Claude AI
The most important step when building any WordPress plugin with AI is writing a clear, detailed prompt. The quality of Claude’s output is directly proportional to how precisely you describe what you want. Vague prompts produce generic code. Specific prompts produce production-ready plugins.
Start with a High-Level Feature Description
Open claude.ai and begin with a clear, complete description of the overall goal. Include every feature you want — do not hold anything back for follow-up prompts:
Create a production-ready WooCommerce plugin that lets store owners add unlimited custom
order statuses with custom colors, icons, email notifications per status, status flow
control (which statuses can precede each one), role-based access control, a full audit
log of all changes, a REST API, and JSON import/export. Follow WordPress coding
standards, use singleton pattern, and ensure HPOS compatibility.
Ask Claude to Plan the Architecture Before Writing Code
Before requesting any PHP code, ask Claude to outline the architecture first. This single step prevents major structural refactoring later:
Before writing any code, please outline the complete file structure, database tables,
PHP class responsibilities, WordPress hooks, and all admin pages this plugin will need.
Claude will produce a detailed specification document. Review it, add or remove features, and confirm before moving to the build phase.
Break the Build into Logical Stages
Do not try to generate the complete plugin in one prompt. Divide the build into four stages, each a separate conversation turn:
- Stage 1 — Main plugin file, database class, and statuses class
- Stage 2 — Admin class, email class, API class, and audit log class
- Stage 3 — All four admin PHP template files
- Stage 4 — CSS admin styles and JavaScript
After each stage, install the partial plugin in a test environment and verify there are no PHP fatal errors before proceeding to the next stage.
Step 2 — Generate the Plugin Architecture and File Structure
Once Claude has confirmed the architecture plan, ask it to begin building. The WooCommerce order status manager plugin uses 14 files organized into a clean, logical structure:
The Complete Plugin File Structure
qt-order-status-manager/
qt-order-status-manager.php <- Main bootstrap file + singleton class QT_OSM
readme.txt
includes/
class-qt-osm-db.php <- Static database methods (all CRUD operations)
class-qt-osm-statuses.php <- WP/WC status registration, bulk actions, hooks
class-qt-osm-admin.php <- Admin menus, pages, 7 AJAX handlers
class-qt-osm-emails.php <- Customer email notification sender
class-qt-osm-audit-log.php <- Status change logging + order meta box
class-qt-osm-api.php <- REST API endpoints (7 routes)
templates/admin/
statuses-list.php <- Drag-to-reorder status table page
edit-status.php <- Add/Edit status form with all settings
audit-log.php <- Paginated global audit log page
import-export.php <- JSON export and import UI
assets/css/qt-osm-admin.css <- All admin styles
assets/js/qt-osm-admin.js <- All admin JavaScript
Key Architecture Decisions to Specify in Your Prompt
Always include these requirements when asking Claude to build the plugin:
- Singleton pattern for all PHP classes — prevents duplicate hook registration
- HPOS compatibility declared via Automattic\WooCommerce\Utilities\FeaturesUtil
- WordPress nonces on every AJAX handler — prevents CSRF attacks
- Sanitize all inputs, escape all outputs — uses sanitize_text_field(), esc_html(), esc_attr()
- Capability checks on every admin action — manage_woocommerce and edit_shop_orders
- Prepared SQL statements for all database queries — prevents SQL injection
Step 3 — Build the Database Layer
The plugin stores all of its data in two custom WordPress database tables, separate from the default WooCommerce tables. Asking Claude to separate database operations into a dedicated static class — QT_OSM_DB — keeps the codebase clean and makes queries easy to modify without touching business logic.
Table 1: wp_qt_osm_statuses
This table stores all custom status configurations. Each row represents one custom WooCommerce order status:
- id, slug (UNIQUE KEY), label — core identity fields
- color, icon — visual display settings for badges and icon picker
- description — internal admin notes, not shown to customers
- transitions — serialized PHP array of allowed predecessor status slugs (empty = any)
- send_email, email_subject, email_body — customer notification configuration
- allowed_roles — serialized array of WordPress role keys (empty = all roles)
- cust_note, cust_note_txt — customer-visible order note configuration
- is_active, sort_order — visibility control and display ordering
- created_at, updated_at — automatic MySQL CURRENT_TIMESTAMP fields
Table 2: wp_qt_osm_audit_log
This table records every order status change permanently:
- order_id — indexed for fast per-order queries
- old_status, new_status — both stored as WooCommerce status slugs (without wc- prefix)
- changed_by (user ID), changed_by_name (display name or System for automated changes)
- note, created_at
Using dbDelta for Safe Database Updates
Specify to Claude that you want dbDelta() used for table creation — not raw CREATE TABLE statements. WordPress’s built-in dbDelta() function creates a table if it does not exist, and safely updates an existing table’s structure when the schema changes. This means plugin updates never cause data loss.
Also ask Claude to include a maybe_upgrade() static method that compares the stored db version option to the current QT_OSM_VERSION constant and re-runs dbDelta() if they differ. This handles database changes across future plugin updates automatically.
Step 4 — Register Custom Statuses with WordPress and WooCommerce
Connecting your custom statuses to WooCommerce is the core technical challenge. The plugin must register each status in two separate systems — WordPress post statuses and WooCommerce’s own status list — or the statuses will not appear in dropdowns, order list filters, or the order detail page.
Two-Layer Registration
Layer 1 — Register each status with WordPress:
register_post_status(‘wc-packed’, [
‘label’ => ‘Packed’,
‘public’ => true,
‘show_in_admin_all_list’ => true,
‘show_in_admin_status_list’ => true,
‘label_count’ => _n_noop(‘Packed (%s)’, ‘Packed (%s)’),
]);
Layer 2 — Add each status to WooCommerce via filter:
add_filter(‘wc_order_statuses’, function($statuses) {
$statuses[‘wc-packed’] = ‘Packed’;
return $statuses;
});
The plugin loads all active statuses from the database and registers them in bulk during the WordPress init hook.
WooCommerce HPOS Compatibility — Critical for Modern Stores
WooCommerce 8.0+ introduced High-Performance Order Storage (HPOS), which stores orders in custom database tables rather than WordPress’s wp_posts table. Plugins that are not HPOS-compatible will fail silently or trigger deprecation notices on modern WooCommerce installations.
Tell Claude to implement full HPOS compatibility in four specific ways:
- Declare compatibility using FeaturesUtil::declare_compatibility(‘custom_order_tables’, __FILE__, true) on the before_woocommerce_init hook
- Use wc_get_order() to load orders instead of get_post() — works for both storage methods
- Register the audit log meta box for both the legacy shop_order screen and wc_get_page_screen_id(‘shop-order’) for HPOS
- Register bulk actions for both edit-shop_order (legacy) and woocommerce_page_wc-orders (HPOS) filter hooks
Step 5 — Build the Admin Interface
The admin interface is the most visible part of the WooCommerce order status manager. Claude generates four separate admin pages, accessible via a dedicated Order Statuses menu item added to the WordPress admin sidebar.
The Status List Page
The main listing page shows all custom statuses in a styled WP_List_Table-like table. Each row includes:
- Drag handle — jQuery UI Sortable handle for drag-to-reorder (AJAX-powered, no page reload)
- Color swatch — circular 24px preview of the status badge color
- Label — bold status name with optional description excerpt
- Slug — the programmatic identifier shown in monospace code formatting
- Icon — the selected dashicons icon rendered in the status’s own color
- Transitions badge — shows ‘Any status’ or the count of allowed predecessor statuses
- Email indicator — green email icon if notifications are enabled for this status
- Active toggle — pure CSS toggle switch powered by AJAX, no page reload required
- Edit / Delete buttons — Edit links to the form; Delete shows confirmation and animates the row out
The Add / Edit Status Form
The edit form uses a two-column CSS grid layout — a wider main column and a narrower sidebar:
Main column (flexible width):
- Status Label — required input, human-readable name shown everywhere
- Slug — auto-generated from the label as you type; permanently readonly after first save
- Description — optional internal admin note, not shown to customers
- Color Picker — WordPress wpColorPicker with live badge preview that updates as you pick
- Icon Grid — 28 clickable dashicons buttons; click to select, highlighted when active
- Status Flow Transitions — checkboxes for every existing WooCommerce status
- Role-Based Access — checkboxes for every WordPress user role on the site
Sidebar (fixed 340px width):
- Save / Update button — full width, shows spinner while AJAX request is in flight
- Email Notification toggle — reveals subject line, HTML body textarea, and placeholder reference
- Customer Note toggle — reveals note text textarea with same placeholder support
Why the Status Slug is Permanently Locked After Creation
One intentional design decision: the status slug field becomes readonly immediately after the status is first saved. This is not a limitation — it is a data-integrity protection. WooCommerce stores order status slugs directly in the order database. Changing a slug would silently break all existing orders using that status, because WooCommerce would no longer recognize their stored status value. If you need a different slug, create a new status with the correct slug and deactivate the old one.
Step 6 — Configure Email Notifications and Customer Notes
Automated customer email notifications are one of the most high-value features of a WooCommerce order status manager. They keep customers informed without requiring manual effort from your team at every status change.
How Email Notifications Are Triggered
The plugin hooks into the woocommerce_order_status_changed action at priority 15 — after WooCommerce’s own internal handlers have run. When an order status changes:
- The plugin checks whether the new status is a custom status with send_email enabled
- If yes, it retrieves the customer’s billing email from the order object
- It parses all placeholders in the configured subject and body text
- It wraps the body in a branded HTML email template with a purple header and white content area
- It sends the email via WordPress’s wp_mail() with a text/html Content-Type header
Email Placeholder Reference
Placeholder | What It Outputs | Example Output |
{order_id} | WordPress order ID | 1247 |
{order_number} | WooCommerce order number | #1247 |
{customer_name} | Full billing name | Jane Smith |
{customer_email} | Customer’s billing email | jane@example.com |
{total} | Formatted order total | $149.99 |
{site_name} | WordPress site name | My WooCommerce Store |
Customer-Visible Order Notes
In addition to email, each custom status can automatically add a note visible to the customer in their My Account order history page. The note supports the same six placeholders as email, but is configured separately — so you can send a detailed email while keeping the order note brief and friendly. Both features are independently toggleable per status.
Step 7 — Add Advanced Features: Status Flow, Roles, Audit Log, and REST API
These four advanced features are what transform a basic WooCommerce custom order status plugin into a professional-grade WooCommerce order management system.
Status Flow Control — Enforced Order Workflows
The transitions feature lets you define which existing statuses must precede each custom status. This is stored as a serialized PHP array of allowed predecessor status slugs per status record:
- Empty array — any status can transition to this one (default behavior)
- Non-empty array — order must currently be in one of the listed statuses
Example: If the Shipped status has transitions configured as [‘packed’, ‘processing’], then an order currently in On Hold cannot be moved to Shipped — only orders in Packed or Processing can. This prevents workflow errors like marking an order as Delivered before it was even Shipped.
The transition check runs in two places: in the Order Actions dropdown on the order detail page (so invalid transitions are simply not shown) and in the AJAX handler for programmatic enforcement.
Role-Based Access Control
The allowed roles feature restricts which WordPress user roles can assign each custom status. Roles are stored as a serialized array in the database:
- Empty array — all roles with order management access can set this status (default)
- Non-empty array — only users holding at least one of the specified roles can set it
Practical example: You might restrict a Refund Approved status to Shop Manager and Administrator roles only. This prevents Editors, Contributors, or custom fulfillment staff from approving refunds without authorization.
The Audit Log — Complete Change Tracking
The audit log provides full traceability for every WooCommerce order status change across your store. Each log entry captures:
- Order ID — hyperlinked to the order’s edit page
- Old status and new status — stored as slugs in the database, displayed as labels in the UI
- Changed by — user display name, or System for automated status changes (e.g., from payment gateways)
- Timestamp — stored in MySQL datetime format and displayed in your WordPress site’s configured timezone
Audit data is accessible in two places: a per-order Status Change History meta box shown on each individual order’s edit page, and a dedicated Global Audit Log admin page showing all changes across all orders, paginated at 25 records per page.
REST API — Complete Programmatic Access
The REST API enables integration with external systems, mobile apps, warehouse management tools, or headless WooCommerce setups. All endpoints live under the namespace /wp-json/qt-osm/v1/:
Method | Endpoint | Action |
GET | /statuses | List all statuses (add ?active_only=false for inactive) |
POST | /statuses | Create a new custom status |
GET | /statuses/{id} | Get one status by database ID |
PUT | /statuses/{id} | Update an existing status |
DELETE | /statuses/{id} | Permanently delete a status |
PUT | /orders/{id}/status | Change an order status (body: {“status”:”slug”}) |
GET | /orders/{id}/audit | Get the full audit log for one order |
All seven endpoints require the manage_woocommerce capability. Authentication accepts WordPress application passwords, standard cookie authentication from logged-in admin users, or WooCommerce consumer key and secret pairs — whatever fits your integration setup.
Step 8 — Test and Debug with Claude AI
Once Claude has generated the complete plugin, download the ZIP file, upload it to WordPress via Plugins > Add New > Upload Plugin, and activate it. Run through this systematic testing checklist:
Post-Activation Testing Checklist
- Navigate to Order Statuses > Add New and create a test status with a distinctive color, icon, and email enabled
- Go to WooCommerce > Orders, open any test order, and change its status to your new custom status
- Check the orders list — confirm the color badge appears correctly with the right color
- Check your email inbox — confirm the notification email arrived with all placeholders replaced correctly
- Go to Order Statuses > Audit Log — confirm the status change was recorded with the correct user and timestamp
- Return to the status list and test drag-to-reorder: drag two statuses to new positions and refresh
- Test the Import/Export feature: export your statuses to JSON, delete one status, then import the JSON back
- Test the REST API using a browser or Postman: visit /wp-json/qt-osm/v1/statuses
How to Debug Issues Effectively with Claude AI
When something does not work as expected, provide Claude with complete context rather than just reporting that something is broken:
- Describe the exact action you performed (e.g., I clicked Update Status on the edit form)
- Describe what you expected to happen
- Describe what actually happened
- Include any PHP error messages from wp-content/debug.log (enable WP_DEBUG in wp-config.php)
- Include any JavaScript errors from the browser’s developer console (F12 > Console tab)
Claude diagnoses most common WordPress plugin issues — hook conflicts, PHP type errors, AJAX nonce failures, JavaScript callback errors — in a single response when given precise, complete information.
The Checkbox Bug We Found and Fixed in Version 1.1.0
After deploying version 1.0.0, a real production bug surfaced: disabling the Email Notification or Customer Note checkboxes appeared to save correctly — the toggle showed disabled in the status list. But when you returned to the edit form for that status, the checkbox was back to checked.
Root cause: The AJAX save handler in PHP used isset($_POST[‘send_email’]) to detect whether the checkbox was checked or unchecked. The JavaScript was correctly sending the integer value 0 when unchecked. But PHP’s isset() returns true whenever a key exists in the POST array — even when its value is ‘0’. So the setting was always being saved as 1 (enabled), regardless of whether the checkbox was checked.
Fix applied in v1.1.0: Replace isset() with !empty() for all three checkbox fields. PHP treats the string ‘0’ as empty, so !empty(‘0’) correctly evaluates to false, saving the value as 0. This fix was applied to send_email, cust_note, and is_active simultaneously.
This is a classic, subtle WordPress AJAX checkbox bug that is easy to miss during development. Describing the symptom precisely to Claude — ‘checkbox appears to save but reverts to checked on re-edit’ — led directly to the root cause diagnosis and the correct fix.
Plugin Features Deep Dive
Here is a closer look at some of the plugin’s more sophisticated capabilities.
Color-Coded Status Badges — Automatic CSS Generation
Each custom status automatically generates three CSS rules injected into the admin via the admin_head hook. The color you configure appears as a semi-transparent (13%) background, a full-opacity text color, and a medium-opacity (40%) border — matching WooCommerce’s native badge style conventions. No manual CSS file editing is required. The moment you save a status with a new color, every order displaying that status in the orders list immediately shows the updated badge.
Auto-Slug Generation from Label
On the Add New Status form, as you type the status label, a JavaScript listener automatically populates the slug field by converting the label to lowercase, removing special characters, replacing spaces with hyphens, collapsing multiple consecutive hyphens, and capping the result at 50 characters. The generated slug is fully editable before the first save. After saving, the slug field becomes permanently readonly to protect existing order data.
Drag-to-Reorder with Immediate Persistence
The statuses list page uses jQuery UI Sortable to enable drag-and-drop reordering. When you drag a row to a new position and release it, an AJAX call immediately fires and updates the sort_order column for every status in the new sequence. This order is then respected in WooCommerce order status dropdowns, bulk action menus, and the Order Actions dropdown on individual order pages — giving you complete control over how statuses appear throughout the admin.
Import and Export for Site Migration
The Import/Export page solves a common problem: setting up your custom status configuration once and reusing it across multiple WooCommerce sites. The export process queries all statuses from the database — including inactive ones — serializes them as a JSON array, and either displays the result in a read-only textarea or triggers a browser file download named qt-osm-statuses-YYYY-MM-DD.json. The import process reads pasted JSON, processes each item, and applies an upsert logic: statuses with matching slugs are updated, while new slugs are inserted as fresh records. The result shows how many statuses were processed.
Quick Status Change Buttons on Individual Orders
On each order’s edit page, the plugin adds custom entries to the Order Actions dropdown (the meta box typically used for resending emails and other per-order actions). These entries show only the custom statuses that are valid from the current status — respecting both the transition rules and the current user’s role access. Selecting one and clicking the checkmark icon immediately triggers the WooCommerce status change hook, which fires the audit log entry, email notification, and customer note in sequence.
Pro Tips for Getting the Best Results from Claude AI
Write a Comprehensive Master Prompt Before Starting
Before beginning your build session, invest 15 minutes writing a master prompt that documents every feature, every database field name, every PHP class and method, and all key design decisions. If Claude loses context mid-conversation — which can happen in longer sessions — pasting the master prompt instantly restores full context without restarting. For this exact plugin, the complete master prompt is shared in the linked YouTube video.
Always Specify Security Requirements Explicitly
Do not assume Claude will add security measures automatically. Explicitly request:
- check_ajax_referer() and nonce verification on every AJAX endpoint
- current_user_can() capability check before any data read, write, or delete operation
- Sanitize every $_POST and $_GET value with the specific appropriate WordPress function
- Escape all output with esc_html(), esc_attr(), esc_url(), or wp_kses_post()
- Use $wpdb->prepare() for every database query that includes user-controlled values
Test Between Each Build Stage
Do not generate all 14 files at once and assume everything will work. After each build stage, install the partial plugin in your local development environment and verify there are no PHP fatal errors before continuing. This approach catches architectural problems early when they are cheap to correct, rather than discovering them after building 14 interdependent files.
Describe Bugs Precisely for One-Response Fixes
The quality of Claude’s debugging diagnosis scales directly with the precision of your problem description. Avoid vague reports like ‘it does not work.’ Instead provide: the exact action taken, the exact expected outcome, the exact observed outcome, the complete error message (not a paraphrase), and any relevant code snippet. Claude resolves the majority of common WordPress plugin issues in a single response when given this level of detail.
Maintain a Version History
Keep copies of each working stage before proceeding to the next. This gives you a stable rollback point if a later stage introduces breaking changes. Simple date-stamped ZIP backups of the plugin folder after each successful test session are sufficient.
Frequently Asked Questions
Is this WooCommerce order status manager plugin completely free?
Yes, entirely free. You create the plugin once using Claude AI and own all the source code permanently — no subscription, no license key, no annual renewal. You can install it on an unlimited number of websites and modify any part of it freely.
Do I need PHP or WordPress development experience to create this plugin?
No technical experience is required. Claude AI generates all the PHP, JavaScript, and CSS files. Your only task is to describe what you want in plain English, review the generated code at a high level, and upload the ZIP file to WordPress. Basic familiarity with installing WordPress plugins is the only prerequisite.
Is this plugin compatible with WooCommerce HPOS?
Yes, fully. The plugin declares High-Performance Order Storage compatibility using WooCommerce’s FeaturesUtil class, uses wc_get_order() for all order data access, and handles both the legacy post-based order screen and the modern HPOS order screen throughout every feature.
How many custom WooCommerce order statuses can I create?
Unlimited. Custom statuses are stored in a custom database table with no hard cap. You can create as many statuses as your business workflow requires, and organize them in any order using the drag-to-reorder interface.
What happens to existing orders if I delete a custom status?
The status slug stored in existing orders remains unchanged in the database — WooCommerce simply will not recognize it as a known registered status, so the badge will not display correctly. For this reason, always deactivate a status using the Active toggle rather than deleting it. Deactivated statuses are hidden from all dropdowns but all existing order data is fully preserved.
Can I use the REST API with WooCommerce consumer keys?
Yes. All REST API endpoints under /wp-json/qt-osm/v1/ use WordPress’s standard REST API authentication system. WooCommerce consumer keys, WordPress application passwords, and cookie authentication for logged-in admin sessions all work. Any tool that can authenticate to the WordPress REST API can access these endpoints.
How do I migrate my custom statuses to another WordPress site?
Use the built-in Import/Export feature. Navigate to Order Statuses > Import/Export, click the Export button to generate a JSON file of all your configurations, and save it. On the destination site with the plugin installed and activated, paste the JSON into the Import textarea and click Import. All status settings — colors, icons, email templates, transition rules, role restrictions — are transferred completely.
Can I extend the plugin with additional features using Claude AI?
Absolutely. Since you own the source code, you can continue working with Claude AI to add any features your workflow needs. Common extensions built on this plugin include webhook notifications to Slack or Zapier on status changes, customer-facing order tracking pages showing current status, integration with WooCommerce Analytics to include custom statuses in reports, and WooCommerce email template overrides for more advanced HTML designs.
Conclusion
Building a custom WooCommerce order status manager with Claude AI is one of the most practical and impactful demonstrations of AI-assisted WordPress development available today. In a single session of about 60 to 90 minutes, you can produce a production-ready plugin with features that rival $79 to $99 per year premium solutions — while paying nothing and owning every line of code outright.
The QT Order Status Manager plugin we built in this tutorial covers the complete spectrum of what a growing WooCommerce store needs: unlimited custom order statuses with colors and icons, automated customer email notifications with placeholder support, enforced status flow rules, role-based access control, a full audit trail of every change, a complete REST API, import/export for site migration, and full HPOS compatibility.
Whether you are a WooCommerce store owner ready to bring your order workflow under control, a WordPress developer looking to build custom WooCommerce solutions faster, or a freelancer exploring the possibilities of AI-assisted plugin development — this approach changes what you can build without deep coding expertise.
Start with the complete master prompt documented in our YouTube video, open Claude AI, and you will have a working, downloadable WooCommerce order status manager plugin ready to install within your first session. No coding experience required.
Subscribe to Quick Tips on YouTube at https://www.youtube.com/@ParamFreelance for more WooCommerce plugin development tutorials using Claude AI.