Ever landed on a long blog post and had no idea how much reading was left? That tiny reading progress bar at the top of the page is what keeps visitors scrolling instead of bouncing. If your WordPress site runs on Elementor Pro, you already have the tool to build this — it is called the Progress Tracker widget, and it is one of those small features that makes a surprisingly big difference to user experience.
The Elementor Progress Tracker widget shows readers exactly how far through a page or post they have scrolled, giving them a clear sense of progress and encouraging them to read all the way to the end. In this guide I will walk you through everything — from installing the widget and choosing between horizontal and circular styles, to making it sticky, responsive, and on-brand. Whether you are building a blog, an online course page, or a multi-step landing page, this tutorial covers it all.
💬 Prashant’s Note:
When I set this up for clients running blog-heavy websites — think coaches and consultants in the USA and UK — I almost always place the horizontal tracker at the very top of the page inside the header template using Elementor Theme Builder. That way it appears on every single post automatically without you touching individual pages. In my experience with local business sites, even a simple 4-pixel-tall bar in the brand colour is enough to keep visitors engaged and reduce bounce rates noticeably. It takes about ten minutes to set up and the results speak for themselves.
Table of Contents
What Is the Elementor Progress Tracker Widget and Why Use It?
The Progress Tracker widget is a Pro-only Elementor feature that displays a visual indicator showing how far a visitor has scrolled through your content. It was introduced in Elementor 3.5 and has been a favourite of designers ever since.
Here is why it matters for your site:
- Enhanced user experience: visitors always know where they are in the content and how much is left to read.
- Reduced bounce rates: knowing there is a clear end point encourages people to keep scrolling rather than giving up halfway.
- Better engagement: it makes long-form articles, tutorials, and course pages feel less overwhelming.
- Instant feedback: the bar updates in real time as the user scrolls, making the page feel interactive and polished.
Requirements: What You Need Before You Start
Before you can use the Progress Tracker widget there are a couple of things you need in place.
First, you need Elementor Pro installed and activated on your WordPress website. The Progress Tracker widget is not available in the free version of Elementor — it is a Pro-only feature.
Here is a quick checklist:
- Log in to your WordPress dashboard and go to Plugins > Add New.
- Search for Elementor, install it, and activate it.
- Purchase Elementor Pro from the Elementor website.
- Download the Pro plugin ZIP file, then go to Plugins > Add New > Upload Plugin and activate it.
- Make sure your licence key is connected under Elementor > Licence in your dashboard.
Once that is done you are ready to go.
How to Add the Progress Tracker Widget to Your Page
There are two main places you can add the Progress Tracker widget — directly to a page or post, or inside a Theme Builder template so it appears site-wide. For blogs and long-form content sites, the Theme Builder route is almost always the better option.
Adding it to a single page or post:
- Open the page or post you want to edit and click Edit with Elementor.
- In the Elementor widget search panel on the left, type Progress Tracker.
- Drag and drop the widget onto the section of the page where you want it to appear.
- The widget will appear immediately and you can start configuring it from the left panel.
Adding it via Theme Builder (recommended for blogs):
- Go to Templates > Theme Builder in your WordPress dashboard.
- Click on the Single Post tab and edit your existing single post template, or create a new one.
- Open the template in the Elementor editor.
- Search for the Progress Tracker widget in the panel and drag it to the top section of your template.
- Click Update to save your changes and make sure your display conditions include all posts.
Content Tab Settings Explained
Once the widget is on your page, the left panel will show three tabs: Content, Style, and Advanced. Start with the Content tab.
Tracker Type
This dropdown gives you two choices: Horizontal or Circular.
- Horizontal: a thin bar that stretches across the page, typically placed at the top. This is the most common choice for blogs and reading progress indicators.
- Circular: a circular ring that fills as the user scrolls. This works well in sidebars or as a floating element on course pages.
By default the tracker type is set to Horizontal.
Progress Relative To
This is the most important setting in the widget. It controls which element the progress is calculated against. You have three options:
- Entire Page: the bar fills from 0 to 100 percent as the user scrolls from the very top to the very bottom of the page. Good for general pages.
- Post Content: the bar only tracks the post content area, ignoring the header and footer. This is the most accurate setting for blog posts and articles.
- Selector: you define a specific CSS class or ID using a hashtag (for example #article or .post-body) and the tracker measures progress within that element only. Best for course content or specific sections.
For most blog setups I recommend using Post Content. It gives a more accurate reading time experience because it ignores the header, footer, and sidebar.
Direction and Percentage
- Direction: choose whether the bar fills from left to right or right to left.
- Percentage: toggle this on if you want to display the actual scroll percentage as a number alongside the bar or circle. Works particularly well with the Circular tracker type.
Style Tab: Customising the Look of Your Progress Bar
The Style tab is where you make the tracker match your brand. Here is what you can control:
- Track Color: this is the background colour of the bar — the unfilled portion. Set it to a light grey or a subtle tint of your brand colour.
- Indicator Color: this is the filled portion of the bar that grows as the user scrolls. Use your primary brand colour here for maximum visual impact.
- Height (for Horizontal): set the thickness of the bar in pixels. A value between 4px and 10px looks clean without being intrusive.
- Size (for Circular): control the overall diameter of the circular tracker.
- Width (for Circular): set the stroke thickness of the ring.
- Background Color (for Circular): sets the colour behind the ring tracker.
- Typography: if you have the percentage display turned on, you can customise the font, size, and weight of the percentage text.
A clean approach that works across most sites: use a 5px to 6px height for the horizontal bar, set the track colour to a very light version of your brand colour, and set the indicator to your full brand primary colour. Simple and effective.
Advanced Tab: Making the Tracker Sticky and Responsive
This is where the Progress Tracker really comes to life. Without making it sticky, the bar will only appear at the position you dropped it on the page and will scroll away with the rest of the content — which defeats the entire purpose.
Making the Widget Sticky
To make the tracker stay fixed at the top of the screen as the user scrolls:
- Click the Advanced tab in the Elementor panel.
- Open the Motion Effects section.
- Find the Sticky dropdown and set it to Top.
- Make sure the Sticky On option includes Desktop, Tablet, and Mobile so it stays fixed on all devices.
Once sticky is enabled, the tracker will remain visible at the top of the viewport the entire time the user is on the page.
Responsive Design
Always check how the tracker looks on tablet and mobile devices. Click the responsive mode toggle at the bottom of the Elementor editor and switch between device sizes. In most cases the horizontal tracker will look fine on all screen sizes without any extra changes. If you are using the circular tracker in a sidebar, you may want to hide it on mobile by using the Responsive Visibility controls in the Advanced tab to avoid clutter on smaller screens.
Adding Custom CSS
If you need more control over the styling than the Style tab allows, go to Advanced > Custom CSS and paste in your custom styles. This is useful if you want to add a box shadow to the bar, round the ends with border-radius, or create a gradient fill effect on the indicator.
Horizontal vs Circular: Which Tracker Type Should You Use?
Both tracker types serve different purposes and there is no single right answer. Here is a simple way to decide:
Use Horizontal when:
- You are adding a reading progress indicator to a blog post or long article.
- You want it fixed to the top of the page like a thin loading-style bar.
- You want a minimal, unobtrusive design that does not distract from the content.
Use Circular when:
- You are building a sidebar widget that shows scroll progress in a visually engaging way.
- You are creating a course or tutorial page and want a more prominent visual indicator.
- You want to display the percentage number prominently alongside the tracker.
In my experience building sites for coaches and online educators, the horizontal bar in the header works best for readability, while the circular tracker in a sidebar can act as an interactive element that makes a course feel more premium.
Advanced Use Cases: Dynamic Tags, Forms, and Courses
Once you are comfortable with the basics, the Progress Tracker can be used in some more creative ways with Elementor Pro.
Using Dynamic Tags
Elementor Pro lets you connect dynamic tags to the Progress Tracker so it adapts based on who is viewing the page or what content is being shown. For example, you can use conditional logic to show the tracker only to logged-in users, or only when a user is viewing content from a specific category. This is particularly useful for membership sites or gated content areas.
Connecting to Multi-Step Forms
You can link the Progress Tracker to a multi-step form to give users a visual indicator of how far through the form they are. By using the Selector option under Progress Relative To and linking it to the form container’s CSS class, the bar fills as each form step is completed. This can meaningfully reduce form abandonment.
Course and Tutorial Pages
The Progress Tracker is a natural fit for online course pages. Add it to your single lesson template in Theme Builder, set Progress Relative To as Post Content, and make it sticky. Students can see at a glance how much of the lesson they have completed. You can also add completion badges or certificate unlock prompts near the end of the content to reward students who read all the way through.
Troubleshooting Common Issues
Here are the most common problems people run into with the Elementor Progress Tracker widget and how to fix them.
- The bar is not moving when I scroll: check that the Progress Relative To setting is correct. If you selected Selector, make sure the CSS class or ID you entered actually exists on the page and is spelled correctly with the dot or hashtag prefix.
- The tracker disappears when I scroll: you have not enabled the Sticky option. Go to Advanced > Motion Effects and set Sticky to Top.
- The bar appears but looks off on mobile: go to the Advanced tab, enable responsive mode, and check whether the sticky setting is applied to mobile. Also check that no padding or margin values are causing alignment issues on smaller screens.
- The widget is not showing up in the Elementor panel: confirm that Elementor Pro is correctly activated with a valid licence. The Progress Tracker is a Pro-only widget and will not appear in the free version.
- The bar is affecting page load speed: the widget is lightweight and should not cause performance issues. If you notice slowdowns, make sure you have a caching plugin active and that your images are optimised separately.
Frequently Asked Questions
Is the Elementor Progress Tracker widget free?
No, the Progress Tracker widget is only available in Elementor Pro. You will need an active Elementor Pro licence to access and use it on your WordPress website.
How do I add a reading progress bar in Elementor?
Install Elementor Pro, open your page or Theme Builder template in the Elementor editor, search for the Progress Tracker widget in the panel, and drag it onto your page. Set the Tracker Type to Horizontal and Progress Relative To as Post Content, then enable Sticky in the Advanced tab so the bar stays visible while scrolling.
What is the difference between Elementor Progress Tracker and Progress Bar widgets?
The Progress Tracker widget is dynamic — it automatically updates as a user scrolls through a page, showing reading progress. The Progress Bar widget is static and is used to display fixed percentages such as skill levels or project completion, and does not respond to user scrolling.
Can I show the Progress Tracker on every blog post automatically?
Yes. The best way to do this is through Elementor Theme Builder. Add the Progress Tracker widget to your Single Post template and set the display conditions to include all posts. It will then appear on every blog post without you needing to add it manually to each one.
How do I make the Elementor Progress Tracker stick to the top of the page?
Click the Advanced tab in the Elementor editor while the widget is selected, open Motion Effects, and set Sticky to Top. Make sure to check that the Sticky On option includes Desktop, Tablet, and Mobile so it works across all devices.
Will the Progress Tracker widget slow down my website?
When properly set up, the Progress Tracker widget has minimal impact on site performance. To keep your site fast, also use a caching plugin, optimise your images, and make sure you are on a reliable hosting plan.
Can I use the circular Progress Tracker in a sidebar?
Yes. Set the Tracker Type to Circular and add the widget to your sidebar section. Set Progress Relative To as Selector and target your post content class so the circle fills based on how far through the article the reader has scrolled. You can also show the percentage number by enabling the Percentage toggle in the Content tab.
How do I add custom CSS to the Elementor Progress Tracker widget?
Select the widget in the Elementor editor, click the Advanced tab, and scroll down to the Custom CSS section. Paste your CSS code there. This lets you add custom effects like a gradient fill, rounded bar ends, or a box shadow that go beyond the built-in Style tab options.
Final Thoughts
And that is everything you need to know about the Elementor Progress Tracker widget — from a basic setup on a single post all the way through to sticky headers, circular sidebars, and course page integrations. It is one of those small details that makes a real difference to how people experience your content, and I love how quick it is to set up once you know where everything lives.
If you want to see the full setup in action, make sure to watch the video tutorial linked above — I walk through the whole process live so you can follow along at your own pace. If you have any questions, or if you ran into a specific issue that I did not cover here, drop a comment below and I will be happy to help. And if you would like me to set this up on your WordPress site for you, just get in touch — this is exactly the kind of thing I do for clients every day.
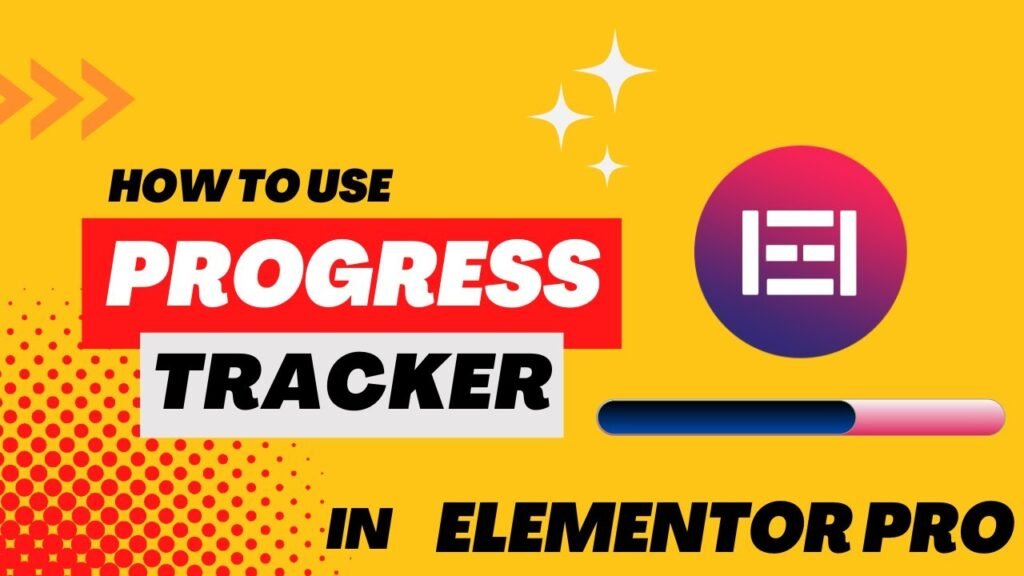
I hope that this article on How to use Progress Tracker Widget with Elementor will help you. Read more articles on Elementor Tutorials.
Do not forget to subscribe to our Quick Tips YouTube Channel for upcoming videos on Website Design, WordPress Tutorials, Elementor, and WooCommerce tutorials