💬 Prashant’s Note
When I first set this up for a clothing boutique client in the UK, she was surprised by how many customers actually used the wishlist feature within the first week — it showed up in her analytics almost immediately. The thing I always tell my clients is that a wishlist is not just a nice-to-have; it is a quiet sales tool that works in the background. I have added this plugin to dozens of WooCommerce stores over the years and the TI WooCommerce Wishlist free version covers everything a small or medium business needs without touching a single paid plan.
Watch step by step video tutorial: https://youtu.be/9d1s0UDgOKU
Table of Contents
What Is a WooCommerce Wishlist and Why Does Your Store Need One?
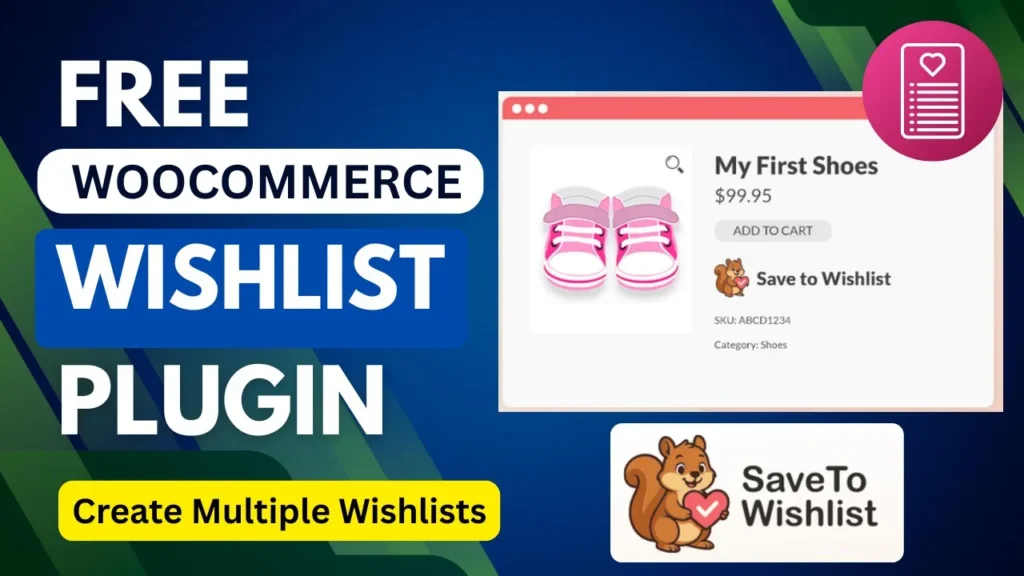
A WooCommerce wishlist is a dedicated space on your store where customers can save products they are interested in but are not ready to buy right now. Think of it as a digital shopping list — they can come back to it whenever they are ready, or share it with friends and family as a gift guide. For store owners, this feature does a lot more than just create a list. Here is what you actually gain: – Customers who save items to a wishlist are far more likely to return and complete their purchase compared to browsers who leave with nothing saved. – You can analyse which products are being added to wishlists most often — giving you real data on what your customers actually want. – Shareable wishlists act as free word-of-mouth marketing, bringing new visitors to your store. – Wishlist data can inform your promotions — if a product appears in hundreds of wishlists, a targeted discount email can drive a spike in sales. – Customers who feel invested in your store through saved lists tend to come back more often, which builds long-term loyalty. WooCommerce does not include wishlist functionality out of the box, but the good news is that there are excellent free plugins that add it in minutes.
Why I Recommend TI WooCommerce Wishlist (Free Version)
There are quite a few wishlist plugins in the WordPress repository, including YITH WooCommerce Wishlist, WPC Smart Wishlist, and others. After setting up stores for hundreds of clients, I keep coming back to TI WooCommerce Wishlist for most small and medium businesses. Here is why: – It is genuinely free for the core features — no bait-and-switch that locks the useful stuff behind a paywall. – It includes a built-in Setup Wizard that walks you through the initial configuration step by step, which is perfect for beginners. – The plugin comes with over 60 appearance customisation options including colours, font sizes, and borders, so you can match it to your store’s branding without writing any CSS. – It is compatible with popular caching plugins like WP Rocket, WP Super Cache, and W3 Total Cache — important for keeping your site fast. – Customers can share their wishlists on social media, which drives new traffic back to your store. – It is GDPR-ready and does not collect personal data from visitors, which matters a lot for my clients in the UK and Europe. – It works with WooCommerce Bookings, Subscriptions, Product Bundles, and many other popular add-ons. For most local business clients running a WooCommerce store, the free version of TI WooCommerce Wishlist is more than enough.
How to Install TI WooCommerce Wishlist Plugin
Installing the plugin is straightforward — you do it directly from your WordPress dashboard. Here are the steps: – Go to your WordPress admin panel and navigate to Plugins > Add New. – In the search bar, type TI WooCommerce Wishlist. – When the plugin appears in the results, click Install Now. – Once installation is complete, click Activate. That is all there is to it. The plugin will immediately redirect you to the Setup Wizard after activation, which is where the real configuration happens. You do not need to download anything manually or fiddle with FTP clients.
Running the Setup Wizard
After activating the plugin, you will be taken directly to the TI WooCommerce Wishlist Setup Wizard. This is the easiest way to get the basics configured quickly. Here is what to do: – Click the Let’s Go button on the welcome screen to begin. – On the Page Setup screen, choose a name for your wishlist page (the default is ‘My Wishlist’ which works fine for most stores) and either create a new page or assign an existing one. – Next, choose the social media sharing platforms you want to make available — Facebook, Twitter, Pinterest, and others are listed. You can enable or disable these depending on your store’s audience. – Review your settings and click Finish to complete the wizard. At this point, your wishlist feature is live and functional. Customers can already click Add to Wishlist on your product pages. However, I recommend spending a few more minutes in the General Settings to fine-tune a couple of things.
Configuring General Settings
To access the full settings, go to TI Wishlist > General Settings in your WordPress admin left menu. There are several options worth knowing about: – Require Login: Toggle this on if you only want logged-in users to create wishlists. For most stores, I leave this off so guest shoppers can also save items — it reduces friction and increases the chance they come back. – Remove from Wishlist After Adding to Cart: When enabled, a product is automatically removed from the wishlist once a customer adds it to the cart. This keeps their list clean and relevant. – Redirect to Wishlist: If turned on, the customer is redirected to the wishlist page within a few seconds of adding an item. I usually leave this off — it interrupts the browsing flow. – Wishlist Counter: You can display a counter in the header or navigation showing how many items a user has saved. This is a subtle but effective reminder that keeps the wishlist top of mind. Take your time going through these settings. Most of them are self-explanatory and the defaults are sensible for a typical store.
Customising the Add to Wishlist Button
One of the things I like about TI WooCommerce Wishlist is how much control you have over the button appearance without needing any code. You can find these options within the General Settings under the Product Page section. – Button Type: Choose whether to display the wishlist trigger as a standard button or a plain text link. – Button Position: Select a predefined position on the product page (before or after the Add to Cart button, for example) or use the provided shortcode to place it anywhere you like, including custom Elementor product templates. – Button Icon: You can enable a heart icon before the button text, or upload your own custom icon if you want something that better matches your brand. – Button Text: Customise the text shown on the button, for example ‘Save for Later’ or ‘Add to Wishlist’. – Style Options: The plugin includes over 60 style settings covering colours, borders, and font size. If you want to go further, you can enable the custom CSS field and add your own styles directly in the admin panel. For most of my clients, I pick a clean icon-plus-text combination and match the button colour to their primary brand colour. It takes about five minutes and makes the feature feel native to the store.
Setting Up the Wishlist Page
The wishlist page is where customers go to view and manage their saved items. TI WooCommerce Wishlist automatically creates this page for you when you run the Setup Wizard, so in most cases it is already sorted. However, there are a few customisation options worth checking under the Wishlist Page Settings: – Choose which columns appear in the wishlist table. You can show or hide the product image, name, price, stock status, date added, and the Add to Cart button. I usually keep it clean — product image, name, price, and Add to Cart is all most customers need. – You can enable an Add All to Cart button at the top of the wishlist page, which lets shoppers move everything from their wishlist to the cart in one click. This is a great conversion booster. – Make sure the wishlist page is linked in your navigation menu or header. If customers cannot find it easily, they will not use it. A quick tip: always add a link to the wishlist page in your site header — even a small heart icon with a counter works well. It acts as a constant reminder that the feature exists.
How to Test Your Wishlist on the Frontend
Once everything is configured, always test the wishlist from the customer’s perspective before calling it done. Here is a quick testing checklist: – Visit your shop page and check that the Add to Wishlist button appears on product listings. – Click a product to open the single product page and confirm the button also appears there. – Click Add to Wishlist and verify you see a confirmation message (the default says ‘Product added to Wishlist’). – Navigate to the wishlist page and confirm your saved product appears with the correct details. – Try clicking the Add to Cart button from the wishlist page and verify the product moves to the cart correctly. – If you have enabled social sharing, check that the sharing buttons appear on the wishlist page. – Test on mobile as well — the plugin is responsive but it is always good to confirm everything looks right on smaller screens. If something does not look right, go back to Settings > Permalinks and click Save — this refreshes the permalink structure and often resolves any page not found issues with the wishlist URL.
Free vs Premium: What Is the Difference?
For most small WooCommerce stores, the free version of TI WooCommerce Wishlist covers everything you need. But it is worth knowing what the premium version adds in case your store grows and you need more: – Multiple Wishlists Per User: The free version gives each customer one wishlist. The premium version lets them create and name multiple lists — useful for stores that sell gifts or seasonal items. – Wishlist Privacy Settings: Premium users can set their lists as public, private, or shared with a link. – Product Sorting: Customers can drag and drop products within their wishlist to reorder them. – Wishlist Total Price: Displays the combined price of all items saved — a handy feature for gift registries. – Product Analytics for Admin: See which products are being wishlisted most often — powerful for marketing decisions. – Promotional Emails: Send automated emails to customers reminding them about their saved items or notifying them of price drops. – Ask for an Estimate Feature: Useful for custom or B2B stores. The free version is genuinely solid and I have used it on many client stores without ever feeling the need to upgrade. If your store grows and you want that email automation or analytics layer, the premium version is worth considering.
Tips to Get More Sales from Your Wishlist Feature
Installing the plugin is just the first step. Here are some practical ways to make the wishlist feature work harder for your store: – Highlight the feature: Add a short note on your homepage or product pages like ‘Save your favourites — add to your wishlist’ so customers know the feature exists. – Add a wishlist icon with a counter to your header: This keeps it visible on every page and encourages more saves. – Use wishlist data for promotions: If you upgrade to the premium version, you can see which products are being saved most and run targeted discount campaigns on those exact items. – Send reminder emails: Even a simple monthly email to registered customers reminding them about their wishlist can drive significant repeat traffic. The premium version automates this, but you can also do it manually using your email marketing tool. – Create urgency: If a wishlisted product goes on sale or is running low in stock, make sure customers know. A simple notification turns a saved item into an immediate purchase. – Make it social: Encourage customers to share their wishlists on social media, especially before Christmas, birthdays, or other gift-giving occasions. Shared wishlists bring in brand new visitors who would not have found your store otherwise.
Frequently Asked Questions
Does WooCommerce have a built-in wishlist feature?
No, WooCommerce does not include a native wishlist feature out of the box. You need to install a third-party plugin to add this functionality. TI WooCommerce Wishlist is one of the most popular free options available in the WordPress plugin directory.
Is TI WooCommerce Wishlist really free?
Yes, the core version of TI WooCommerce Wishlist is completely free and available to download from WordPress.org. The free version includes the Add to Wishlist button, a dedicated wishlist page, social sharing, and extensive styling options. A premium version with advanced features like multiple wishlists per user and promotional emails is also available.
Can guest users add products to a wishlist without logging in?
Yes, by default TI WooCommerce Wishlist allows guest users to save products to a wishlist without needing an account. You can restrict this to logged-in users only by enabling the Require Login setting in the plugin’s General Settings.
Will a wishlist plugin slow down my WooCommerce store?
TI WooCommerce Wishlist is lightweight and designed to have minimal impact on performance. It is also compatible with popular caching plugins like WP Rocket and W3 Total Cache, which helps keep your store fast. Always test your page speed after installing any new plugin to confirm there is no significant impact.
Can customers share their WooCommerce wishlist with friends?
Yes. TI WooCommerce Wishlist includes built-in social sharing options so customers can share their wishlist on platforms like Facebook, Twitter, and Pinterest. Sharing wishlists is a great way to drive new visitors to your store, especially during gift-giving seasons.
How do I add the wishlist icon to my WooCommerce header?
In TI WooCommerce Wishlist, you can enable a wishlist counter or icon in the plugin settings and then add it to your header via your theme’s customiser or a menu widget. If you are using Elementor, you can also use the plugin’s shortcode to place the counter wherever you need it.
What is the difference between TI WooCommerce Wishlist free and premium?
The free version covers the core wishlist functionality — one wishlist per user, the Add to Wishlist button, a wishlist page, social sharing, and styling options. The premium version adds multiple wishlists per user, wishlist privacy settings, product analytics for admins, promotional emails, and drag-and-drop sorting, among other features.
Final Thoughts
And that is really all there is to it — adding a free WooCommerce wishlist to your store is one of those quick wins that pays off over time. Customers who save products are more likely to come back and buy, and you get useful data on what your audience actually wants. Thanks for reading this far — I hope the tutorial was clear and easy to follow. If you are more of a visual learner, make sure to check out my YouTube video tutorial where I walk through the full setup on screen, step by step. Got a question or ran into a snag during setup? Drop it in the comments below and I will do my best to help you out. And if you would rather have someone set this up properly on your WooCommerce store for you, feel free to reach out to me directly — I am always happy to help.