💬 Prashant’s Note
When I set this up for a client running a small online clothing store in Melbourne, the thing that surprised her most was how quick the setup was — we had a live countdown timer on her sale products in under ten minutes. I’ve built well over 1800 websites for local businesses across the USA, UK, and Australia, and I can tell you: adding urgency to your product pages is one of the simplest, highest-impact things you can do. Don’t overthink it — just get the timer live and watch what happens to your conversion rate.
Watch Video: WooCommerce Sales Countdown Timer
Table of Contents
What Is a WooCommerce Sales Countdown Timer?
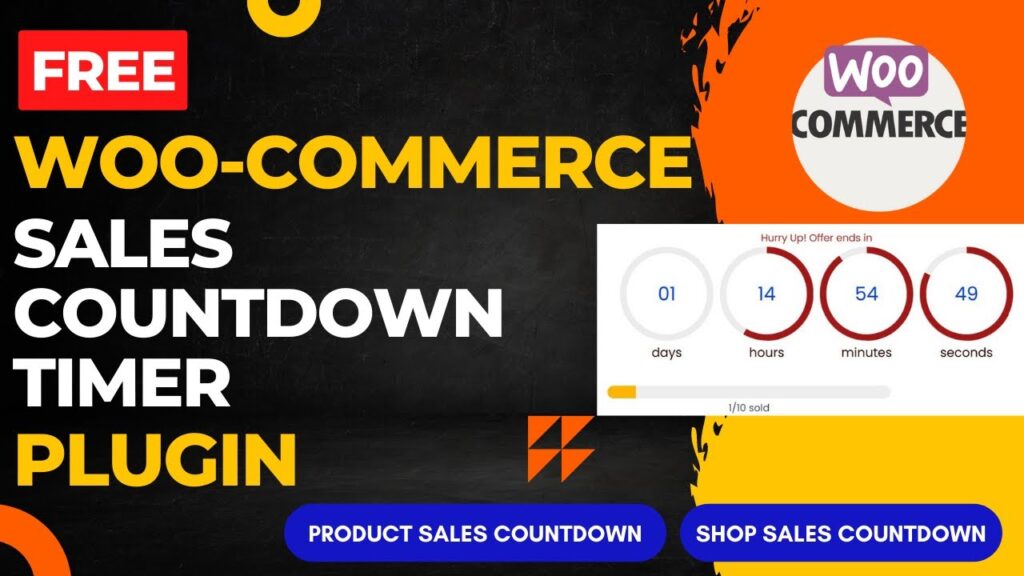
A countdown timer plugin is a digital clock that counts down from a set time to zero, marking the end of a sale or promotional period on your WooCommerce store. Instead of just showing a crossed-out price, you’re showing customers exactly how much time they have left before the deal disappears. This is one of the most effective tools in e-commerce marketing because it taps directly into FOMO — the Fear of Missing Out. For WooCommerce store owners specifically, a sales countdown timer can be displayed on individual product pages, on your main shop page, or across specific product categories. Some plugins even let you display them on archive pages so every shopper who browses your store sees the urgency message.
Why Your WooCommerce Store Needs a Countdown Timer
Most online shoppers are chronic procrastinators. They browse, they add to their cart, and then they close the tab. A visible countdown timer changes that behaviour in a measurable way. Here’s why they work so well for local and small businesses: – They create genuine urgency — when a customer sees the timer ticking, they know the discount is real and time-limited. – They reduce cart abandonment — shoppers are less likely to leave and “come back later” when they can see the clock running. – They are easy to set up — modern free plugins require no developer, no custom code, and no technical knowledge. – They work on any device — a responsive timer looks just as good on a mobile phone as on a desktop, which matters enormously since most local business customers browse on their phones. In my experience building WooCommerce stores for salons, gyms, coaches, and restaurants, even a simple countdown timer on a sale item noticeably increases the click-to-purchase rate during promotional periods.
About the WPC Product Timer Plugin (Free Version)
The plugin I recommend for this job is the WPC Product Timer for WooCommerce, developed by WPClever. It is a free, all-in-one tool for setting time-based conditions that control your products’ prices, availability, and sale status. You can download it directly from the WordPress plugin repository at no cost. What makes this plugin stand out from other free options is that it works in the backend to actually control product behaviour — not just display a pretty clock. It lets you define exactly when a product goes on sale, when the price reverts, and when the sale timer should appear. The plugin has a genuinely intuitive admin interface that works straight out of the box. There is no complex configuration required, and even beginners can get started without reading through documentation. Note: WPClever also makes a separate companion plugin called WPC Countdown Timer, which handles the front-end visual display. For full functionality — both the back-end sale scheduling and the visible front-end countdown — using both free plugins together gives you the best result.
Key Features of the Free WPC Product Timer Plugin
Here is what you get with the free version of the WPC Product Timer plugin: – Simple installation and intuitive setup interface — no developer needed. – Product-specific timers — set a countdown for one specific product only. – Category-specific timers — apply a timer to an entire product category at once. – Global timers — run a store-wide promotion with a single timer setting. – Responsive design — timers display correctly on both desktop and mobile devices. – Scheduled start and stop — set your promotion to begin and end automatically, so you don’t have to manually turn it on and off. – Customisable appearance — adjust fonts, colours, and sizes to match your store branding. – Flexible time conditionals — set timers by specific date, day of the week, time of day, recurring dates, and more. With the premium version, you unlock additional actions per product and the ability to choose precise placement of the countdown clock on single product pages — such as before the price, after the Add to Cart button, or inside the product image.
How to Install the WPC Product Timer Plugin
Installing this plugin takes about two minutes. Here are the exact steps: – Step 1: Log in to your WordPress dashboard. – Step 2: Go to Plugins > Add New. – Step 3: In the search bar, type “WPC Product Timer for WooCommerce”. – Step 4: Click Install Now next to the WPClever plugin, then click Activate. – Step 5: Once activated, go to WPClever > Product Timer in your dashboard menu. Alternatively, if you want the front-end visual countdown timer as well, also search for and install “WPC Countdown Timer for WooCommerce” — it’s a separate free plugin from the same developer that handles the visual display on your product pages.
How to Set Up a Sales Countdown Timer (Step-by-Step)
Once the plugin is installed and activated, setting up your first countdown timer is straightforward. Here is how I walk clients through it: – Step 1: Go to WooCommerce > Countdown Timers in your dashboard. – Step 2: Click Add New Timer. – Step 3: Choose the timer type — you can select product-specific, category-specific, or a global timer that applies across your whole store. – Step 4: Enter the start date and time, and the end date and time for your sale. Use your current timezone so the timer is accurate for your customers. – Step 5: Set the action — for example, “set sale price” so the discount automatically activates and then reverts when the timer ends. – Step 6: Use the customisation options to adjust the timer’s colours and style to match your store design. – Step 7: Save and publish. Visit your product page to confirm the timer is displaying correctly. If you have also installed the WPC Countdown Timer companion plugin, go to the product edit screen, click on the “Countdown” tab in the Product Data section, set Active to Yes, and configure your countdown end time there for the front-end visual display.
How to Customize the Timer’s Appearance
One question I always get from clients is: “Will the timer look out of place on my site?” The good news is the plugin gives you a solid range of customisation options, even in the free version. You can adjust: – Font size and style of the countdown display. – Colour scheme — match your brand’s primary and accent colours. – Timer label text — change “Sale ends in” to whatever phrase suits your promotion. – Position on the product page — in the premium version, you can place the timer before the price, after the price, before the Add to Cart button, after the Add to Cart button, or even inside the product image. For most of the WooCommerce stores I build using Elementor, the default styling of the WPC timer is clean enough to sit naturally on the page without any extra CSS. If you do need small tweaks, most WooCommerce-compatible themes allow you to add custom CSS from the WordPress Customiser.
Free vs Premium: What’s the Difference?
The free version of the WPC Product Timer plugin is genuinely capable and works well for most small business WooCommerce stores. Here is a clear breakdown of what each version offers: Free version: – Product-specific, category-specific, and global timers. – Scheduled start and stop dates and times. – Basic time conditionals (date range, daily, weekly). – Compatible with most WordPress themes. Premium version adds: – Multiple actions per product (for example, set sale price AND mark as featured, all in one timer). – No restrictions on the number of actions you can add. – Advanced time conditionals (recurring dates, odd/even dates, specific times of day). – Priority support from the WPClever team. – Precise front-end position control for the countdown display on single product pages. For most of my clients running a small WooCommerce store with one or two sale promotions per season, the free version is all they need. If you are running a more complex store with multiple simultaneous campaigns and heavily customised product rules, looking at the premium version makes sense.
Best Practices for Using Countdown Timers on WooCommerce
A countdown timer is a powerful tool, but it only works if you use it correctly. Here are the tips I share with every WooCommerce client after we set this up: – Be honest about the deadline. If your timer expires and the sale is still running the next day, customers will lose trust. Set a real end time and stick to it. – Use supporting copy. A timer is more effective when combined with a short message like “Hurry — this offer ends at midnight!” placed near the product title or above the Add to Cart button. – Don’t run timers on every product all the time. Urgency only works when it feels genuine. If every product on your store has a countdown running 365 days a year, shoppers will tune it out. – Test on mobile first. A majority of your customers are browsing on their phones. Make sure the timer renders correctly on small screens before going live. – Use A/B testing where possible. Run a timer on one product and compare conversion rates against a similar product without a timer. The data will tell you exactly how much difference it makes in your specific store.
Frequently Asked Questions
Is the WPC Product Timer plugin completely free?
Yes, the WPC Product Timer for WooCommerce by WPClever is available as a free download from the WordPress plugin repository. The free version includes product-specific, category-specific, and global timers with scheduled start and stop times. A premium version is also available with additional features and priority support.
Does a WooCommerce countdown timer work on mobile devices?
Yes. The WPC Product Timer plugin is built with responsive design, meaning it displays correctly on both desktop computers and mobile phones. Since most shoppers browse WooCommerce stores on their phones, this is an important feature to check before going live with any timer plugin.
Can I set different countdown timers for different products or categories?
Absolutely. The WPC Product Timer plugin lets you create product-specific timers, category-wide timers, or a global timer that applies across your entire store. You can manage multiple timers simultaneously from the WooCommerce dashboard.
Will the countdown timer plugin work with my WordPress theme?
The WPC Product Timer plugin is designed to work with a wide range of WordPress themes. For best performance, it is recommended to use a WooCommerce-compatible theme. Most popular themes like Astra, OceanWP, and Storefront work without any issues.
What is the difference between WPC Product Timer and WPC Countdown Timer?
WPC Product Timer works in the backend to control time-based product actions such as setting sale prices, managing stock status, and scheduling visibility. WPC Countdown Timer is a front-end display plugin that shows the visual ticking clock on your product pages. For the full experience — backend control plus a visible timer — you should install both free plugins together.
Can I customise the appearance of the countdown timer?
Yes. The plugin offers a range of customisation options including font size, colour scheme, and label text. In the premium version, you also get full control over the exact position of the timer on single product pages, such as placing it before or after the Add to Cart button.
How do I track whether my countdown timers are actually increasing sales?
The best approach is to compare conversion rates during timed sale periods versus non-sale periods using WooCommerce’s built-in reports or Google Analytics. Some countdown plugins also include basic built-in analytics showing views, clicks, and conversion data for your timer campaigns.
Final Thoughts
Thanks for reading all the way through! Adding a free WooCommerce sales countdown timer is honestly one of the easiest wins you can get for your online store — it takes less than ten minutes to set up and can make a real difference to your conversion rate during sale periods. I’ve put together a full video tutorial walking through the entire process step by step, so if you prefer to watch rather than read, head over to my YouTube channel and check that out. If you have any questions about how to set this up on your specific WooCommerce store, drop a comment below — I read every one. And if you’d like me to set this up for you directly, feel free to reach out through the contact page on paramfreelance.com. I’m always happy to help.
I hope that this article on How to install Free WooCommerce Sales Countdown Timer plugin will help you. Read more articles on WooCommerce Tutorials.
Do not forget to subscribe to our Quick Tips Youtube Channel for upcoming videos on Website Design, WordPress Tutorials, Elementor, and WooCommerce tutorials.