Table of Contents
Why Customize Your WooCommerce My Account Page
Most WooCommerce store owners put all their energy into the shop page, the product pages, and the checkout. The My Account page gets ignored. But think about it — this is the page your logged-in customers visit every time they want to check an order, update their address, or manage their account details. It is a high-traffic, high-trust page.
A well-designed My Account page does several things for your business:
- It reinforces your brand identity with consistent colours, fonts, and layout
- It improves the customer experience and makes navigation easier
- It builds trust, which directly impacts repeat purchases
- It gives you a place to showcase promotions, upsells, or helpful links
- It makes your store look and feel more professional compared to competitors
The default WooCommerce My Account page is functional, but it is also completely generic. Every store running WooCommerce out of the box has the same page. Customizing it with Elementor takes maybe an hour and the difference is significant.
What You Need Before You Start
Before you jump in, make sure you have these three things in place:
- A WordPress website with WooCommerce installed and activated
- The Elementor plugin installed (the free version works for basic customization; Elementor Pro gives you more advanced template and theme builder features)
- A WooCommerce My Account widget — either from Elementor Pro’s built-in WooCommerce widgets or a free/paid Elementor addon that provides one
If you do not have Elementor Pro, do not worry. There are free addon plugins like ShopLentor (formerly WooLentor) that add a My Account widget to the free version of Elementor. I will cover both approaches in this tutorial.
How to Install WooCommerce and Elementor
If you have not already set up WooCommerce and Elementor, here is how to do it quickly.
Install WooCommerce
- Go to your WordPress dashboard and navigate to Plugins > Add New
- Search for WooCommerce
- Click Install Now, then click Activate
- Follow the WooCommerce setup wizard to configure your store basics — currency, address, payment methods, and shipping
Once WooCommerce is active, it automatically creates several pages for you including the My Account page. You can find it under WooCommerce > Settings > Advanced to confirm the page assignment.
Install Elementor
- Go to Plugins > Add New in your WordPress dashboard
- Search for Elementor
- Click Install Now, then Activate
- If you have purchased Elementor Pro, upload the plugin zip file under Plugins > Add New > Upload Plugin and activate it with your license key
The free version of Elementor is perfectly fine for basic My Account page customization. Elementor Pro unlocks the Theme Builder, which gives you more control over WooCommerce templates and display conditions.
Step-by-Step: Creating the My Account Page Template in Elementor
There are two main methods to customize the WooCommerce My Account page with Elementor. The first uses the Elementor Theme Builder (requires Elementor Pro). The second uses a My Account widget from a free addon plugin and works with the free version of Elementor. I will walk you through both.
Method 1: Using Elementor Pro Theme Builder
- In your WordPress dashboard, go to Templates > Add New
- Select the template type as Single, then choose My Account from the dropdown
- Give your template a name — something like Custom My Account Page — and click Create Template
- The Elementor editor will open. Start designing your layout using the drag-and-drop interface
- Add the WooCommerce My Account widget from the Elementor widget panel. This widget displays all the account tabs including Orders, Downloads, Addresses, Account Details, and Logout
- Customize the layout — you can choose between a vertical or horizontal tab layout
- Style the colours, fonts, borders, and spacing to match your brand
- Click Publish. Elementor will prompt you to set the display conditions. Choose Your Entire Site or specifically target the My Account page
Once published, your custom template will automatically replace the default WooCommerce My Account page.
Method 2: Using a Free Addon Plugin (No Elementor Pro Required)
If you do not have Elementor Pro, you can use a free plugin like ShopLentor to add a My Account widget to the standard Elementor editor.
- Go to Plugins > Add New and search for ShopLentor
- Install and activate the plugin
- Go to Pages > Add New and create a new page. Name it something like My Account Custom
- Click Edit with Elementor to open the page in the Elementor editor
- Search for the My Account widget in the Elementor panel on the left
- Drag and drop the widget onto your canvas
- You will immediately see the My Account tabs appear with default styling
- Customize it from the Content and Style tabs in the left panel
- Publish the page
- Go to WooCommerce > Settings > Advanced and assign this new page as your My Account page
This method works well and costs nothing extra. When I set this up for budget-conscious clients, this is exactly the approach I use.
Designing and Styling the My Account Page
Once your template or page is open in Elementor, here is what you can customize on the My Account widget to make it look sharp and on-brand.
Layout and Navigation Tabs
From the Content tab of the My Account widget, you can:
- Switch between a vertical sidebar layout and a horizontal top-navigation layout
- Reorder or rename the navigation tabs (Orders, Downloads, Addresses, etc.)
- Show or hide specific tabs based on your store’s needs
- Adjust the spacing between tabs using the spacing slider
Colours and Typography
From the Style tab you can control:
- Background colour for the entire widget, the navigation panel, and the content area
- Tab text colour for normal, hover, and active states
- Active tab indicator colour — this is the highlight that shows which tab the customer is currently on
- Font family, font size, font weight, and line height for all text elements
- Link colours and link hover colours throughout the page
Borders and Spacing
Clean spacing makes a huge difference to how professional a page looks. In the Style tab you can set:
- Border type (solid, dashed, dotted, or none) and border radius for tabs and content areas
- Box shadow for the navigation panel or content container
- Padding inside each tab and the overall widget
- Row gap between navigation items
A little padding and a subtle border radius can transform a plain account page into something that looks really polished.
Styling the Forms
The My Account page includes several forms — the Billing Address form, the Shipping Address form, and the Account Details form. The Style tab lets you style all of these consistently:
- Input field background colour, border, and padding
- Label text colour and typography
- Submit button background colour, text colour, hover state, and border radius
- Heading colour and typography for each form section
Make sure your form styling matches the rest of your website. Inconsistent form styles are one of the most common things I fix when I take over a WooCommerce build from someone else.
Making the Page Mobile Responsive
A lot of your customers will log in to their accounts on a mobile device, especially if they are checking order status after receiving a dispatch notification. Elementor makes it easy to check and adjust your My Account page layout for different screen sizes.
- In the Elementor editor, click the responsive mode icons at the bottom of the screen — Desktop, Tablet, and Mobile
- Switch to Tablet view and check how the navigation tabs sit. A vertical layout often works better on tablet
- Switch to Mobile view. If the horizontal tab layout looks cramped, switch it to vertical or a stacked accordion style
- Adjust font sizes, padding, and button sizes specifically for mobile without affecting the desktop layout — Elementor applies the changes only to the breakpoint you are currently editing
- Always preview on an actual mobile device before publishing, not just the Elementor mobile preview
In my experience, the My Account page is one that people rarely test on mobile. Do not make that mistake — it is worth five minutes to check.
How to Assign the Custom Template in WooCommerce
If you used the Elementor Pro Theme Builder method, Elementor handles the assignment automatically when you set display conditions. If you used the free addon method and created a standalone page, you need to assign it manually.
- Go to WooCommerce > Settings in your WordPress dashboard
- Click on the Advanced tab
- Find the My Account page dropdown
- Select your newly created custom page from the dropdown
- Click Save changes
From this point on, when any logged-in customer visits your My Account page, they will see your custom Elementor design instead of the default WooCommerce layout.
Performance Tips for Your Custom My Account Page
Customizing your My Account page is great, but you do not want it to slow your store down. Here are the things I always check after building a custom My Account page for a client:
- Use a caching plugin like WP Rocket or LiteSpeed Cache and make sure the My Account page is excluded from caching (it is a dynamic, logged-in user page and should never be cached)
- Optimize any images or icons you add to the page — use WebP format and compress them before uploading
- Do not load too many extra scripts on this page. Each addon widget you add can bring its own CSS and JavaScript. Keep it simple
- Use Elementor’s built-in Asset Loading settings to prevent unused widget CSS and JS from loading across your site
- Run a page speed test on your My Account page specifically using Google PageSpeed Insights after you publish
The goal is a page that loads fast and feels smooth. A slow account page frustrates returning customers more than a slow homepage.
Adding Custom Fields to the My Account Page
Sometimes a client wants to display extra customer information on the My Account page — things like a membership level, a loyalty points balance, or a custom profile field. You can do this by combining Elementor with a custom fields plugin.
Plugins like Advanced Custom Fields (ACF) or Custom User Meta let you create extra fields attached to user accounts. Once you have created those fields and collected the data, Elementor’s dynamic tags feature lets you display that data on the My Account page template.
For example, if you created a custom user field called loyalty_points using ACF, you can add a text widget in Elementor, click the dynamic tag icon, and pull that field value directly into the page. The customer will see their personal loyalty points balance every time they log in.
This is an intermediate-level feature, but it is very powerful for membership sites, subscription stores, and reward-based shops.
How to Revert to the Default My Account Page
If something goes wrong or you just want to go back to the original WooCommerce My Account page, it is easy to do:
- Go to WooCommerce > Settings > Advanced
- Find the My Account page dropdown
- Change it back to the original My Account page that WooCommerce created during setup
- Click Save changes
Your custom Elementor page will still exist as a draft or published page — it just will not be assigned as the active My Account page anymore. You can delete it, keep it as a backup, or continue editing it before reassigning it.
Frequently Asked Questions
Can I customize the WooCommerce My Account page without Elementor Pro?
Yes, you can use the free version of Elementor combined with a free addon plugin like ShopLentor. The ShopLentor plugin adds a My Account widget to Elementor’s free widget panel, which gives you full styling control without needing Elementor Pro.
Will customizing the My Account page affect WooCommerce functionality?
No, as long as you keep the core My Account widget on the page, all WooCommerce functionality stays intact. The widget handles all the backend logic for orders, addresses, and account settings. You are only changing the visual presentation, not the underlying function.
How do I make the WooCommerce My Account page mobile friendly in Elementor?
Use Elementor’s responsive mode controls at the bottom of the editor to switch between Desktop, Tablet, and Mobile views. You can adjust layout, font sizes, and spacing independently for each breakpoint without affecting the other views.
Can I add custom fields to the WooCommerce My Account page in Elementor?
Yes. You can create custom user meta fields using a plugin like Advanced Custom Fields (ACF) and then display those field values on the My Account page template using Elementor’s dynamic tags feature. This is great for showing loyalty points, membership levels, or any custom user data.
Does customizing the My Account page slow down my WooCommerce store?
It can if you add too many widgets and scripts. To keep it fast, exclude the My Account page from caching (since it is a dynamic logged-in page), optimize any images you add, and use Elementor’s asset loading settings to prevent unused CSS and JS from loading across your site.
How do I go back to the default WooCommerce My Account page?
Go to WooCommerce > Settings > Advanced and change the My Account page dropdown back to the original page WooCommerce created during setup. Click Save changes and the default layout will be restored immediately.
Do I need to assign the custom page in WooCommerce settings after building it in Elementor?
If you used Elementor Pro’s Theme Builder with display conditions, it is assigned automatically. If you created a standalone page with a free addon plugin, you need to manually assign it under WooCommerce > Settings > Advanced > My Account page.
Final Thoughts
Thanks for reading all the way through — I hope this tutorial makes the whole process feel straightforward. Customizing the WooCommerce My Account page with Elementor is one of those things that looks complicated but really only takes an hour once you know the steps. I have done it on hundreds of WooCommerce builds and the difference it makes to the customer experience is always worth it.
If you are more of a visual learner, make sure you watch the detailed video tutorial I have put together to go along with this article — I walk through the whole thing on screen so you can follow along in real time.
Have a question about your specific setup? Drop it in the comments below — I read every single one and I am always happy to help. And if you would rather have someone set this up for you properly, feel free to reach out to me directly at paramfreelance.com. I build clean, fast websites for local businesses every day and I would love to help yours look great.
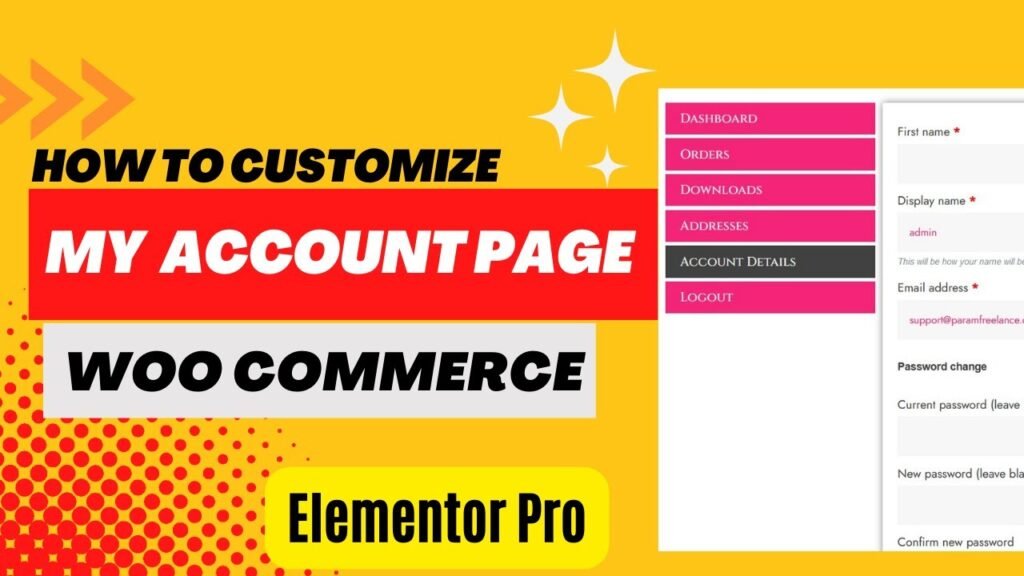
I hope that this article on How to customize WooCommerce My Account Page with Elementor will help you. Read more articles on Elementor Tutorials.
Do not forget to subscribe to our Quick Tips YouTube Channel for upcoming videos on Website Design, WordPress Tutorials, Elementor, and WooCommerce tutorials