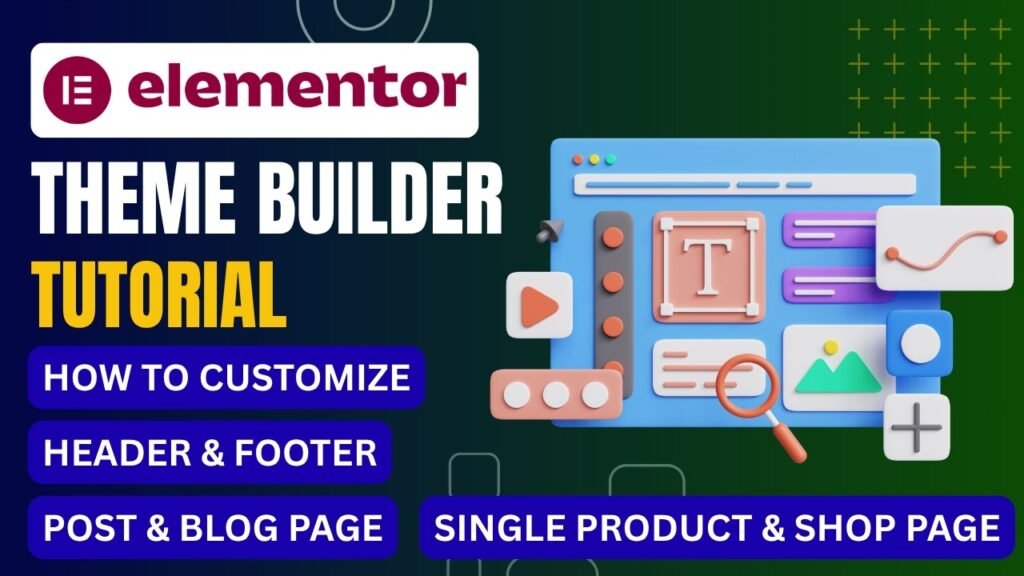
If you have ever wanted complete visual control over every part of your WordPress website — from the header your visitors see first to the footer they scroll to last — the Elementor Theme Builder is the tool that makes it possible. Available as part of Elementor Pro, the Theme Builder lets you design headers, footers, single post templates, blog archive pages, WooCommerce product pages, custom 404 pages, and search results pages using the same visual drag-and-drop editor you already use to build regular pages — all without touching a line of PHP or CSS. In this complete Elementor Theme Builder tutorial, you will walk through every template type step by step, learn how display conditions work, and discover the tips and techniques that separate beginner setups from professional-grade WordPress websites.
Watch step by step video tutorial: https://youtu.be/NWUum7N3XlI
Table of Contents
What Is the Elementor Theme Builder?
The Elementor Theme Builder is a feature included with Elementor Pro that extends the power of the Elementor page builder beyond individual pages. While the free version of Elementor lets you design the content area of pages and posts, the Theme Builder takes over the structural elements that traditionally required theme code to modify: the header, footer, sidebar, single post layout, archive pages, and WooCommerce store pages.
Before tools like the Theme Builder existed, WordPress website owners who wanted a custom header had two options: they could hire a developer to modify theme PHP files, or they could switch to a different theme that happened to support the header layout they wanted. Both approaches were costly, inflexible, and time-consuming. Every design change required either code or a new theme.
The Elementor Theme Builder changes this paradigm entirely. Every structural element of your website becomes a visual canvas. You design what you want to see, set conditions that control where it appears, and publish — with no code required and no theme switching necessary. It works alongside virtually any WordPress theme, and is fully optimized for the lightweight Hello theme that Elementor provides for free.
What Makes Theme Builder Different from Regular Elementor Pages?
Regular Elementor pages contain static content that you write directly. Theme Builder templates are different: they use dynamic content through Elementor’s Dynamic Tags system. Instead of typing your post title into a heading widget, you connect that heading widget to the Dynamic Post Title field. Instead of uploading a static image, you connect an image widget to the Dynamic Featured Image field. This means one template automatically pulls the correct content for any post or page it is applied to — creating a consistent design with unique content across your entire site.
Is Theme Builder Part of the Free Version?
No. The Elementor Theme Builder is a premium feature that requires an active Elementor Pro subscription. Elementor Pro is available as an annual subscription starting with a single-site plan. However, the Hello theme and the basic Elementor page builder plugin are both free. Many users run the free version for page building and upgrade to Pro specifically to access the Theme Builder, which is one of the most compelling reasons to do so.
Elementor Theme Builder Template Types
The Theme Builder organizes its capabilities into distinct template types, each designed for a specific part of your website. Understanding what each type controls is essential before diving into the setup process.
Template Type | What It Controls | Requires WooCommerce? |
Header | Top navigation area across entire site | No |
Footer | Bottom area across entire site | No |
Single Post | Individual blog post layout and styling | No |
Single Page | Individual page layout and styling | No |
Archive | Blog listing, category, tag, and search result pages | No |
404 Page | Custom ‘Page Not Found’ design | No |
Search Results | Search results page layout | No |
Single Product | Individual WooCommerce product page | Yes |
Product Archive | WooCommerce shop and category listing pages | Yes |
Each of these template types uses its own set of widgets appropriate for that context. Headers have navigation menu widgets, logo widgets, and cart widgets. Single Post templates have post title, post content, and post meta widgets. WooCommerce templates have product image, add-to-cart, and product gallery widgets. The widget palette adapts to the template type you are working in.
Requirements: What You Need Before Getting Started
Before opening the Theme Builder for the first time, make sure your WordPress setup meets these requirements to ensure the smoothest possible experience.
Technical Requirements
- WordPress 6.4 or higher (WordPress 6.9+ recommended)
- Elementor (free) plugin installed and active
- Elementor Pro plugin installed and active with a valid license
- PHP 7.4 or higher (PHP 8.1+ recommended for performance)
- A compatible WordPress theme — Hello Theme by Elementor is strongly recommended for the cleanest Theme Builder experience
- For WooCommerce templates: WooCommerce 3.4 or higher installed and active
Preparing Your Theme
The most common issue new Theme Builder users encounter is their existing theme overriding or conflicting with the custom header and footer they design. To prevent this, you should disable your theme’s built-in header and footer functionality before activating Theme Builder templates. Most themes provide an option for this in their customizer or theme options panel. Themes like Hello Theme, GeneratePress, Astra, and OceanWP all have straightforward settings for disabling the default header and footer so Theme Builder takes over cleanly.
If you are using the Hello Theme, no additional configuration is needed — it is designed specifically for Elementor and has no built-in header or footer to conflict with.
How to Build a Custom Header with Elementor Theme Builder
Your website header is the first visual element every visitor encounters. Getting it right — with the correct logo placement, navigation structure, and responsive behavior — sets the tone for the entire site. Here is the complete process.
Step 1: Access the Theme Builder
- Log in to your WordPress dashboard
- In the left sidebar, navigate to Templates > Theme Builder
- You will see the Theme Builder interface with tabs for each template type
- Click on the Header tab in the left panel
- Click the Add New button in the top right corner
Step 2: Name Your Header and Choose a Starting Point
A dialog box appears asking you to name your header template. Give it a descriptive name like “Main Site Header” or “Homepage Header” — this helps when you have multiple header variants. Click Create Header.
The Elementor Template Library opens automatically. You have two choices:
- Use a pre-designed header template: Browse the library and click on any header design you like. Click Insert to load it into the editor. This is the fastest path to a functional header.
- Build from scratch: Close the library window. You will land on a blank canvas with the standard Elementor editor. This gives you complete design freedom.
Step 3: Design Your Header
Whether you started from a template or a blank canvas, the Elementor editor works exactly as it does for regular pages. The key widgets you will use most often in headers include:
- Site Logo widget: Displays your WordPress site logo (set under Appearance > Customize > Site Identity). This widget automatically updates if you ever change your logo — no need to edit every header template.
- Nav Menu widget: Displays your WordPress navigation menus. You can control typography, hover effects, dropdown styling, and the hamburger menu breakpoint for mobile.
- Button widget: Perfect for CTAs like “Get a Quote” or “Shop Now” in your header.
- Search Form widget: A clean inline search field for sites where search is a primary navigation tool.
- WooCommerce Menu Cart widget: Displays a cart icon with item count for WooCommerce stores — essential for any online shop.
- Site Title widget: An alternative to the Site Logo that displays your site name as text.
Step 4: Configure Sticky Header Behavior
One of the most requested header features is the sticky header — one that remains fixed at the top of the screen as the user scrolls. In Elementor, you configure this at the Section level. Click on the outermost section of your header (the full-width container), then go to the Advanced tab in the left panel and find the Motion Effects section. Enable Sticky, set it to Top, and choose whether you want it to appear on desktop only, mobile only, or both.
For a more refined sticky effect, you can configure the header to shrink as it becomes sticky. This involves creating two separate header states — a tall normal state and a shorter sticky state — and toggling visibility. While more complex to configure, the result is a highly professional header behavior that many premium websites use.
Step 5: Make Your Header Responsive
Every Elementor header design should be checked and adjusted for mobile and tablet. Use the responsive preview buttons at the bottom of the editor (desktop, tablet, mobile icons) to switch views. For mobile, the Nav Menu widget automatically converts to a hamburger menu when the screen width drops below your configured breakpoint. You can control the hamburger icon style, menu open/close animation, and mobile menu background color all within the Nav Menu widget settings.
For complex headers, some designers create entirely separate header templates for desktop and mobile, then use display conditions to show each version only on its respective device size. This approach gives maximum control at the cost of maintaining two separate templates.
Step 6: Publish and Set Display Conditions
When your header looks exactly as you want it on all device sizes, click Publish. A conditions window appears automatically. To apply this header across your entire website, leave the default selection of Entire Site and click Save and Close. Your new Elementor-built header will immediately replace your theme’s default header across all pages.
How to Build a Custom Footer with Elementor Theme Builder
The footer creation process mirrors the header workflow closely. Navigate to Templates > Theme Builder, click the Footer tab, and click Add New. Name your footer template and choose whether to start from a pre-designed template or a blank canvas.
Anatomy of an Effective Footer
Great footers serve both design and functional purposes. The most common footer elements include:
- Footer widget areas: Multiple columns with your top-performing links, recent posts, or other widget content
- Contact information: Address, phone number, email address, and social media icons
- Navigation links: Privacy policy, terms of service, sitemap, and other utility pages
- Copyright text: Typically the lowest element in the footer
- Newsletter signup form: A final conversion opportunity for first-time visitors
- Payment method icons: Essential for WooCommerce stores to establish trust
Using the Copyright Widget
The Text widget combined with the dynamic Copyright shortcode is the cleanest way to add an auto-updating copyright notice to your footer. Rather than manually updating the year each January, you use Elementor’s dynamic tag to insert the current year automatically. In any Text widget, type your copyright text, then use the dynamic tags button to insert the Current Date/Year value. The year will update automatically on every page load.
Footer Sticky and Reveal Effects
For a more sophisticated footer experience, Elementor supports footer reveal effects where the footer appears to slide up from behind the main content as the user scrolls to the bottom of the page. This is configured through custom CSS on the footer section — a popular technique among Elementor-experienced designers who want to differentiate their sites from standard footer presentations.
How to Create a Single Post Template
The Single Post template controls how every individual blog post on your site looks. Without a custom template, your posts use whatever layout your theme provides — which is often generic and does not align with the rest of your Elementor-designed site. A custom Single Post template created in the Theme Builder lets you design the complete post reading experience.
Step 1: Create a New Single Post Template
- Go to Templates > Theme Builder in your WordPress dashboard
- Click the Single Post tab in the left panel
- Click Add New and name your template (for example, “Blog Post Template”)
- Click Create Template and choose from the library or start from scratch
Step 2: Add Dynamic Content Widgets
Unlike headers and footers which contain mostly static elements, Single Post templates are built primarily with dynamic widgets that pull content automatically from each post. The essential widgets for a single post template include:
- Post Title widget: Displays the current post’s title dynamically
- Featured Image widget: Shows the post’s featured image at the size you configure
- Post Content widget: The core widget that displays all the post’s actual written content
- Post Info widget: Shows post metadata like author, date, category, tags, and reading time
- Post Navigation widget: Previous and next post links for keeping readers on your site
- Post Comments widget: The comments section with your configured styling
- Author Box widget: A styled author bio section with photo, name, and description
- Related Posts widget: Displays posts in the same category to extend reading sessions
Step 3: Design the Reading Experience
The Single Post template is where you establish your site’s reading typographic hierarchy. Configure the Post Content widget with your preferred body font family, size, line height, and paragraph spacing. Consider setting a maximum content width (around 680–720px is optimal for reading comfort) with centered alignment to prevent content from stretching too wide on large monitors.
The table of contents, pull quotes, and custom callout boxes can also be designed here. While the content of these elements will vary per post, the visual styling and positioning comes from your template design.
How to Build a Blog Archive Template
An Archive template controls how your blog listing pages look — the page visitors see when they browse your blog, click on a category, explore a tag, or view posts by a specific author. It is the “grid of cards” or “list of posts” view that serves as your content discovery interface.
Understanding Archive Page Structure
An Archive template typically consists of two parts: the archive header (showing the archive title, description, and possibly a hero image for the category) and the post loop (the repeating grid or list of post cards). Elementor handles both through dedicated archive widgets.
Creating an Archive Template Step by Step
- Go to Templates > Theme Builder and click the Archive tab
- Click Add New, name your template, and choose whether to use a library template or start fresh
- In the editor, use the Archive Title widget to display the current archive’s name dynamically (“Technology”, “Design”, etc.)
- Add the Archive Description widget below the title to show the optional category description if one has been set in WordPress
- The core widget for archive pages is the Posts widget (or Loop Grid widget). This creates the repeating card layout that displays each post
- Configure the Posts widget: number of columns, gap between cards, how many posts to show per page, and whether to use infinite scroll or numbered pagination
- Design the individual post card within the Posts widget: featured image, title, excerpt, date, category, and read more button
Dynamic Archive Page Tip
A powerful technique for category archive pages is to create a custom featured image field for each category using Advanced Custom Fields (ACF). You can then connect the archive header’s background image to this ACF field, so each category archive automatically displays a unique banner image that you have assigned to that category — creating a visually distinct experience for each content vertical on your site.
How to Customize WooCommerce Pages with Theme Builder
The WooCommerce builder capabilities within the Elementor Theme Builder give you visual control over your entire online store. This is one of the most valuable features for e-commerce sites, as default WooCommerce templates are notoriously difficult to style with standard CSS alone.
Single Product Template
The Single Product template controls how each individual product page looks. Creating one follows the same process as other template types:
- Go to Templates > Theme Builder and navigate to Single Product
- Add a new template and choose a prebuilt block or start from scratch
- The WooCommerce-specific widgets become available: Product Title, Product Price, Product Images (with gallery), Add to Cart, Product Rating, Product Description, Product Meta, Product Stock, and Product Tabs
- Arrange these widgets according to your preferred product page layout — the conventional two-column layout with images left and purchase details right is a strong default
- Add social sharing buttons, related products, and product review sections below the main product area
- Publish and set conditions to All Products or to specific product categories
Product Archive / Shop Page Template
The Product Archive template controls your main shop page and all product category listing pages. This is where you design how products appear in grid or list format. Key WooCommerce-specific widgets for this template include the Products widget (for the product grid), Archive Title, WooCommerce Breadcrumbs, WooCommerce Notices, and Order By widget (the sorting dropdown).
One of the most impactful customizations for WooCommerce archive templates is designing a custom product card. The default WooCommerce product cards are functional but generic. With Elementor, you can add hover effects, quick-view buttons, badge overlays for sale or new items, and custom color schemes that align with your brand identity.
How to Design a Custom 404 Page
A custom 404 page transforms a frustrating dead end into a positive brand experience. Visitors who land on broken links or mistyped URLs will see your custom design instead of a generic browser error or your theme’s default minimal 404 layout. Done well, a custom 404 page can redirect visitors back into your site and save a significant percentage of otherwise-lost traffic.
Building Your 404 Template
- Go to Templates > Theme Builder and click the 404 Page tab
- Click Add New and name your template
- Design a page that communicates the error clearly but with personality
- Include a large friendly heading like “Oops! That page does not exist”
- Add your site logo and main navigation so visitors can orient themselves
- Include a Search widget prominently so visitors can look for what they need
- Add links to your most popular pages or categories
- Set display conditions to 404 Page and publish
The best 404 pages balance humor or brand personality with functional navigation options. Adding a search bar, links to popular posts, and a clear path back to the homepage will recover a meaningful percentage of visitors who would otherwise leave the site entirely.
Mastering Display Conditions in Elementor Theme Builder
Display conditions are one of the most powerful and most misunderstood features in the Elementor Theme Builder. They determine where each template is applied on your website, and mastering them is what separates basic Theme Builder usage from advanced professional implementations.
Every time you publish a Theme Builder template, the display conditions window appears. This window asks: where should this template be displayed? The choices range from Entire Site (apply everywhere) to extremely specific conditions like a single named post or a specific product category.
Condition | What It Does | Best Used For |
Entire Site | Applies template to every page | Global headers and footers |
All Singular | All single posts, pages, and CPTs | Universal single post layouts |
Front Page | Homepage only | Custom homepage header |
In Category | All posts in a specific category | Category-specific header variants |
Search Results | Search result pages only | Custom search experience |
404 Page | Error pages only | Custom 404 error page |
All WooCommerce | All WooCommerce store pages | Shop-wide WooCommerce styling |
Product Category | Specific product category pages | Category-specific shop layouts |
How Display Conditions Stack
Display conditions can be combined and layered. You can set one header template to appear on the entire site and then set a second header template with a more specific condition — for example, “In Category: News” — and Elementor will apply the more specific template to pages matching the narrower condition. This allows you to create header variants for specific sections of your site without disrupting the global header.
Include and Exclude Rules
Every display condition can be set as Include (show on these pages) or Exclude (do not show on these pages). This lets you create rules like “Show on Entire Site EXCEPT the Homepage” — perfect for templates like promotional banners that you want everywhere except on a specific page you have already designed.
Practical Display Condition Strategies
- Global Header + Exception: Set your main header to Entire Site, then create a second stripped-down header for landing pages and set it to Include: Landing Pages
- Category-Specific Archive Headers: Create a hero header variant for each major content category using In Category conditions
- WooCommerce-Only Cart Header: Create a header variant with the WooCommerce cart icon displayed prominently, and apply it only to WooCommerce pages
- Blog Post Footer: Create a footer with related post suggestions and email signup CTA, and apply it only to single blog posts
Tips, Best Practices & Common Mistakes to Avoid
Use the Hello Theme for the Cleanest Experience
The Hello Theme by Elementor is a completely minimal WordPress theme with zero built-in styling. It provides no header, no footer, no typography presets, and no color schemes — it is a blank slate designed specifically for Elementor to take full control. Building on Hello Theme eliminates the most common source of Theme Builder conflicts: the active theme trying to render its own header or footer on top of your Elementor designs. For new projects, Hello Theme should be your default choice.
Always Work on Staging First
Theme Builder changes are live the moment you publish them with a display condition. A mistake in your header or footer can affect every page on your site simultaneously. Before making significant Theme Builder changes on a production site, use a staging environment where you can test without risk. Most quality WordPress hosts provide one-click staging environments.
Build a Global Stylesheet Before Starting Templates
Elementor Pro includes a Global Stylesheet feature under Elementor > Site Settings > Global Colors and Global Typography. Configure your brand colors and font pairings here before building any Theme Builder templates. When your template elements reference Global Colors instead of hardcoded hex values, changing your brand color later updates every element across every template automatically — a massive time-saver.
Use the Preview Feature Extensively
When designing archive and single post templates, always use the preview feature to see how your template looks with real content. At the bottom left of the Elementor editor, there is a gear icon where you can select which specific post, page, or archive to preview your template against. Switch between several different posts to ensure your template works well across varied content lengths, featured images of different dimensions, and different amounts of post metadata.
Common Mistakes to Avoid
- Forgetting to disable the theme’s header/footer: The single most common problem. Always disable your active theme’s default header and footer before publishing Theme Builder replacements.
- Not setting display conditions: Templates without display conditions are invisible. Always configure at least one condition before publishing.
- Using hardcoded text instead of dynamic tags in post templates: Hardcoding a post title or date defeats the purpose of a reusable template. Always use dynamic tags for any content that varies between posts.
- Not testing on mobile: Designs that look perfect on desktop often need adjustment on mobile. Test every template at all responsive breakpoints before publishing.
- Creating too many template variations: Start simple. Build one global header, one global footer, and one single post template. Add variations only when you have a specific need for them.
Frequently Asked Questions
Is Elementor Theme Builder free or does it require Elementor Pro?
The Elementor Theme Builder requires Elementor Pro. The free version of Elementor only allows you to design the content area of individual pages and posts. The Theme Builder — which gives you control over headers, footers, and all other structural templates — is a Pro-exclusive feature. Elementor Pro is available as an annual subscription with single-site and multi-site license options.
Can I use Elementor Theme Builder with any WordPress theme?
Yes, the Theme Builder works with virtually any WordPress theme. However, for the best and most conflict-free experience, Elementor recommends using their free Hello Theme, which is built specifically to provide a blank slate for Theme Builder to work with. If you use another theme, you may need to disable its built-in header and footer in the theme’s settings to prevent overlap with your Theme Builder designs.
How do I remove my theme’s default header and replace it with an Elementor header?
After designing and publishing your Elementor header with a display condition, you also need to disable your active theme’s header output. Most themes provide a setting in the WordPress Customizer or their own theme options panel to hide or disable the default header. If your theme does not have this option, a small CSS rule to hide the default header class or a snippet in your theme’s functions.php file will accomplish the same result. With Hello Theme, this step is not needed since it has no default header.
Can I have different headers on different pages?
Yes, this is one of the most powerful capabilities of the display conditions system. You can create multiple header templates and assign each one to specific pages, categories, or post types. Elementor applies the most specific matching condition when multiple templates could apply. For example, you could have a global header for the entire site and a separate simplified header for all landing pages — and both will work correctly simultaneously.
Do I need WooCommerce installed to use the product page templates?
Yes, the WooCommerce-specific template types (Single Product and Product Archive) only appear in the Theme Builder when WooCommerce is installed and active on your WordPress site. The WooCommerce-specific widgets (Product Images, Add to Cart, Product Rating, etc.) are also WooCommerce-dependent. All other template types — Header, Footer, Single Post, Archive, 404, and Search Results — work without WooCommerce.
What is the difference between a Page Template and a Single Post Template in Theme Builder?
In Elementor Theme Builder, Single Post templates apply to your blog posts (post type: post) and Single Page templates apply to your WordPress pages (post type: page). They work identically in terms of how you build and configure them, but they are applied to different content types. If you want the same layout for both posts and pages, you can set the same template’s display condition to cover All Singular content, which applies to both.
Can I export and import Theme Builder templates to use on other sites?
Yes. Each Theme Builder template can be exported as a JSON file from the Template Library (Templates > Saved Templates). You can then import this file on any other WordPress site running Elementor Pro. This makes it very efficient to build a standard template library once and deploy it across multiple client sites or your own projects. Template kits also bundle complete sets of Theme Builder templates for an entire site design that can be installed at once.
Conclusion
The Elementor Theme Builder is one of the most transformative tools available to WordPress website owners and designers. By giving you complete visual control over every structural element of your site — headers, footers, post layouts, archive pages, WooCommerce templates, 404 pages, and more — it effectively frees you from the constraints of your WordPress theme and makes every design decision a visual one.
Whether you are building your first website or managing dozens of client projects, the workflow is the same: design your template in the visual editor, add dynamic content widgets where content should vary between pages, configure display conditions to control where the template appears, and publish. The result is a completely cohesive, fully branded website where every element — from the first navigation item in the header to the copyright notice in the footer — reflects your exact design intention.
The concepts covered in this tutorial — template types, dynamic tags, display conditions, sticky headers, WooCommerce integration, and best practices — give you the foundation to build any WordPress website structure you can envision. The only limit is your design imagination.
Ready to take full control of your WordPress website design? Start with the Hello Theme, activate Elementor Pro, and follow this tutorial to build your custom header first. Once you experience the freedom of designing your entire site visually, you will never go back to theme-based limitations. Have questions about a specific template type or display condition? Drop them in the comments and we will help you figure it out.