Want to create custom Gutenberg blocks plugin for WordPress without spending hundreds of dollars on premium tools — or months learning React? In this complete guide, you’ll discover exactly how to use Claude AI to build a fully working, free WordPress Gutenberg addons plugin packed with 15 professional custom blocks. Whether you’re a blogger, freelance designer, or WordPress beginner, this step-by-step tutorial shows you how AI makes Gutenberg block development accessible to everyone.
Table of Contents
What Is a WordPress Gutenberg Addons Plugin?
A WordPress Gutenberg addons plugin extends the default block editor by adding custom blocks that don’t ship with WordPress out of the box. Think of the standard Gutenberg editor as a starter kit — it gives you paragraphs, headings, images, and buttons. A Gutenberg addons plugin adds everything else: animated counters, pricing tables, testimonial carousels, accordion FAQs, countdown timers, and much more.
Popular commercial options like Spectra, Kadence Blocks, and GenerateBlocks offer these features but often sit behind premium paywalls or come bundled with features you’ll never use. Building your own plugin gives you exactly what you need — nothing more, nothing less — and costs you nothing.
💡 Definition: A Gutenberg addons plugin is a WordPress plugin that registers additional custom blocks for use in the block editor, extending its functionality beyond the default block set.
The Default Gutenberg Editor vs. a Gutenberg Addons Plugin
The default WordPress block editor ships with around 90 core blocks. However, many common design elements — like a star-rated testimonial card, an animated skill progress bar, or a featured pricing table — simply aren’t included. A Gutenberg addons plugin bridges that gap, letting you drop professional design elements onto any page without touching a single line of code in your theme.
Who Needs a Custom Gutenberg Addons Plugin?
- Freelancers building client sites who want branded, reusable blocks
- Bloggers and content creators who want richer page designs
- WordPress agencies looking for a white-label block solution
- Developers who want to learn Gutenberg block development the fast way
Why Build Your Own Plugin Instead of Using a Premium One?
Premium Gutenberg block plugins are powerful, but they come with real trade-offs. Here’s an honest comparison that will help you decide which approach is right for you.
The Cost Problem
Plugins like Spectra Pro, Kadence Blocks Pro, or Stackable Premium charge between $59 and $299 per year. If you manage multiple client sites, those costs multiply fast. Building your own plugin with Claude AI costs nothing — you only need a free Claude account.
The Bloat Problem
Most premium plugins ship 50 to 90 blocks. The reality is that most WordPress sites use fewer than 10 block types regularly. Installing a heavy plugin to use three blocks means your visitors’ browsers load JavaScript and CSS for 80+ blocks they’ll never see. A custom plugin built for your exact needs is leaner and faster.
The Ownership Problem
When you rely on a third-party plugin, your site’s design depends on that plugin’s future. If the developer discontinues it, raises prices, or changes the block structure, your existing pages may break. A plugin you own and control will never be abandoned.
What Is Claude AI and Why Use It for WordPress Development?
Claude AI is a large language model developed by Anthropic. It can read, write, and reason about code across virtually every programming language — including PHP, JavaScript, HTML, and CSS. For WordPress development in particular, Claude has proven exceptionally capable at generating Gutenberg block code, debugging registration issues, and even writing entire plugin file structures from a single detailed prompt.
Claude AI vs. ChatGPT for WordPress Plugin Development
Both tools can write WordPress plugin code, but Claude tends to produce more consistent, error-free JavaScript for Gutenberg block development — especially for the nuanced block validation rules that govern how edit() and save() functions must behave. In our testing across multiple versions of the QT Gutenberg Addons plugin, Claude consistently identified and fixed subtle serialization issues that caused blocks to become unselectable after saving.
Do You Need Coding Experience to Use Claude AI?
No. The approach covered in this tutorial requires zero prior coding experience. You provide Claude with a detailed written prompt — describing exactly what plugin you want, which blocks to include, and what technical rules to follow — and Claude generates all the code. Your role is to copy the output, zip it, and upload it to WordPress.
💡 Claude AI is free to use at claude.ai. A free account gives you enough usage to generate a complete Gutenberg addons plugin in a single conversation.
The 15 Custom Gutenberg Blocks We’re Building
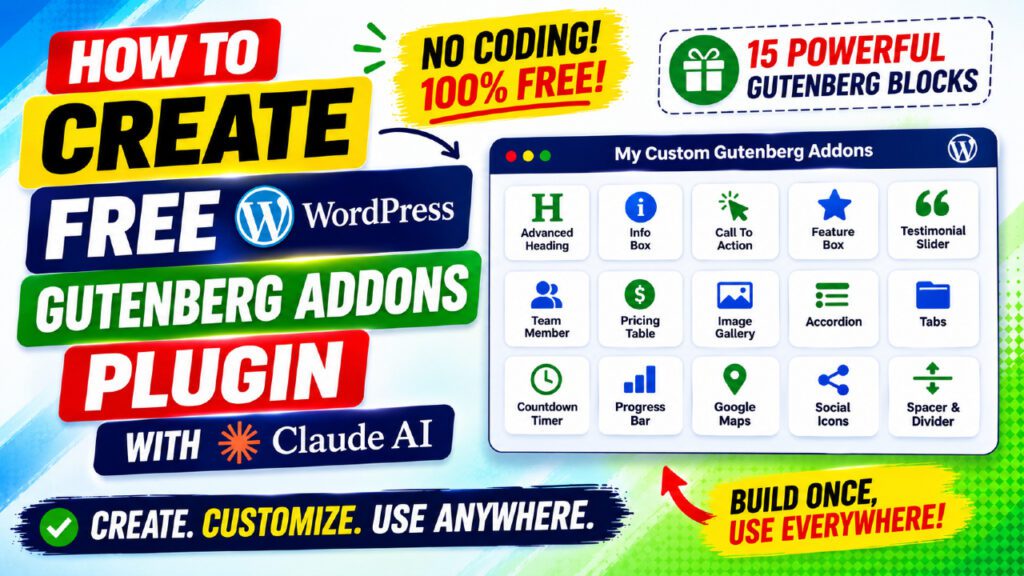
The QT Gutenberg Addons plugin we’re building in this tutorial includes 15 fully customizable, production-ready custom blocks. Each block includes a live preview in the editor, a full set of Inspector Controls for color, style, and content customization, and clean semantic HTML output on the frontend.
Content & Typography Blocks
- Advanced Heading — Gradient text, letter spacing, text shadow, and a decorative separator below the heading. Fully replaces the default heading block with far more design control.
- Info Box — Five pre-styled alert types: Info, Success, Warning, Error, and Tip. Each has custom background, border, and text colors. Includes a dismiss button option.
- Divider — Five line styles including an animated SVG wave. Choose color, thickness, width, alignment, and optional center label text.
Interactive & Animated Blocks
- Counter — An animated number counter that triggers on scroll using IntersectionObserver. Set the target number, prefix, suffix, animation duration, and all colors.
- Countdown Timer — Counts down to any date and time. Includes a native date picker and time picker. Shows days, hours, minutes, and seconds with custom colors.
- Progress Bar — Animated skill progress bars. Multiple bars per block. Scroll-triggered fill animation. Custom bar fill color, track color, label color, and percentage display.
- Accordion / FAQ — Smooth expand/collapse panels with separate color controls for inactive headers, active headers, and body content. Supports multiple-open mode.
- Tabs — Three visual styles: Underline, Boxed, and Pills. Add emoji icons to each tab label. Full color customization for all states.
Layout & Card Blocks
- Button Group — Multiple buttons in one block. Three styles per button: Solid, Outline, Ghost. Individual color control per button. Alignment and gap controls.
- Testimonial — Star rating, avatar initials, quote, name, role, and company. Seven independent color controls. Perfect for social proof sections.
- Icon Box — Feature cards with an emoji icon, title, description, and optional link. Top and Left layout options. Hover lift effect toggle.
- Pricing Table — Feature list with checkmarks and crosses. Featured badge. Highlighted featured plan border. Thirteen separate color controls.
- Image Card — WordPress media uploader integration. Category badge, title, description, and link. Shadow and border radius controls.
- Team Member — WordPress photo upload with avatar-initials fallback. Bio, role, social links for Twitter, LinkedIn, and GitHub.
- Social Links — Eight platforms including Facebook, Twitter, Instagram, LinkedIn, YouTube, and GitHub. Three button styles and three shapes. Per-platform color control.
How to Build the Plugin Step by Step
Here is the exact process we used to build the QT Gutenberg Addons plugin using Claude AI. Follow these steps in order and you’ll have a fully working plugin ready to install in WordPress.
Step 1: Open Claude AI and Start a New Conversation
Go to claude.ai and sign in or create a free account. Start a fresh conversation. Do not use an existing conversation with unrelated context — a clean session gives Claude the clearest focus on your task.
Step 2: Write Your Plugin Prompt
This is the most important step. The quality of your prompt determines the quality of the output. Your prompt must tell Claude:
- The plugin name, version, author, and author URI
- All 15 blocks to build, with their slugs and key features
- The exact technical rules Claude must follow (covered in the next section)
- The expected output format: a downloadable .zip file
A detailed prompt that covers all the critical technical rules is essential. Skipping technical details is the most common reason AI-generated Gutenberg plugins fail. The good news is that we’ve already written this prompt for you — it’s available to download from the link in the YouTube video description.
Step 3: Let Claude Generate the Plugin
After submitting your prompt, Claude will generate all the files for your plugin. This typically takes a few minutes in a single response. Claude will produce:
- The main plugin PHP file
- 15 block.json metadata files
- 15 block index.js JavaScript files
- assets/css/frontend.css and editor.css
- assets/js/frontend.js for interactivity
- A readme.txt and uninstall.php
Step 4: Download the ZIP File
Claude will package everything into a downloadable .zip file. The zip must contain a single root folder named qt-gutenberg-addons/. If Claude delivers individual files instead of a zip, ask it to package them: “Please zip all the files into qt-gutenberg-addons.zip ready for WordPress upload.”
Step 5: Upload and Activate in WordPress
In your WordPress admin panel, go to Plugins → Add New → Upload Plugin. Choose the .zip file and click Install Now. Then click Activate Plugin. All 15 blocks will immediately appear under the “QT Addons” category in the Gutenberg block inserter.
Critical Technical Rules That Make Blocks Work Correctly
This section explains the technical rules that Claude must follow to produce a working plugin. These rules are the result of extensive testing across multiple plugin versions. Understanding them will help you troubleshoot if anything doesn’t work as expected.
Rule 1: Always Use apiVersion 2 in block.json
Every block.json file must declare “apiVersion”: 2. Using version 3 requires a compiled build tool like @wordpress/scripts, which generates a required companion file called index.asset.php. Without a build tool, version 3 blocks will silently fail to register.
{ “apiVersion”: 2, “name”: “qt-addons/counter”, … }
Rule 2: useBlockProps in BOTH edit() and save()
This single rule caused the most persistent bug across all early versions of this plugin. Without useBlockProps, blocks cannot be selected after you click away to another block. The toolbar — Edit, Duplicate, Copy, Delete — will not appear.
useBlockProps is WordPress’s official API that injects a unique block identifier onto the root element. Without it, Gutenberg cannot track which rendered element belongs to which block instance.
var useBlockProps = wp.blockEditor.useBlockProps;
// In edit(): var blockProps = useBlockProps({className:’qt-counter-editor’});
// In save(): var blockProps = useBlockProps.save({className:’qt-counter’});
Rule 3: Only data-* Attributes in save() — No Inline Styles
WordPress’s wp_kses_post HTML sanitizer strips CSS custom properties (like –my-color: #fff) from style= attributes when saving content to the database. This causes block validation failures on page reload.
The solution is to store all dynamic values in data-* attributes in save() and then read them with JavaScript on the frontend to apply styles.
// ❌ Wrong — CSS vars stripped by WordPress sanitizer
return el(‘div’, { style: ‘–qt-bg:#ffffff’ }, children);
// ✅ Correct — data-* attributes survive all sanitization
return el(‘div’, Object.assign({}, useBlockProps.save(), {‘data-bg’: a.bgColor}), children);
Rule 4: Script Registration Priority in PHP
Block registration in PHP reads block.json, which references JavaScript file handles. Those handles must already be registered before the blocks register. Use priority 1 to register scripts and priority 10 to register blocks:
add_action(‘init’, function() { /* register scripts */ }, 1);
add_action(‘init’, function() { /* register blocks */ }, 10);
Rule 5: editorScript Must Be a Handle String, Not a File Path
Using “editorScript”: “file:./index.js” in block.json only works with a build tool that generates index.asset.php. Without that file, the script is silently ignored and the block never appears.
// ❌ Wrong: “editorScript”: “file:./index.js”
// ✅ Correct: “editorScript”: “qt-block-counter”
How to Install the Plugin in WordPress
Installing a custom WordPress plugin from a zip file takes less than two minutes. Here’s the exact process:
- Log in to your WordPress admin dashboard
- Go to Plugins in the left sidebar
- Click Add New Plugin at the top
- Click Upload Plugin
- Click Choose File and select your qt-gutenberg-addons.zip file
- Click Install Now and wait a few seconds
- Click Activate Plugin
- Open any post or page in Gutenberg
- Click the + icon to open the block inserter
- Scroll down or search for “QT” — all 15 blocks appear under the QT Addons category
💡 You need WordPress 6.0 or higher and PHP 7.4 or higher. Check your versions at Dashboard → Updates before installing.
Testing and Customizing Your 15 Blocks
Once the plugin is active, spend a few minutes testing each block to make sure everything works as expected. Here’s what to verify for each block:
Testing Block Selection (The Most Important Test)
Add a Counter block to a page. Configure its settings in the right sidebar. Then click somewhere else on the page to deselect it. Click the Counter block again. If the block toolbar appears above it — with Move, Duplicate, and Delete icons — block selection is working correctly.
If you cannot re-select the block after clicking away, the useBlockProps rule was not followed in the plugin code. In that case, ask Claude to fix the specific block that is failing.
Testing the Countdown Timer
Add the Countdown Timer block. In the Inspector Controls, use the date picker to select a future date and the time picker to select a time. Save the page and view it in a new browser tab. The countdown should be live, updating every second. Test the expired state by selecting a past date.
Testing Scroll-Triggered Animations
The Counter and Progress Bar blocks animate when they scroll into the viewport. To test this, add the block low enough on the page that you need to scroll to see it. Open the published page and scroll down — the counter should count up from zero and the progress bar should fill from left to right.
Customizing Block Colors
Every block has a Colors panel in the Inspector Controls sidebar. Click any block to select it, then look for the Colors section on the right. Each block has between 3 and 13 individual color controls. Changes preview live in the editor and save with the page.
Common Issues and How to Fix Them
Blocks Not Appearing in the Inserter
If you don’t see any QT blocks in the inserter after activating the plugin, open a new browser tab and check the WordPress admin for error notices. The most common cause is a JavaScript syntax error in one of the block files. Ask Claude: “Check all 15 block index.js files for syntax errors” to identify and fix the problem.
Block Becomes Unselectable After Adding a Second Block
This is the symptom of missing useBlockProps in either the edit() or save() function. It’s also caused by a mismatch between what edit() renders and what save() produces. Ask Claude to verify that every block has useBlockProps declared, used in edit(), and used with useBlockProps.save() in save().
“Block Validation Failed” Error on Page Reload
This error means the HTML stored in the database no longer matches what the block’s save() function produces. This happens when inline styles are used in save() and WordPress strips them. The fix is to move all dynamic values to data-* attributes in save() and apply styles via frontend JavaScript.
When you see this error, WordPress shows an “Attempt Block Recovery” button. Clicking it recovers the block content but resets any custom styling. After recovery, save the page to update the stored HTML to the new format.
Countdown Timer Not Updating
If the countdown shows 00:00:00:00 and doesn’t update, the issue is usually that the target date attribute is empty or in the wrong format. Check that the date is stored as YYYY-MM-DD and the time as HH:MM in the block attributes.
Frequently Asked Questions
Is this Gutenberg addons plugin free to use?
Yes, completely free. You build the plugin using Claude AI’s free tier at claude.ai, and the resulting plugin is yours to use on unlimited WordPress sites at no cost. The plugin code is GPL-licensed, just like WordPress itself.
Do I need coding experience to build this plugin?
No. The entire plugin is generated by Claude AI from a detailed text prompt. You don’t need to write a single line of code. Your only tasks are writing or copying the prompt, downloading the zip Claude generates, and uploading it to WordPress.
Will this plugin work with any WordPress theme?
Yes. The plugin outputs clean, semantic HTML and loads its own CSS. It is fully compatible with block themes, classic themes, Elementor-based themes, and Full Site Editing (FSE) themes. It does not depend on any theme-specific styles.
How is this different from Spectra, Kadence Blocks, or GenerateBlocks?
Commercial plugins like Spectra and Kadence Blocks are excellent, but they cost money, load scripts for blocks you don’t use, and can’t be customized without hiring a developer. This plugin is free, lightweight, fully customizable, and owned by you. If you need a block that isn’t included, you can ask Claude to add it.
Can I add more blocks to the plugin?
Absolutely. After you have the working plugin, start a new Claude conversation and say: “I have the QT Gutenberg Addons plugin with 15 blocks. I want to add a new [block type] block. Here are the technical rules…” Claude will generate the additional block files and tell you exactly where to add them.
Why do my blocks become unselectable after I save the page?
This is caused by missing useBlockProps in the block code. useBlockProps injects a unique block instance identifier that Gutenberg uses to track and select blocks. Without it, Gutenberg cannot find the block in the DOM after a page reload. Ask Claude to add useBlockProps to both the edit() and save() functions of every block.
Does the plugin work in Full Site Editing (FSE)?
Yes. All blocks are registered using the standard WordPress block API and work in both the post/page editor and the Site Editor used for Full Site Editing. They appear in the QT Addons category in both contexts.
Can I use this plugin on client sites?
Yes. The plugin is GPL-licensed, which means you can use it on as many sites as you want, including client sites. You can also rename it, change the author information, and customize the blocks to match your clients’ brands.
Conclusion
Building a free WordPress Gutenberg addons plugin with Claude AI is genuinely one of the most practical applications of AI in web development today. In a single afternoon, you can go from having no plugin at all to installing 15 professional, fully customizable custom Gutenberg blocks on your WordPress site — with zero budget and zero prior coding experience.
The key to making it work correctly is the prompt. The technical rules covered in this guide — especially the useBlockProps requirement, the data-* attribute pattern for save(), and the PHP script registration priority — are what separate a plugin that works reliably from one that breaks the moment you try to edit a block.
Use the detailed prompt document linked in the YouTube video description to give Claude everything it needs to generate a production-ready plugin on the first attempt. Save it, zip it, upload it, and you’re building better WordPress pages today.