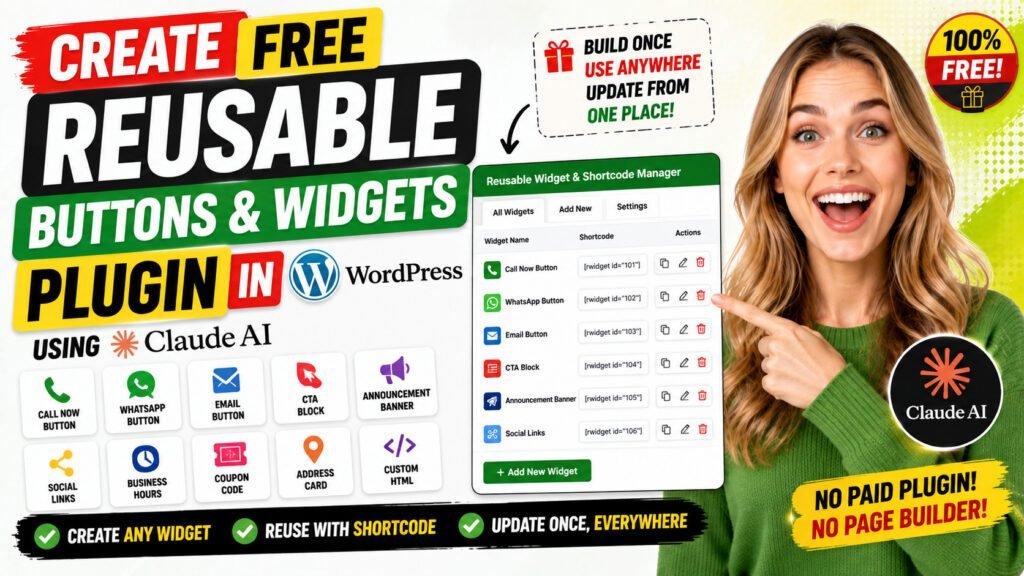
If you manage a WordPress website with multiple pages, you already know the pain: you add a “Call Now” button to 15 different pages, only to realize the phone number has changed. You now have to edit every single page manually. This is exactly the problem a WordPress reusable widget plugin solves. In this guide, you will learn how to create a free, fully functional shortcode manager plugin from scratch using Claude AI — no coding knowledge required — and start using reusable widgets, buttons, and text placeholders across your entire WordPress site in minutes.
Table of Contents
What Is a WordPress Reusable Widget Plugin?
A WordPress reusable widget plugin lets you create a content element — like a call button, a banner, or a CTA block — exactly once and reuse it anywhere on your website by inserting a simple shortcode such as [qt_widget id=”5″]. The widget is stored centrally. When you update it, every page where you placed the shortcode reflects the change instantly without you having to touch a single page.
Think of it as a “master template” for any repeatable piece of content on your site. Instead of embedding static content directly in pages, you embed a reference to a centrally managed widget. This concept is sometimes called reusable blocks, global elements, or dynamic content in various page builders — but those solutions are often locked to a specific builder. This plugin works everywhere.
Reusable Widgets vs. Reusable Blocks in Gutenberg
WordPress Gutenberg has a built-in “Reusable Blocks” feature, but it only works inside the Gutenberg editor. If you use Elementor, Divi, WPBakery, or the Classic Editor — or if you want to place a widget inside a sidebar, footer widget area, or PHP template — Gutenberg’s reusable blocks will not help you. A shortcode-based plugin works universally across every WordPress context.
Who Should Use This Plugin?
This plugin is ideal for freelancers managing client sites, agency developers, business owners running WordPress sites with repeated contact information, and anyone who wants to make site-wide updates from a single screen. If you have ever edited the same phone number on more than two pages, this plugin will save you significant time.
Why You Need One — The Problem It Solves
WordPress websites often contain the same pieces of information repeated across dozens of pages. Your phone number might appear in a call button in the header, a CTA section on the homepage, a contact page sidebar, a service page footer, and an about page. That is five locations — and most real sites have far more.
When that information changes — a new phone number, a new offer, a new WhatsApp number, a seasonal discount code — you must hunt down every instance and update it individually. Miss even one and your site displays outdated or incorrect information to visitors. This creates errors, erodes trust, and wastes hours of your time.
The Real Cost of Manual Updates
Consider a business website with 20 service pages, each containing a “Call Now” button. Updating the phone number manually means opening 20 pages, finding the button, editing it, and republishing — roughly 2 to 5 minutes per page. That is up to an hour and 40 minutes for a single phone number change. A reusable widget plugin reduces this to under 60 seconds.
What Happens Without a Reusable Widget System
- Missed pages display wrong phone numbers or outdated offers.
- Inconsistent button styles across the site as pages are built at different times.
- No central record of which content appears where.
- Every design change requires visiting multiple pages.
- High risk of human error during updates.
Key Features of the QT Reusable Widget Plugin
The QT Reusable Widget & Shortcode Manager plugin was built to cover the most common reusable content needs for WordPress websites. Here is a complete breakdown of what it includes.
10 Built-In Widget Types
- Phone Button — A click-to-call button with your phone number, icon, label, and full color control.
- WhatsApp Button — A direct WhatsApp chat button with optional pre-filled message and brand-correct green color.
- Email Button — A mailto link button with optional subject line.
- CTA Block — A full call-to-action section with heading, subtext, button URL, and custom background color.
- Announcement Banner — A full-width banner strip with background color, text color, and an optional CTA button.
- Social Links Cluster — A row of branded social icon buttons for Facebook, Instagram, X/Twitter, YouTube, LinkedIn, and Pinterest.
- Business Hours Table — A styled opening-hours display for all seven days, with Closed toggle per day.
- Coupon Code Badge — A click-to-copy coupon with a customizable badge color and description line.
- Address Card — A location card with full address and an optional “Get Directions” button linking to Google Maps.
- Custom HTML — A free-form HTML/CSS block for any custom content you need to reuse.
Text Tokens / Global Placeholder System
Beyond widgets, the plugin includes a Text Token system. You define named placeholders such as {{phone_number}} or {{business_name}} with real values in a central admin screen. Then type those placeholders anywhere in your page content — Elementor text blocks, Classic Editor paragraphs, sidebar widgets, post excerpts — and they are replaced with the real value at display time. Change the value once and it updates globally.
Visual Admin Dashboard
A dedicated admin menu called “QT Widgets” gives you a central dashboard showing all widgets, their types, status (Active or Draft), and a one-click copy button for each shortcode. A separate “Text Tokens” screen shows all your defined placeholders with their current values and copy chips for both the {{key}} and [qt_token key=”…”] formats.
Full Styling Control Per Widget
Every widget has individual styling controls: background color (with WordPress color picker), text color, border radius, font size, alignment (left, center, right), and a custom CSS field for advanced adjustments. No two widgets need to look the same.
Universal Placement — Works Everywhere
The shortcode [qt_widget id=”5″] works in Gutenberg, Classic Editor, Elementor shortcode widgets, Divi code modules, WPBakery raw HTML elements, sidebar text widgets, and PHP template files via do_shortcode(). No page builder dependency.
Enable/Disable Without Touching Pages
Setting a widget to Draft status instantly removes it from every page where it is placed — no broken elements, no placeholder errors. Republish it and it reappears everywhere automatically.
Benefits of Using This Plugin
Beyond the feature list, here is the practical impact this plugin delivers to real WordPress site owners and developers.
Save Hours on Every Site Update
A single phone number change that previously required editing 20 pages now takes under a minute. A seasonal offer banner can be switched on and off from one screen. The time savings compound dramatically on large sites.
Eliminate Update Errors
When humans update content manually across multiple pages, they miss pages. With this plugin, there is no “missed page” scenario. If a widget is placed using its shortcode, it is always current — no exceptions.
100% Free — No Premium Tier
Unlike Elementor Pro’s global widgets feature, ACF Pro, or other commercial solutions, the QT Reusable Widget Plugin costs nothing. You get full widget management, 10 widget types, the text token system, and all styling controls for free.
No Dependency on a Specific Page Builder
Elementor global widgets only work in Elementor. Divi global elements only work in Divi. This plugin works across every WordPress editing environment simultaneously. You can mix editors on the same site and the shortcode still works everywhere.
Lightweight and Performance-Friendly
The plugin loads one small CSS file on the front end and uses zero JavaScript on the public-facing site. Widgets are rendered server-side with plain PHP. No heavy scripts, no external API calls, no performance overhead.
Consistent Branding Across the Site
Define your button colors, font sizes, and styles once per widget. Every instance of that widget looks identical. No more inconsistencies from copying and re-styling buttons across pages at different times.
Developer and Non-Developer Friendly
The admin UI requires no coding to use. Developers can also access widgets via PHP using do_shortcode() in template files, giving both technical and non-technical users full access to the plugin’s power.
How to Create This Plugin Using Claude AI — Step-by-Step
The entire plugin was created using Claude AI — specifically Claude Sonnet. You do not need to write a single line of PHP, CSS, or JavaScript yourself. Here is the exact process.
Step 1 — Open Claude AI
Go to claude.ai and open a new conversation. Make sure you are using Claude Sonnet 4 or above for best results with complex code generation tasks.
Step 2 — Use the Master Prompt
Copy the master prompt that describes the full plugin specification — including all 15 files, all 10 widget types, the text token system, the admin UI, the canonical hidden-field form architecture, and the CSS/JS requirements. Paste it as a single message into Claude.
The prompt covers every technical detail including the critical architecture pattern that prevents data loss: all panel form fields use data-field attributes instead of name attributes, with canonical hidden inputs that JavaScript syncs before form submission. This prevents duplicate-name conflicts that would cause hidden panels to overwrite the active panel’s saved data.
Step 3 — Claude Generates All 15 Files
Claude will write every file in full — the main plugin PHP file, all include classes, admin classes, templates, CSS, JavaScript, and readme. This typically takes 2 to 3 minutes.
Step 4 — Download the ZIP File
Claude packages all files into a downloadable ZIP named qt-reusable-widgets.zip, ready to upload directly to WordPress.
Step 5 — Install in WordPress
Go to your WordPress admin panel, navigate to Plugins → Add New → Upload Plugin, choose the ZIP file, click Install Now, then Activate. The QT Widgets menu will appear in your sidebar immediately.
Step 6 — Create Your First Widget
Go to QT Widgets → Add New Widget, choose a widget type from the visual tile selector, fill in the fields (phone number, label, colors), and click Publish. Copy the shortcode from the sidebar meta box and paste it anywhere on your site.
Step 7 — Set Up Text Tokens
Go to QT Widgets → Text Tokens. Click “Add New Token,” set the key to phone_number and the value to your actual phone number. Click Save All Tokens. Now type {{phone_number}} anywhere in your page content and it will display your number automatically.
How to Install the Plugin in WordPress
Installation follows the standard WordPress plugin upload process and takes less than two minutes.
Upload via WordPress Admin
- Log into your WordPress admin panel.
- Go to Plugins → Add New Plugin.
- Click Upload Plugin at the top.
- Choose the qt-reusable-widgets.zip file.
- Click Install Now, then Activate Plugin.
Upload via FTP (Alternative)
If you prefer FTP, extract the ZIP and upload the qt-reusable-widgets folder to /wp-content/plugins/ on your server. Then activate the plugin from Plugins → Installed Plugins in the WordPress admin.
After Activation
Once activated, you will see a “QT Widgets” menu item in the WordPress left sidebar with submenus for All Widgets, Add New Widget, Text Tokens, and Help & Usage. No configuration is required before you start creating widgets.
How to Create Your First Reusable Widget
Creating a widget takes about two minutes. Let us walk through creating a “Call Now” phone button as an example.
Creating a Call Now Button
- Go to QT Widgets → Add New Widget.
- Enter a widget title such as “Call Now — Main Office.”
- In the Widget Settings panel, click the 📞 Phone Button tile.
- Enter your phone number, button label, and choose your background color.
- Set border radius, font size, and alignment.
- Click Publish. The Shortcode box shows: [qt_widget id=”5″]
- Copy this shortcode and paste it on any page, post, or widget area.
Updating the Widget Later
When your phone number changes, go to QT Widgets → All Widgets, click Edit on the Call Now widget, update the number, and click Update. Every page where [qt_widget id=”5″] appears will immediately display the new number. Zero page editing required.
Disabling a Widget Temporarily
To hide a widget everywhere without removing its shortcodes from pages, go to the widget editor and change its status from “Published” to “Draft.” The shortcode silently renders nothing — no broken layout, no missing element errors. Republish the widget when you want it visible again.
Using Text Tokens & Global Placeholders
The Text Token system is the second major feature of this plugin. It is designed for pieces of text rather than full widgets — things like a phone number embedded in a paragraph, a business name in a heading, or an offer phrase woven into page copy.
Defining a Token
Go to QT Widgets → Text Tokens. Click “+Add New Token” or use one of the quick-add chips for common tokens like phone_number, email, business_name, or address. Enter the key and the value, then click Save All Tokens.
Using Tokens in Content
In any page editor, type the token surrounded by double curly braces: {{phone_number}}. When the page renders, WordPress replaces the placeholder with the real value from your token settings. This works in Elementor text widgets, Classic Editor paragraphs, Gutenberg text blocks, and sidebar text widgets.
Using the Shortcode Method
In places where curly brace syntax might be stripped or escaped — such as some page builder fields — use the shortcode method instead: [qt_token key=”phone_number”]. This method works everywhere shortcodes are supported.
Practical Example
Imagine your site has 30 pages that mention your WhatsApp number in their body text. You define a token:
Key: whatsapp_number
Value: +91-9876543210
Then in each page, instead of the actual number, you write: Contact us on WhatsApp at {{whatsapp_number}}. When the number changes, update the token once and all 30 pages update immediately.
Widget Types Explained in Detail
Here is a deeper look at each of the 10 widget types and when to use them.
Phone Button
Best for service businesses, clinics, restaurants, and any site where visitors should call directly. The button links to tel: and opens the phone dialer on mobile devices. Configure the icon, label text, background color, and whether to show the phone icon emoji.
WhatsApp Button
Increasingly the preferred contact method in India, the Middle East, and Southeast Asia. The button opens WhatsApp chat with your number pre-loaded. You can also set a pre-filled message so visitors land in WhatsApp with an opening message already typed.
Email Button
Opens the user’s mail client with the To address pre-filled and optionally a Subject line. Useful for businesses that prefer email enquiries over calls.
CTA Block
A full-section call-to-action with a headline, supporting text, and a button. Useful on service pages, landing pages, and blog posts where you want to convert readers into contacts. The entire block background color is customizable.
Announcement Banner
A full-width strip typically placed at the top of the page or above the footer. Use for seasonal offers, limited-time promotions, new service announcements, or operational notices. Update the message and take it live site-wide in seconds.
Social Links Cluster
A horizontal row of branded social media icon buttons. Each platform has its correct brand color applied automatically — no manual color picking required for common platforms. Leave a field blank and that platform’s button simply does not render.
Business Hours
A formatted table showing opening and closing times for each day of the week. Each day has an Open/Close time selector and a “Closed” checkbox for days the business is not operating. The table renders cleanly with a card-style container.
Coupon Code Badge
A visually distinct coupon badge with click-to-copy behavior. Visitors click the code and it copies to their clipboard automatically. Use this on product pages, sale announcements, or promotional landing pages.
Address Card
Displays a physical address with a location pin icon and an optional “Get Directions” button linking to any URL (typically a Google Maps link). Useful in footers, contact pages, and location-specific service pages.
Custom HTML
A free-form content area for any HTML or CSS you want to reuse. This is the escape hatch for anything the other nine types do not cover — embed scripts, custom styled sections, or third-party widget code.
How Shortcodes Work Across Page Builders
One of the strongest advantages of the shortcode approach is universal compatibility. Here is how to place a QT widget shortcode in the most popular page-building environments.
Elementor
In Elementor, search for the “Shortcode” widget in the element panel and drag it to your page. Paste [qt_widget id=”5″] into the shortcode field. The widget renders inside the Elementor layout just like any other element. You can wrap it in Elementor containers and apply Elementor spacing settings around it.
Gutenberg Block Editor
In Gutenberg, add a “Shortcode” block from the block inserter. Paste the shortcode into the block. The widget renders on the front end. Alternatively, type /shortcode in the editor to quickly insert the block.
Divi Builder
In Divi, add a “Code” module to any column or section. Paste the shortcode inside it. Divi processes shortcodes natively so the widget renders correctly.
Classic Editor
In the Classic Editor, paste the shortcode directly into the content area in either Visual or Text (HTML) mode. WordPress processes it before display.
PHP / Theme Templates
Developers can call the widget from any PHP template file using:
<?php echo do_shortcode(‘[qt_widget id=”5″]’); ?>
This makes the plugin compatible with custom theme development and headless WordPress setups where content is output directly from templates.
Best Practices for Using Reusable Widgets
Getting the most from this plugin means building good habits around how you name, organize, and maintain your widgets.
Use Descriptive Widget Names
Name your widgets clearly: “Call Now — Main Office,” “WhatsApp — Sales Team,” “Banner — Summer Sale 2025.” This makes the All Widgets list readable at a glance and prevents confusion when you have 20 or more widgets created.
One Widget Per Unique Purpose
Avoid creating separate “Call Now” buttons for different pages with slightly different styles. Instead, create one button with the correct styling and reuse it everywhere. If you genuinely need two different styles, create two clearly named widgets.
Use Drafts as an Off Switch
Rather than deleting seasonal or promotional widgets, set them to Draft. This preserves your shortcode placements. When the promotion runs again, simply republish the widget — no shortcode re-insertion needed.
Define Tokens Before You Build Pages
If you know certain information (phone number, address, WhatsApp number) will appear throughout the site, define them as tokens first. Then build your pages using {{token_key}} from the start rather than trying to find and replace static text later.
Test After Every Update
After updating a widget, visit one or two representative pages to confirm the change rendered correctly across different templates and page builders. Browser caching can sometimes delay the update — a hard refresh (Ctrl+Shift+R) will show the latest version.
Back Up Before Bulk Updates
Before making a major widget change that affects many pages (such as a business rebrand), take a full site backup. While the plugin itself is low-risk, having a restore point is good practice for any site-wide change.
Frequently Asked Questions
Will editing a widget update all pages immediately?
Yes. The shortcode is resolved at render time, not at page-save time. This means the moment you update a widget and click Publish, every page where the shortcode appears will display the new content. No cache-aware page re-saving is needed, though you may need to clear your caching plugin’s cache if you use one.
Does the plugin work with Elementor, Divi, and WPBakery?
Yes. The plugin uses WordPress native shortcodes, which are supported by all major page builders. In Elementor, use the Shortcode element. In Divi, use a Code module. In WPBakery, use a Raw HTML block. In the Classic Editor, paste the shortcode directly.
Is this plugin free?
Yes. The QT Reusable Widget & Shortcode Manager plugin is completely free. There is no premium tier, no recurring subscription, and no feature gating. The full plugin including all 10 widget types and the Text Token system is available at no cost.
Can I disable a widget without removing the shortcode from pages?
Yes. Set the widget to Draft status. The shortcode will render nothing — the placement is silently skipped. Republish the widget when you want it to appear again. No page editing is required either to hide or restore it.
What are Text Tokens and how are they different from widgets?
Widgets render full styled HTML elements — a button, a banner, a table. Tokens are plain text values that get inserted inside existing content. Use widgets when you want to place a standalone content element. Use tokens when you want to insert a piece of text (like a phone number or business name) inside a paragraph or heading that already exists on the page.
Do Text Tokens work inside Elementor text blocks?
Yes. The plugin hooks into WordPress’s the_content and widget_text filters, which Elementor respects when rendering page content. Type {{phone_number}} inside any Elementor Text widget or Text Editor widget and it will be replaced with the token value on the front end.
Can I use this plugin without any coding knowledge?
Yes, absolutely. The entire admin interface is visual and form-based. You select a widget type, fill in the fields, choose your colors, and publish. The shortcode is generated automatically. No PHP, CSS, or JavaScript knowledge is needed to create, manage, or update widgets or tokens.
How do I create this plugin?
Use Claude AI with the detailed master prompt that specifies all 15 plugin files, all widget types, the admin UI architecture, and the technical constraints. Claude generates every file in full and packages them into a ZIP file you can upload directly to WordPress. The process takes about 5 minutes from start to installation.
Can I add custom CSS to individual widgets?
Yes. Every widget has a Custom CSS field in its settings. CSS rules entered there are scoped to that specific widget instance using a unique ID selector, so they cannot affect other widgets or page elements.
What happens if the plugin is deactivated?
Shortcodes will appear as plain text (the raw [qt_widget id=”5″] string) until the plugin is reactivated. Text Tokens will stop being replaced and the {{token_key}} placeholders will appear as literal text. No content is deleted — everything restores when you reactivate the plugin.
Conclusion
A WordPress reusable widget plugin solves one of the most common and frustrating problems in website management: maintaining consistent, up-to-date content across dozens of pages. The QT Reusable Widget & Shortcode Manager gives you 10 professionally styled widget types, a global Text Token system, a full visual admin dashboard, and complete page-builder compatibility — all for free, and all built without a single line of manual coding using Claude AI.
Whether you are a freelancer managing multiple client sites, a business owner who needs to update a phone number or promotion without touching 20 pages, or a developer who wants a lightweight utility plugin that works everywhere — this plugin delivers exactly what you need.
Watch the full video tutorial on the Quick Tips YouTube channel (@ParamFreelance) to see the plugin built and demonstrated live. Download the plugin, install it today, and experience the difference that centralized content management makes on your WordPress workflow.