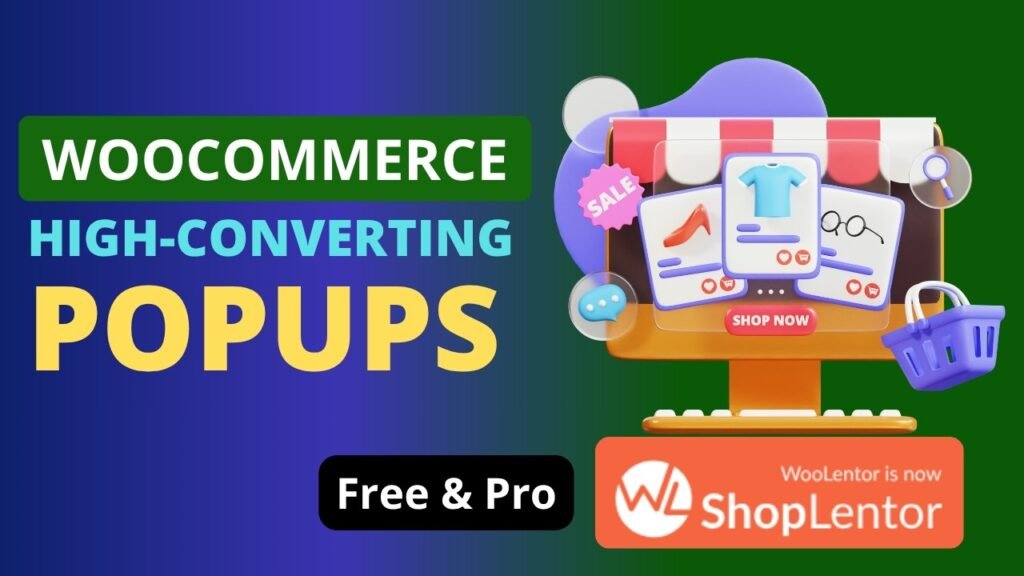
If you want to create popups in WooCommerce that genuinely convert visitors into buyers, you have landed in the right place. Popups remain one of the most powerful tools for WooCommerce store owners — when done right, they capture leads, promote flash sales, recover abandoned carts, and dramatically improve your store’s bottom line. In this step-by-step guide, you will learn exactly how to build stunning, conversion-ready WooCommerce popups using the ShopLentor Popup Builder — without writing a single line of code.
Watch step by step video tutorial: https://youtu.be/AYBEpTzraZg
Table of Contents
What Is the ShopLentor Popup Builder?
ShopLentor (formerly known as WooLentor) is a feature-rich WooCommerce plugin trusted by over 100,000 active users and with more than 5.3 million total downloads. Among its many powerful modules, the Popup Builder stands out as an all-in-one solution for creating engaging, fully customizable popups directly within your WordPress dashboard.
The ShopLentor Popup Builder allows you to design eye-catching popups that integrate seamlessly with Elementor, giving you complete visual control over every aspect of your popup — from layout and typography to colors, images, and call-to-action buttons.
Key Features of ShopLentor Popup Builder
- Full Design Control — customize every visual element to match your brand
- Precision Targeting — show popups to specific audiences based on behavior, device, and location
- Multiple Triggers — control when and how popups appear (page load, scroll, exit intent, click)
- Device-Specific Display — enable or disable popups on desktop, tablet, or mobile
- Analytics Integration — track performance and optimize conversion rates
- No Coding Required — build professional popups without any technical skills
Why Create Popups in WooCommerce? (Key Benefits)
Before diving into the tutorial, it is worth understanding why WooCommerce popups are such a valuable marketing tool. A well-timed, well-designed popup can be the difference between a visitor leaving your store empty-handed and completing a purchase.
Increase Conversion Rates
Popups that display relevant offers at the right moment — such as a discount for first-time visitors — can significantly lift conversion rates. Studies consistently show that targeted popups convert at rates between 3% and 11%, far outperforming static banner ads.
Capture Email Leads
Growing your email list is one of the most cost-effective marketing strategies available. Newsletter popups that offer a small incentive (such as 10% off) in exchange for an email address turn casual browsers into long-term customers you can reach repeatedly.
Promote Special Offers and Discounts
Flash sales, seasonal promotions, and limited-time deals perform far better when communicated through a well-placed popup. Instead of hoping visitors notice a banner in your sidebar, a popup puts the offer directly in front of them at the right moment.
Reduce Bounce Rate
Exit-intent popups detect when a visitor is about to leave your site and display a compelling offer to keep them engaged. This simple technique can reduce your bounce rate and give you one final opportunity to convert a departing visitor.
Recover Abandoned Carts
Cart abandonment is one of the biggest revenue leaks for WooCommerce stores, with the average abandonment rate hovering around 70%. An exit-intent popup triggered when a shopper is about to leave the cart page — offering free shipping or a small discount — can recover a meaningful percentage of those lost sales.
Requirements Before You Start
To follow this tutorial and create popups in WooCommerce using ShopLentor, make sure you have the following in place:
- WordPress (version 5.0 or higher)
- WooCommerce plugin installed and activated
- Elementor page builder installed and activated (free version works for basic designs)
- ShopLentor plugin (free version available; Pro unlocks advanced triggers)
- A hosting environment with PHP 7.4 or higher
Recommended Image: Screenshot of WordPress dashboard showing all required plugins active — ShopLentor, WooCommerce, and Elementor.
Step 1 – Install and Activate ShopLentor
Installing ShopLentor from the WordPress Repository
ShopLentor is freely available in the official WordPress plugin directory. Follow these steps to install it:
- Log in to your WordPress dashboard.
- Navigate to Plugins > Add New from the left sidebar.
- In the search bar, type ShopLentor and press Enter.
- Locate the ShopLentor plugin in the results and click Install Now.
- Once the installation is complete, click Activate.
You will now see a new ShopLentor menu item in your WordPress dashboard sidebar. This confirms the plugin is active and ready to configure.
Installing ShopLentor Pro (Optional)
The free version of ShopLentor gives you access to basic popup triggers such as page load and scroll. If you want advanced features like exit-intent detection, after-inactivity triggers, and dismiss-on-overlay-click, you will need ShopLentor Pro. To install the Pro version, purchase it from woolentor.com, download the plugin ZIP file, and upload it via Plugins > Add New > Upload Plugin.
Recommended Image: WordPress Plugins > Add New page with ShopLentor search result displayed.
Step 2 – Enable the Popup Builder Module
ShopLentor organizes its features into individual modules, which means you only activate what you need — keeping your site lean and fast. Here is how to enable the Popup Builder module:
Activating the Module
- From your WordPress dashboard, click ShopLentor in the left sidebar.
- Click Settings.
- Select the Modules tab at the top of the Settings page.
- Scroll through the module list to find Popup Builder.
- Click on Popup Builder to expand its settings panel.
- Toggle the feature to Enabled.
- You can also configure default popup width, height, and z-index here.
- Click Save Changes to apply your settings.
Once saved, the Popup Builder module is live on your site. A new Template Builder menu will appear under ShopLentor in your dashboard sidebar.
Recommended Image: ShopLentor Modules tab in Settings with Popup Builder highlighted and enabled.
Step 3 – Create a New Popup Template
With the module enabled, it is time to create your first popup template. ShopLentor gives you two ways to build a popup: starting from a pre-designed template or building one entirely from scratch.
Creating a New Template
- In your WordPress dashboard, go to ShopLentor > Template Builder.
- Click the Add New Template Builder button.
- A settings window (Template Settings) will appear.
- In the Name field, enter a descriptive name for your popup (e.g., “Exit Intent Discount Popup” or “Newsletter Signup”).
- In the Type field, select Popup from the dropdown.
- In the Editor field, choose Elementor (recommended for visual design).
- Click Save to create the template.
Using a Pre-Designed Template
ShopLentor offers a library of professionally designed popup templates you can import and customize. After selecting Elementor as your editor and saving, click the Import Template button to browse the template library. Select a design that matches your goal — lead capture, promotional offer, or exit intent — and import it with a single click.
Recommended Image: ShopLentor Template Builder screen showing the popup creation modal with Name, Type, and Editor fields.
Step 4 – Design Your Popup with Elementor
After saving your template, click the Edit with Elementor button. This opens the full Elementor page builder within a popup canvas, giving you complete control over your popup’s appearance.
Building Your Popup Layout
Inside the Elementor editor, you can add, remove, and arrange elements using a drag-and-drop interface. Here are some essential elements to consider for your popup:
- Heading Widget — for your main offer headline (e.g., “Get 20% Off Your First Order”)
- Text Widget — for supporting copy that explains the offer or value proposition
- Image Widget — to add a product photo, banner graphic, or brand logo
- Button Widget — your primary call-to-action (e.g., “Claim My Discount”)
- Form Widget — for newsletter signups, use Elementor’s Form widget or a shortcode from FluentCRM, Mailchimp, or MailPoet
- Countdown Timer Widget — for urgency-driven popups promoting limited-time offers
Design Tips for High-Converting Popups
Keep these design principles in mind as you build:
- Use a strong, benefit-driven headline that immediately communicates value
- Keep the copy concise — visitors decide in seconds whether to engage
- Make your CTA button visually prominent with a contrasting color
- Include a subtle close button so visitors do not feel trapped
- Use high-quality images that are relevant to your offer
Once you are satisfied with the design, click Publish or Update in Elementor to save your popup template.
Recommended Image: Elementor editor showing a styled popup with headline, image, and CTA button.
Step 5 – Configure Popup Conditions and Triggers
This is where the real power of the ShopLentor Popup Builder comes into play. After saving your Elementor design, return to the Template Builder list, find your popup, and click its Popup Settings link. You will see five configuration panels: Conditions, Triggers, General Settings, Advanced Options, and Customize.
Setting Conditions — Where Your Popup Appears
Conditions let you define which pages or sections of your WooCommerce store will display the popup. You can target:
- All pages across your entire site
- Specific pages (home page, product pages, category pages)
- WooCommerce-specific pages (shop page, cart page, checkout page)
- Custom post types or specific post IDs
- URL-based conditions (contains a keyword, starts with, ends with, or exactly matches)
For example, if you want to show an exit-intent popup only on your cart page to recover abandoned purchases, set the condition to “Cart Page” and nothing else. This precision keeps your other pages clean and uncluttered.
Setting Triggers — When Your Popup Appears
Triggers determine the event that causes your popup to appear. ShopLentor offers the following trigger options:
- On Page Load — the popup appears after a specified delay in seconds. Great for welcome offers or announcements.
- On Scroll — the popup fires when the user scrolls a defined percentage of the page. Useful for engagement-based popups.
- On Click (Pro) — triggers the popup after the visitor has clicked the page a set number of times.
- On Click Specific Element (Pro) — activates the popup when the visitor clicks a defined element using its CSS ID or class. Perfect for inline CTA triggers.
- After Inactivity (Pro) — shows the popup if the page has been idle for a specified number of seconds.
- On Page Exit Intent (Pro) — detects when the cursor moves toward the browser’s close or back button and fires the popup immediately. This is the most powerful trigger for reducing bounce rate and recovering abandoning visitors.
Recommended Image: ShopLentor Popup Settings panel showing Triggers options with Exit Intent highlighted.
Step 6 – Advanced Popup Settings
Beyond basic conditions and triggers, ShopLentor’s Popup Builder offers a comprehensive suite of advanced controls that give you fine-grained command over the popup experience.
General Settings
In the General Settings panel, you can configure behavioral options:
- Disable Page Scroll — prevent background scrolling while the popup is open, keeping the visitor focused
- Disable Close Button — useful for popups where you want a definitive action (note: use sparingly to avoid frustrating visitors)
- Dismiss on ESC Key — allow visitors to close the popup by pressing the Escape key for a friendlier experience
- Dismiss on Overlay Click (Pro) — lets visitors close the popup by clicking the darkened overlay
- Disable Popup Overlay (Pro) — removes the background overlay for non-intrusive popup styles
- Dismiss Automatically (Pro) — auto-closes the popup after a set number of seconds
- Animation — choose from several entrance and exit animation styles (fade, slide, zoom)
Do Not Show Again — Frequency Control
One of the most important settings for user experience is the Do Not Show Again control. This setting prevents your popup from appearing repeatedly to a visitor who has already dismissed it. For example, you can configure the popup not to appear again for 7 days if the visitor closes it once. This dramatically reduces annoyance and keeps the popup feeling fresh and relevant rather than spammy.
Device and Browser Targeting
ShopLentor lets you show or hide your popup based on the visitor’s device type and browser:
- Show Only on Devices — toggle the popup on or off for desktop, tablet, or mobile independently
- Show Only on Browsers — enable or disable the popup for specific browsers such as Chrome, Firefox, Safari, or Edge
This granular control is especially useful if your popup design looks great on desktop but does not render well on a small mobile screen — simply disable it for mobile and create a separate mobile-optimized version instead.
Customize Panel — Popup Positioning and Dimensions
The Customize panel lets you adjust the popup’s visual position and size:
- Position Vertical — choose Top, Center, or Bottom placement on the screen
- Position Horizontal — choose Left, Center, or Right placement
- Dimensions — override the default width, height, z-index, margin, and padding values
Recommended Image: ShopLentor Advanced Popup Settings showing Do Not Show Again controls and device targeting toggles.
Step 7 – Publish and Test Your Popup
Publishing Your Popup
Once you have configured all your settings, click Save Changes in the Popup Settings panel. Your popup is now live on the pages and conditions you have defined. There is no separate “publish” step required — enabling the popup template and saving its settings is all it takes.
Testing Your Popup
Always test your popup thoroughly before assuming it works correctly for all visitors. Here is a practical testing checklist:
- Open your site in a private or incognito browser window (this simulates a new visitor session).
- Navigate to the page where you set the popup condition.
- Trigger the popup using its configured trigger (wait for the page load delay, scroll down, or simulate exit intent by moving your mouse toward the top of the browser).
- Verify that the popup appears correctly with the right design and content.
- Test the close button and ESC key functionality.
- Check that the Do Not Show Again setting works by closing the popup and refreshing the page (it should not reappear within the defined timeframe).
- Test on both desktop and mobile devices to confirm device-specific settings work correctly.
Recommended Image: Live popup displayed on a WooCommerce product page, showing the design in context.
Types of Popups You Can Create with ShopLentor
The ShopLentor Popup Builder is remarkably versatile. Here are the most popular popup types WooCommerce store owners create:
Newsletter Signup Popup
Grow your email list by offering a discount or free resource in exchange for a subscription. Connect your Elementor form widget to FluentCRM, Mailchimp, or MailPoet to automatically add new subscribers to your email list. Trigger this popup on page load with a 3–5 second delay for best results.
Exit Intent Popup
Intercept visitors who are about to leave your store with a last-minute offer. Exit intent popups are particularly effective on the cart and checkout pages, where a small nudge — such as “Wait! Here is 10% off” — can recover an otherwise lost sale. This feature requires ShopLentor Pro.
Promotional Offer Popup
Highlight limited-time sales, seasonal discounts, or special coupon codes. Pair a Countdown Timer widget with your offer to create a sense of urgency that motivates visitors to act immediately rather than return later.
Cart Abandonment Recovery Popup
Set the popup condition to your cart page and use an exit-intent trigger to show a compelling offer to visitors who are about to leave without purchasing. A well-crafted cart recovery popup can bring back a meaningful portion of your otherwise lost revenue.
Product Announcement Popup
Launching a new product or running a pre-order campaign? Use a popup to make the announcement with a striking image and a direct link to the product page. Target the popup to your shop or home page for maximum visibility.
Cross-Sell Popup
ShopLentor also includes a dedicated Smart Cross-Sell Popup module that automatically displays product recommendations after a customer adds an item to their cart. This popup can significantly increase average order value without any manual configuration.
Best Practices for WooCommerce Popups
Creating a popup is only the first step. Following these best practices will ensure your popups convert visitors rather than frustrate them:
Time Your Popups Thoughtfully
Avoid showing popups the instant a visitor lands on your page. A delay of 5–10 seconds on page load, or waiting until the visitor has scrolled 50% of the page, gives them time to engage with your content before the popup appears. Exit-intent triggers are inherently well-timed because they activate only when a visitor is about to leave.
Keep the Message Clear and Concise
Your popup headline should communicate the value proposition in five words or fewer. Long paragraphs of text inside a popup are almost always ignored. Use the supporting text area to add one sentence of context, then let your CTA button do the heavy lifting.
Use Frequency Caps to Prevent Popup Fatigue
Use the Do Not Show Again setting to prevent the same popup from appearing to the same visitor repeatedly. Showing a popup every time someone visits your store is one of the fastest ways to damage your brand reputation and increase bounce rate.
A/B Test Your Designs
Create multiple popup templates with different headlines, images, or CTA button colors and track which one performs better. Over time, even small improvements in popup conversion rate compound into significant revenue gains.
Ensure Mobile Responsiveness
With more than half of all WooCommerce traffic coming from mobile devices, it is critical that your popups look great on small screens. Use ShopLentor’s device-specific settings to show a separate, mobile-optimized popup design to smartphone users.
Suggested Internal Links
- ShopLentor Smart Cross-Sell Popup Guide (link to your existing cross-sell article)
- How to Set Up WooCommerce Abandoned Cart Recovery (link to your abandoned cart article)
- WooCommerce Email Marketing with FluentCRM (link to your email marketing guide)
- ShopLentor Modules Overview (link to your ShopLentor modules guide)
- How to Improve WooCommerce Conversion Rates (link to your conversion optimization article)
Suggested External Links
- ShopLentor Official Website — woolentor.com
- ShopLentor Popup Builder Documentation — woolentor.com/doc/popup-builder
- Elementor Page Builder — elementor.com
- FluentCRM Email Marketing — fluentcrm.com
Frequently Asked Questions (FAQ)
Is ShopLentor free to use for creating popups in WooCommerce?
Yes, the ShopLentor plugin is free to download and use from the official WordPress plugin directory. The free version includes basic popup triggers such as page load and scroll. Advanced triggers — including exit intent, after inactivity, and click-specific-element — require a ShopLentor Pro subscription.
Can I create popups in WooCommerce without Elementor?
Yes. When creating a new popup template in ShopLentor, you can choose the WordPress Default Editor instead of Elementor. However, Elementor provides a far richer visual editing experience, so it is strongly recommended for creating professional-looking popups.
How do I create an exit intent popup in WooCommerce?
To create an exit intent popup, enable the Popup Builder module in ShopLentor, design your popup template, and then in the Popup Settings panel, select On Page Exit Intent under the Triggers section. Note that this trigger requires ShopLentor Pro. Set your condition to the page where you want it to appear (for example, the cart or checkout page) and save your settings.
Will WooCommerce popups slow down my site?
ShopLentor is built with performance in mind. The Popup Builder module only loads its assets on pages where a popup is configured to appear, minimizing the impact on overall site speed. However, it is always good practice to use optimized images inside your popups and to test your page speed with tools like Google PageSpeed Insights after adding any new functionality.
How many popups can I create with ShopLentor?
There is no set limit on the number of popup templates you can create. You can return to the Template Builder and add as many popups as needed, each with its own unique design, conditions, and triggers. This makes it easy to run multiple simultaneous campaigns targeting different segments of your WooCommerce audience.
Can I connect my ShopLentor popup form to Mailchimp or FluentCRM?
Yes. You can add a newsletter form to your popup either by using the Elementor Form widget (which supports multiple email marketing integrations natively) or by pasting a shortcode from a form plugin such as FluentCRM, Mailchimp for WordPress, or MailPoet directly into your popup template.
Does the ShopLentor Popup Builder work with any WooCommerce theme?
ShopLentor is designed to be theme-agnostic and works with most modern WordPress and WooCommerce themes. It has been tested with popular themes including Storefront, Astra, OceanWP, and Flatsome, among others.
Conclusion
Creating popups in WooCommerce has never been easier, and the ShopLentor Popup Builder gives you everything you need to build high-converting, beautifully designed popups without touching a line of code. From capturing email leads and promoting flash sales to recovering abandoned carts with exit-intent technology, ShopLentor empowers you to engage your visitors at exactly the right moment.
In this guide, you have learned how to install and activate ShopLentor, enable the Popup Builder module, create and design a popup template with Elementor, configure conditions and triggers, fine-tune advanced settings for frequency control and device targeting, and test your popup before going live. You have also explored the different popup types available and the best practices that separate a high-performing popup strategy from one that drives visitors away.
Ready to start converting more visitors into customers? Download ShopLentor for free today, follow this step-by-step guide, and launch your first WooCommerce popup in under 15 minutes. For more advanced features and powerful triggers like exit intent, explore ShopLentor Pro at woolentor.com.