The internet has fundamentally changed how people connect, learn, and collaborate. Rather than relying on third-party social media platforms where your audience’s data, reach, and experience are controlled by algorithms and corporate policies, more and more creators, educators, brands, and businesses are building their own private online communities on platforms they own and control.
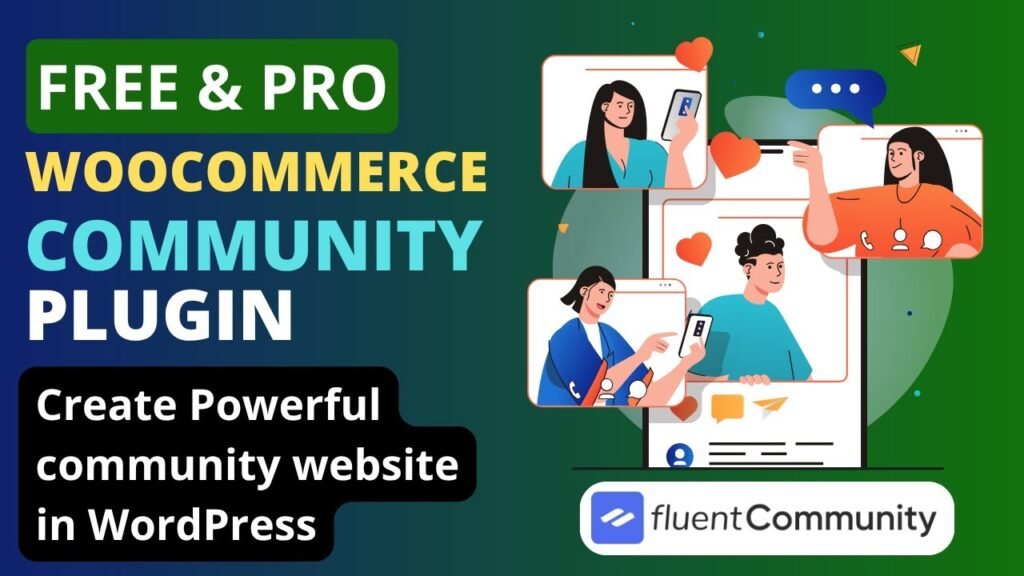
WordPress — the world’s most popular website platform — is increasingly the foundation of choice for community websites. And FluentCommunity is rapidly becoming the plugin of choice for building those communities. Described as the fastest WordPress community plugin for creators, FluentCommunity combines powerful social networking tools, a built-in Learning Management System (LMS), real-time chats, leaderboards, course management, and deep WooCommerce and marketing automation integrations into a single, ultra-fast plugin.
In this comprehensive guide, we cover everything you need to know: what a community website is, why building one on WordPress is a smart decision, the full features of FluentCommunity, a step-by-step setup walkthrough, a free vs pro comparison, real-world use cases, and answers to the most common questions about WordPress community websites.
Watch Step by step Video Tutorial: https://youtu.be/IhkUEQCVXRE
What is a Community Website?
A community website is an online platform specifically designed to bring groups of people together around a shared interest, goal, identity, or topic. Unlike a standard website that broadcasts information one-way from creator to visitor, a community website is interactive and participatory — members join, create profiles, post content, start discussions, react to each other’s contributions, and build relationships over time.
Community websites come in many forms and serve many purposes. Some are structured like social networks with activity feeds and private messaging. Others are organized around learning, with courses and lesson discussions. Some are professional networks for industry peers, while others are fan communities, brand advocate spaces, or alumni networks.
What distinguishes a community website from a standard social media profile or Facebook group is ownership and control. When you build your community on your own WordPress website with FluentCommunity, you own the platform, the data, the member relationships, and the experience. There are no algorithm changes that reduce your reach, no platform policy updates that restrict your content, and no competing advertisements displayed to your members.
A complete community website typically includes:
- Member registration and custom user profiles
- Activity feeds and content posting
- Discussion threads and comment sections
- Private messaging between members
- Groups or spaces for sub-communities around specific topics
- Notifications and real-time engagement tools
- Search and member directories
- Privacy and moderation controls
- Optional LMS features for courses and learning paths
Benefits of Creating a Community Website in WordPress
1. Complete Ownership and Data Control
When your community lives on Facebook, Discord, or Slack, those platforms own the data, the relationships, and the rules. If the platform changes its policies, reduces organic reach, or shuts down, you lose everything. Building your community on WordPress means you own the platform, host the data, and maintain full control over every aspect of the member experience — now and in the future.
2. No Monthly Platform Fees
Third-party community platforms like Circle, Mighty Networks, Kajabi, or Teachable charge substantial monthly fees that scale with your member count. A WordPress-based community with FluentCommunity runs on your own hosting — meaning your platform costs are fixed and predictable, regardless of how large your community grows.
3. Unlimited Customization
WordPress gives you complete freedom to design and customize your community website to match your brand, your audience, and your specific use case. With FluentCommunity’s built-in branding options and WordPress theme compatibility, you can create a community experience that feels entirely unique — not constrained by the visual templates of a third-party platform.
4. Deep Integration with Your Existing WordPress Stack
If you already have a WordPress website for your business, blog, or online store, FluentCommunity integrates seamlessly into your existing installation. Members who are already customers, students, or subscribers can join your community without creating a separate account on a different platform — reducing friction and improving the overall user experience.
5. Monetization Flexibility
On your own WordPress community site, you choose exactly how to monetize — paid memberships, gated courses, premium spaces, one-time access fees, or subscription-based access. You keep 100% of the revenue with no platform commission fees. Integration with WooCommerce, FluentCart, and payment gateways gives you complete billing flexibility.
6. Privacy and Security
For communities dealing with sensitive topics — health, recovery, professional mentorship, or private business discussions — the privacy assurances of a self-hosted community far exceed those of consumer social platforms. You control who can join, what data is collected, how it is stored, and what privacy standards are applied.
7. Built-in LMS Capabilities
FluentCommunity uniquely combines community and course management in a single plugin. You can build an online course alongside a community space for course students — enabling peer discussions, lesson-level interaction, and progress tracking without needing a separate LMS plugin. This tightly integrated approach creates a superior learning and community experience.
8. Scalability
A self-hosted WordPress community site scales with your hosting infrastructure. As your community grows, you upgrade your hosting plan rather than paying an increasingly expensive per-member fee to a third-party platform. FluentCommunity is specifically engineered for speed and performance — delivering fast load times and smooth member experiences even as your community scales to thousands of active members.
What is FluentCommunity Plugin?
FluentCommunity is a full-featured WordPress community and LMS plugin developed by WPManageNinja — the team behind popular tools including FluentCRM, FluentForms, Fluent Support, and FluentSMTP, which together power over 1 million businesses globally.
FluentCommunity is described as the fastest WordPress community plugin, engineered from the ground up to deliver ultra-fast, high-performance community experiences without the bloat and slow loading times associated with older community plugins like BuddyBoss and BuddyPress. It combines powerful social networking features (activity feeds, spaces, private messaging, reactions, polls, leaderboards) with a complete built-in LMS (course builder, drip content, progress tracking, lesson discussions) in a single seamless platform.
The plugin is available as a free version on WordPress.org and a premium Pro version at fluentcommunity.co. The free version includes an impressively complete feature set for building a functional community. Pro unlocks advanced engagement features including leaderboards, user badges, verification signs, the Giphy module, emoji module, media module, welcome screen customization, and automation actions. Pro annual plans start at $159 per year for a single site.
Key Features of FluentCommunity Plugin
1. Ultra-Fast Performance
Unlike older WordPress community plugins that load heavy scripts and slow down your server, FluentCommunity is engineered for speed. It delivers a strikingly fast, smooth user experience — comparable to modern consumer social platforms like Facebook or Discord — without the performance penalty that traditionally comes with feature-rich community plugins. Fast load times directly impact member retention and engagement.
2. Unlimited Spaces (Groups)
Spaces are the organizational backbone of FluentCommunity. Think of them as sub-communities or groups within your larger community. You can create unlimited spaces for different topics, interest areas, courses, or membership tiers — each with its own activity feed, privacy settings, member list, and discussion threads. Spaces let you build a structured, organized community where members can find and engage with content that is most relevant to them.
3. Activity Feeds
FluentCommunity’s real-time activity feed keeps members informed and engaged by displaying the latest posts, reactions, comments, and interactions from across the community or within specific spaces. The feed is designed to be engaging and easy to navigate — encouraging members to dive into conversations and discover new content naturally.
4. Rich User Profiles
Every community member gets a complete, personalized profile where they can showcase their interests, bio, social links, contributions, badges, and activity history. Rich profiles help members discover each other, build relationships, and establish their reputation within the community — fostering deeper connections than a simple username and avatar.
5. Posts and Content Sharing
Members can create posts in the community feed or within specific spaces, sharing text, images, videos, documents, GIFs, and polls. Post creation is intuitive and clean, encouraging members to contribute regularly without technical barriers. Admins can pin important posts, enable or restrict certain content types, and moderate contributions through a centralized dashboard.
6. Real-Time Private Chats
FluentCommunity includes built-in real-time private messaging between members — a critical feature for fostering genuine one-on-one connections within your community. Members can access their inbox directly from the community interface without needing a third-party messaging tool. This keeps all community interactions within your owned platform.
7. Comments, Reactions, and Engagement Tools
Members can comment on posts, reply to comments, and react with emoji reactions — creating dynamic, multi-layered conversations similar to popular social platforms. In Pro, the Giphy module and full emoji module add additional expressive tools that make interactions more lively and engaging.
8. Polls and Surveys
Create polls within posts or spaces to gather member opinions, run quick surveys, make decisions collaboratively, or simply drive engagement. Polls are a powerful tool for keeping the community active, understanding member preferences, and creating a sense of shared participation in community decisions.
9. Leaderboard and Gamification (Pro)
FluentCommunity Pro includes a leaderboard system that ranks members based on their community contributions and engagement. This gamification element creates friendly competition, motivates participation, and rewards your most active members with public recognition. Combined with user badges (Pro) and verification signs (Pro), the leaderboard system transforms community engagement from passive scrolling into active, motivated participation.
10. Built-in LMS — Course Builder
FluentCommunity’s integrated LMS lets you create full online courses using the familiar Gutenberg block editor. Each course can contain multiple lessons organized into structured modules, with support for video content, rich text, embedded media, and file attachments. The centralized course directory makes all available courses discoverable and easy to access for enrolled members.
11. Drip Content
The drip content feature lets you release course lessons on a scheduled basis rather than all at once. This is ideal for program-style courses where you want students to progress through material sequentially over days or weeks — preventing overwhelm, maintaining engagement throughout the course duration, and creating a sense of momentum and anticipation.
12. Progress Tracking
Both instructors and students can monitor course progress in real time. Students see their completion status for each lesson and module, while instructors and admins get a centralized view of enrollment data and class-wide progress — enabling timely intervention and personalized support for students who fall behind.
13. Privacy and Moderation Controls
FluentCommunity gives administrators granular privacy controls at both the community and space level. Spaces can be public, private (members only), or secret (invite only). User approval workflows let admins manually approve new member registrations before they gain access. The role manager lets you assign different permissions to different member types — administrators, managers, moderators, and regular members.
14. Branding Customization
Customize the visual appearance of your community portal to match your brand — custom colors, logos, welcome messages, custom slugs, and sidebar links. The welcome screen feature (Pro) lets you create a branded, guided first experience for new members. Dark and light mode are both supported, letting members choose the display preference that suits them.
15. One-Click Migration from BuddyBoss and BuddyPress
If you are currently running a community on BuddyBoss or BuddyPress and want to migrate to FluentCommunity, the plugin offers a one-click migration tool that transfers your existing community data, user profiles, activities, and media without data loss. Large BuddyBoss communities can use the WP CLI command for bulk migration of all content.
16. Deep Integration Ecosystem
FluentCommunity integrates natively with the entire WPManageNinja product suite and beyond:
- FluentCRM — Sync community member data with your CRM, trigger marketing automation based on community activity, and segment members based on engagement
- FluentForms — Use form builder to collect additional member information during registration or community onboarding
- FluentCart — Sell access to community spaces or courses with payment processing
- Fluent Support — Integrate your community with your help desk for seamless member support
- FluentSMTP — Ensure reliable delivery of all community email notifications
How to Create a WordPress Community Website Using FluentCommunity Plugin
Follow this complete step-by-step guide to build your WordPress community website using FluentCommunity, starting with the free version.
Step 1: Install WordPress and Choose Your Hosting
FluentCommunity requires a self-hosted WordPress installation. Choose a reliable WordPress hosting provider with sufficient resources for your community’s expected traffic. Managed WordPress hosting with at least 2GB RAM is recommended for communities with active real-time features. Install WordPress via your hosting control panel’s one-click installer.
Step 2: Install FluentCommunity Free Plugin
- Log in to your WordPress Dashboard
- Go to Plugins > Add New
- Search for ‘FluentCommunity’
- Find the plugin by Shahjahan Jewel (WPManageNinja) and click Install Now
- Click Activate — FluentCommunity will now appear in your WordPress admin sidebar
Step 3: Run the Setup Wizard
FluentCommunity includes a guided setup wizard that launches automatically on first activation. The wizard walks you through:
- Setting your community name and description
- Choosing your community slug (the URL path for your community portal, e.g., yoursite.com/community/)
- Configuring basic registration settings — open registration or admin approval required
- Selecting an initial color scheme for your community
- Creating your first space
The setup wizard gets your community portal live in under five minutes — no complex configuration required.
Step 4: Create and Configure Spaces
- Go to FluentCommunity > Spaces in your WordPress dashboard
- Click Create New Space
- Enter the space name, description, and icon/cover image
- Set the privacy level: Public (anyone can join), Private (approval required), or Secret (invite only)
- Choose who can post in the space: all members or admins only
- Repeat to create spaces for each major topic or sub-community you want to support
Well-organized spaces are the foundation of a healthy community — give each space a clear purpose, focused topic, and a compelling name that members will immediately understand.
Step 5: Customize Your Community Portal Design
- Go to FluentCommunity > Settings > Appearance
- Upload your community logo and cover image
- Set your brand colors for the community portal
- Configure the community welcome message that new members see on first login
- Add custom sidebar links to important pages on your website
- Set your preferred default mode: dark or light
Step 6: Configure Member Registration and Approval
Go to FluentCommunity > Settings > Registration. Choose your registration model:
- Open Registration — anyone can sign up and immediately access the community
- Admin Approval — new registrations are held in a pending state until an administrator manually approves them
- Invitation Only — members can only join via a direct invitation link
For paid or private communities, admin approval or invitation-only registration ensures your membership remains curated and valuable.
Step 7: Set Up the Role Manager
Go to FluentCommunity > Settings > Roles to configure member permissions. Define what different member roles (Administrator, Manager, Moderator, Member) can do within the community — create posts, delete others’ content, manage spaces, approve members, and access admin settings.
Step 8: Create Your First Community Post
Navigate to your community portal (yoursite.com/community/) and log in as an admin. Click the post creation area in the main feed and create a welcome post introducing your community, explaining what members can expect, and encouraging them to introduce themselves. Pin this post so it stays visible at the top of the feed for new members.
Step 9: Create an Online Course (LMS Feature)
- Go to FluentCommunity > Courses > Add New Course
- Enter the course title, description, and cover image
- Set the enrollment type: free, paid (via FluentCart), or restricted to specific user roles
- Add lessons using the Gutenberg block editor — each lesson can contain video, text, embedded media, and files
- Organize lessons into modules for structured progression
- Configure drip content settings if you want lessons released on a scheduled basis
- Enable lesson discussions to let students interact within each lesson
- Publish the course — it will appear in the FluentCommunity course directory
Step 10: Configure Email Notifications
Go to FluentCommunity > Settings > Email to configure the email notifications sent to members. Available notification triggers include new post in a followed space, direct message received, mention notification, new reaction on a post, course enrollment confirmation, and weekly digest email. Connect FluentSMTP to ensure all transactional emails are delivered reliably.
Step 11: Set Up Polls and Engagement Features
When creating a post in your community feed or within a space, click the Polls option to create a survey or vote. Use polls to:
- Welcome new members and gather preferences
- Make community decisions collaboratively
- Run fun weekly engagement activities
- Survey members about upcoming course topics or community features
Step 12: Install FluentCommunity Pro (Optional Upgrade)
- Purchase a Pro plan from fluentcommunity.co (Single Site from $159/year or $399 lifetime)
- Download the Pro plugin ZIP from your WPManageNinja account
- Go to WordPress > Plugins > Upload Plugin, upload and activate the ZIP
- Enter your license key in FluentCommunity > Settings > License
- Pro features — Leaderboards, User Badges, Verification Signs, Giphy Module, Emoji Module, Manage Topics, Media Module, Welcome Screen, Automation Actions — are unlocked immediately
Step 13: Migrate from BuddyBoss or BuddyPress (If Applicable)
If you are migrating an existing community from BuddyBoss or BuddyPress, go to FluentCommunity > Tools > Migration. Run the one-click migration wizard to transfer your existing member profiles, activity data, groups, and media. For large communities with extensive data, use the WP CLI migration command for faster, more reliable bulk data transfer.
Step 14: Invite Members and Launch
With your community configured, spaces created, and initial content published, invite your first members:
- Share the community registration link with your email list
- Announce the community launch on your blog, social media, and YouTube channel
- Send a personal invitation to your most engaged followers or customers
- Offer an early-member incentive (exclusive space access, a free course, or a badge) to reward founding members
Use Cases for WordPress Community Websites
1. Online Course Community
Pair each online course with a dedicated community space where students ask questions, share progress, celebrate wins, and support each other. The combined course + community experience dramatically improves course completion rates and student satisfaction. FluentCommunity’s built-in LMS makes this the most seamless option available on WordPress — no separate LMS plugin required.
2. Brand Advocate Community
Turn your most loyal customers into a passionate community of brand advocates. Create a private members-only space where your top customers get early access to new products, exclusive content, direct interaction with your team, and peer connections with other brand enthusiasts. This kind of community deepens brand loyalty, generates word-of-mouth referrals, and provides invaluable customer feedback.
3. Professional Network and Mastermind
Build a private professional network for industry peers, mastermind groups, freelancers, or consultants in a specific niche. Members pay a monthly or annual subscription for access to networking spaces, expert discussions, resource libraries, and peer accountability groups. The leaderboard and badge features add recognition elements that reward the most active and valuable contributors.
4. Educational Institution or School
Create a safe, private digital campus for students to connect with peers and instructors beyond the classroom. Each course or subject gets its own space with dedicated lesson discussions, peer study groups, and shared resources. Progress tracking and drip content ensure students stay on pace with the curriculum. User approval prevents unauthorized access to student-only spaces.
5. Nonprofit and Cause Community
Rally supporters, volunteers, and donors around a shared cause in a dedicated online community. Members can coordinate campaigns, share updates, celebrate milestones, and collaborate on advocacy initiatives. The privacy controls ensure sensitive discussions remain within the community, while the activity feed keeps everyone informed and motivated around the mission.
6. Creator Fan Community
YouTubers, podcasters, writers, and content creators can build a premium members-only community where their most dedicated fans get exclusive content, behind-the-scenes access, direct interaction with the creator, and connections with other fans. The community becomes an additional revenue stream (via paid membership) while reducing dependence on social media platforms for audience engagement.
7. Workplace Internal Community
Build an internal company community platform for teams working across multiple locations or time zones. Different spaces serve different departments, projects, or interests. Real-time chat supports quick communication while activity feeds and discussion threads create asynchronous collaboration. Custom branding ensures the platform feels native to your company culture.
8. Coaching and Mentorship Platform
Coaches, consultants, and mentors can create a private community for their clients that combines group coaching content (via the LMS), peer accountability spaces, direct messaging between coach and client, and community-wide motivation through leaderboards and badges. This transforms a one-to-one coaching service into a scalable one-to-many community product.
FluentCommunity Free vs Pro: Detailed Comparison
Here is a comprehensive feature-by-feature breakdown of the free and Pro versions of FluentCommunity:
Feature | Free (Lite) | Pro Version |
Setup Wizard | Yes | Yes |
Unlimited Spaces (Groups) | Yes | Yes |
User Profiles | Yes | Yes |
Activity Feeds | Yes | Yes |
Posts & Content Sharing | Yes | Yes |
Comments & Reactions | Yes | Yes |
Real-Time Private Chats | Yes | Yes |
Notifications | Yes | Yes |
Hashtags | Yes | Yes |
Mentions | Yes | Yes |
Polls & Surveys | Yes | Yes |
Bookmarks | Yes | Yes |
Member Directory | Yes | Yes |
Search Functionality | Yes | Yes |
Privacy Settings | Yes | Yes |
Custom Sidebar Links | Yes | Yes |
Welcome Message | Yes | Yes |
Custom Slug | Yes | Yes |
File Upload | Yes | Yes |
Dark / Light Mode | Yes | Yes |
Role Manager | Yes | Yes |
User Approval | Yes | Yes |
Email Digest | Yes | Yes |
Branding Customization | Yes | Yes |
Course Builder (Gutenberg) | Yes | Yes |
Lesson & Module Management | Yes | Yes |
Drip Content | Yes | Yes |
Progress Tracking | Yes | Yes |
Lesson Discussion | Yes | Yes |
Course Enrollment Types | Yes | Yes |
Manager Role | No | Yes |
Leaderboards | No | Yes |
User Badges | No | Yes |
Verification Sign (Checkmark) | No | Yes |
Giphy Module | No | Yes |
Emoji Module | No | Yes |
Manage Topics | No | Yes |
Media Module (Advanced) | No | Yes |
Welcome Screen (Custom) | No | Yes |
Automation Actions | No | Yes |
FluentCRM Integration | Yes | Yes |
FluentForms Integration | Yes | Yes |
FluentCart Integration | Yes | Yes |
Fluent Support Integration | Yes | Yes |
FluentSMTP Integration | Yes | Yes |
One-Click BuddyBoss Migration | Yes | Yes |
Priority Support | Community Forum | Priority Support |
FluentCommunity Pro Pricing Plans
FluentCommunity Pro offers both annual and lifetime payment options, with all plans including access to every Pro feature:
Plan | Annual Price | Lifetime Price | Sites | Support |
Free | Free forever | Free forever | Unlimited | Community Forum |
Single Site | $159/year | $399 one-time | 1 Site | 1 Year Support |
5 Sites | $319/year | $799 one-time | 5 Sites | 1 Year Priority |
15 Sites | $519/year | $1,599 one-time | 15 Sites | 1 Year Priority |
All Pro plans include all features with no feature gating between tiers — pricing varies only by the number of sites you can activate the plugin on. Lifetime plans include lifetime plugin updates and lifetime priority support, making them an excellent long-term investment for established businesses.
Frequently Asked Questions (FAQs)
1. Is FluentCommunity a Good Alternative to BuddyBoss?
Yes. FluentCommunity is widely considered one of the best alternatives to BuddyBoss for several compelling reasons. First, FluentCommunity is significantly faster — it is engineered from the ground up for performance, whereas BuddyBoss is known for adding substantial load to WordPress sites. Second, FluentCommunity is more affordable — BuddyBoss costs $228 per year for a single site, while FluentCommunity Pro starts at $159 per year. Third, FluentCommunity includes a built-in LMS, which BuddyBoss does not natively. Finally, FluentCommunity offers a one-click migration tool for BuddyBoss users to switch without losing existing data.
2. Can I Charge Members to Access My WordPress Community?
Yes. You can monetize your FluentCommunity-powered community website in several ways. The most straightforward approach is to integrate FluentCommunity with FluentCart or WooCommerce — you create a product or subscription that, upon purchase, grants access to specific community spaces or the entire community portal. You can also use WooCommerce Memberships or Restrict Content Pro to gate community access behind a paid membership. FluentCommunity’s user approval system lets you manually approve only paying members, or you can configure automatic access provisioning via FluentCRM automation workflows.
3. Does FluentCommunity Work with Any WordPress Theme?
Yes. FluentCommunity is designed to be theme-independent. The community portal renders within its own full-screen interface that overlays your WordPress theme — meaning the community experience looks consistent and professional regardless of which theme your main website uses. Your homepage, blog, and other pages continue to use your active theme, while the community portal at its dedicated slug provides a completely separate, app-like interface. This architecture means you do not need to find or purchase a special theme to use FluentCommunity.
4. How Many Members Can a FluentCommunity Website Support?
FluentCommunity itself does not impose any limits on the number of members or community spaces you can have — both the free and Pro versions support unlimited members and unlimited spaces. The practical capacity of your community website is determined by your hosting infrastructure. A well-optimized hosting environment with sufficient CPU, RAM, and database resources can support communities of tens of thousands of active members. For very large communities (100,000+ members), managed WordPress hosting with dedicated resources or a VPS with proper caching configuration is recommended.
5. Can I Use FluentCommunity Alongside My Existing WordPress Website?
Yes, and this is one of FluentCommunity’s greatest strengths. Because FluentCommunity is a WordPress plugin — not a separate SaaS platform — it installs on your existing WordPress website and operates as an integrated part of it. Your existing pages, blog posts, WooCommerce store, and other functionality remain completely intact. Community members use the same WordPress user accounts as your customers, students, or subscribers — eliminating the need for separate logins. This integration creates a seamless experience where the community feels like a natural extension of your existing website rather than a disconnected external platform.
Conclusion
Building an online community is one of the most powerful investments you can make in your brand, business, or mission. A thriving community creates recurring revenue, deepens member loyalty, generates organic word-of-mouth growth, and builds something far more durable than any social media following — a direct relationship with your audience that no algorithm change or platform policy can take away.
FluentCommunity makes building that community on WordPress easier, faster, and more affordable than ever before. With an impressively complete free version, a Pro upgrade that unlocks gamification, advanced engagement, and automation features, a built-in LMS for course creators, native integrations with the world’s most popular marketing and CRM tools, and the fastest community performance available in a WordPress plugin, FluentCommunity is the clear choice for creators, educators, brands, nonprofits, and businesses ready to build their own online community.
Whether you are starting your first community or migrating away from an expensive SaaS platform or a slower legacy plugin, FluentCommunity gives you everything you need to create an engaging, professional, high-performance community website — on a platform you own, with data you control, at a fraction of the cost of alternatives.
Download the free FluentCommunity plugin from WordPress.org today, or visit fluentcommunity.co to explore Pro plans and start building your WordPress community website.