Watch Video Tutorial on WooCommerce Wallet plugin
Table of Contents
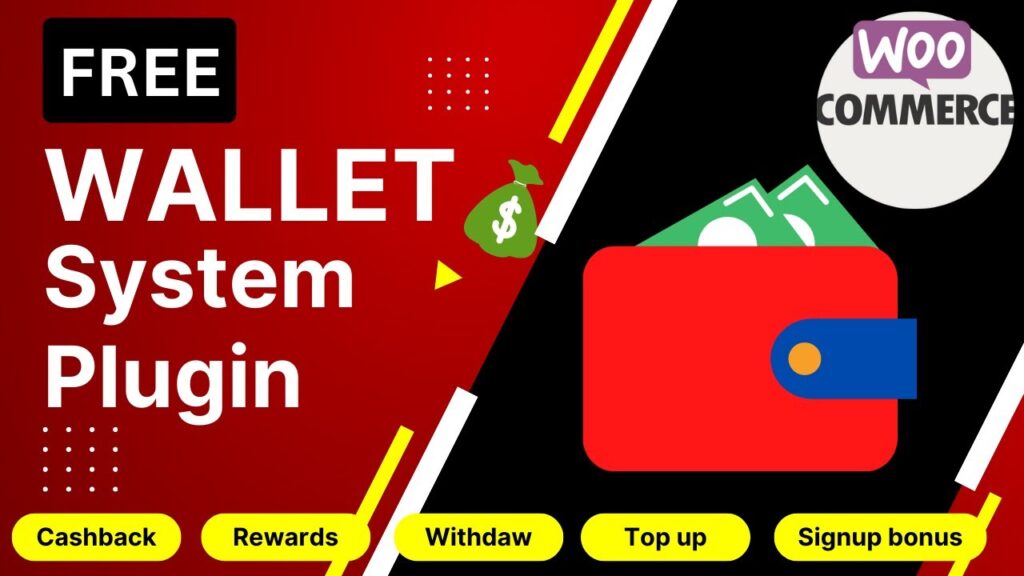
What Is a WooCommerce Wallet Plugin and Why Does Your Store Need One?
A WooCommerce wallet plugin adds a digital wallet feature to your store, letting registered customers pre-load funds into their account and use that balance to pay for orders — without reaching for their credit card every time. Think of it like a prepaid account tied directly to your WooCommerce store. Here is why this matters for a local business or small e-commerce store: – Customers with store credit are far more likely to come back and spend it, especially if they have earned it through cashback or a refund. – The checkout process becomes much faster when customers just tap “pay with wallet” — no card details needed. – You can use the wallet to issue refunds as store credit, which means the money stays inside your ecosystem instead of going back to a bank. – Wallet systems encourage larger purchases, because customers who have a balance often spend it plus more. For any store owner trying to build repeat business, a wallet system is one of the smartest free tools you can add to WooCommerce.
About the Plugin: Wallet System for WooCommerce by WP Swings
The plugin we are using in this tutorial is called Wallet System for WooCommerce, developed by WP Swings. It is available for free on the official WordPress plugin repository, and it has a strong track record with thousands of active installs and consistently positive user reviews. This plugin is an in-store digital wallet that helps registered customers purchase products and services using their available wallet balance. Customers can also recharge their wallet using any supported payment method on the store, and the admin can review all transactions and manage wallet balances from a single dashboard. The plugin also has a Pro version (Wallet System for WooCommerce Pro) if you need advanced features, but the free version has plenty to get started with — and for most small business stores, it covers everything you need.
Key Features of the Free Version
Here is what the free Wallet System for WooCommerce plugin includes out of the box: – Customers can add funds to their wallet using any payment method enabled on your store. – Customers can pay fully or partially with their wallet balance at checkout — if the wallet does not cover the full order total, they can pay the remainder with another gateway like Stripe or PayPal. – Cashback rewards — you can set up automatic cashback that is deposited into customer wallets after an order completes, either as a flat amount or a percentage. – Customers can view their full transaction history (credits and debits) directly from their account page. – Customers can transfer wallet balance to other registered users. – The admin can manually credit or debit the wallet balance of individual users or bulk-update all users at once. – Email notifications are sent to customers whenever their wallet balance is updated. – Refunds from cancelled orders can be sent directly to the customer’s wallet instead of back to their original payment method. – A [wps-wallet] shortcode is available to display the wallet panel on any page of your site. – Compatible with WordPress Multisite and WPML for multilingual stores.
How to Install the WooCommerce Wallet Plugin (Step-by-Step)
Installing the plugin is straightforward — you do not need any coding knowledge at all. Here is exactly how to do it.
Step 1: Go to Plugins > Add New in Your WordPress Dashboard
Log in to your WordPress admin panel. In the left sidebar, hover over Plugins and click Add New. This takes you to the plugin search screen.
Step 2: Search for the Plugin
In the search bar at the top right, type “Wallet System for WooCommerce” and press Enter. Look for the plugin by WP Swings in the search results. You will see the plugin’s star rating, number of active installs, and a brief description.
Step 3: Install and Activate
Click the Install Now button next to the plugin. WordPress will handle the download automatically — you do not need to leave your browser. Once installed, the button changes to Activate. Click Activate, and the plugin is live on your site.
Step 4: Enable the Plugin from Settings
After activation, navigate to WP Swings > Wallet System in your dashboard. In the General Settings tab, find the toggle to enable the wallet plugin and switch it on. This is an important step — the wallet will not function until you enable it here. Once enabled, you can proceed to configure the other payment and cashback settings.
How to Configure the Wallet Settings
Once the plugin is installed and enabled, there are a few key settings worth configuring right away.
General Settings
From WP Swings > Wallet System > General Settings, you can enable the wallet, set minimum and maximum wallet recharge amounts, and configure whether refunded orders should automatically credit the customer’s wallet. You can also enable the auto-complete feature so that orders paid entirely by wallet are marked as complete automatically, without you needing to do it manually.
Cashback Settings
Head to the Wallet Cashback tab to set up your cashback rewards. You can choose which order status triggers the cashback (for example, when an order is marked Completed), and you can set the cashback rule to either Cart-Wise (based on the total order amount) or Category-Wise (cashback only on selected product categories). This is a great way to incentivize purchases in specific parts of your store.
Wallet Shortcode
To display the wallet dashboard on any page — for example, a dedicated “My Wallet” page — use the shortcode [wps-wallet]. You can also use [wps-wallet-amount] to display just the current wallet balance anywhere on the site, such as in a header widget or sidebar.
Managing Customer Wallets as Admin
From WP Swings > Wallet System, you can see a full list of all wallet users and their balances. You can manually add or subtract funds from individual accounts, or use the bulk operation to credit or debit all users at once — useful for running store-wide promotions. You can also view the complete transaction list under the Wallet Transactions tab, and download it as a CSV or Excel file for your records.
How the Wallet Works for Your Customers
Once everything is set up, here is what your customers experience on the front end. After logging into their account, customers will see a wallet section where they can check their current balance, add funds using any payment method you have enabled, view their transaction history, and transfer balance to another registered user if you have enabled that feature. At checkout, the wallet appears as a payment option. Customers with enough balance can simply select Wallet and complete their purchase instantly — no card details needed. If their wallet balance is less than the order total, they can pay partially with their wallet and cover the rest with another method like Stripe or PayPal. This partial payment flexibility is one of the most practical features, especially for stores selling a mix of low and high-priced items.
Free vs Pro: What Do You Get with the Paid Version?
The free version is genuinely useful and covers the core wallet functionality for most small stores. However, if you want to take things further, the Pro version (Wallet System for WooCommerce Pro) unlocks additional features: – Buy Now Pay Later (BNPL): Customers can continue shopping even if they have insufficient wallet funds — the shortfall is recorded as a pay-later amount they settle later, with optional interest. – KYC Verification: Customers can upload identity documents, and you can approve or reject them before enabling full wallet features — useful for stores that need compliance controls. – QR Code Payments: Customers can generate a QR code for their wallet so other users can transfer funds by scanning it. – Wallet Coupons: Create exclusive coupons that can only be redeemed as wallet top-ups, rather than discounts at checkout. – Subscription-Based Auto Top-Up: Set up recurring wallet recharges on a daily, weekly, monthly, or yearly schedule. – Advanced user restriction controls — restrict specific users from individual wallet features like withdrawals, transfers, or top-ups. For most small business stores and local e-commerce sites, the free version is the right starting point. You can always upgrade if your store grows and you need the extra functionality.
Tips to Use the Wallet System to Boost Sales
Getting the plugin installed is just the beginning. Here are a few practical ways to use the wallet system to actually grow your revenue: – Set a small cashback percentage (even 2–5%) on every completed order. Customers love earning something back, and that wallet balance gives them a reason to return and spend it. – When processing a refund, always refund to the wallet instead of back to the customer’s payment method (where possible). The money stays in your store ecosystem. – Promote the wallet feature on your homepage, checkout page, and in your post-purchase emails. A lot of customers will not know the feature exists unless you point it out. – If you run a sale, consider offering a small wallet credit bonus (e.g. “Spend $50 and get $5 wallet credit”) as an alternative to a simple discount. It drives the next purchase rather than just reducing the current one. – Use the bulk wallet credit tool around seasonal events or store anniversaries to surprise customers with a small credit — it generates goodwill and often triggers an immediate purchase.
Frequently Asked Questions
Is the WooCommerce wallet plugin free?
Yes, the Wallet System for WooCommerce by WP Swings has a fully functional free version available on the WordPress plugin repository. Some advanced features like Buy Now Pay Later, KYC verification, and QR code payments require the paid Pro version, but the core wallet functionality is free.
Can customers withdraw money from their WooCommerce wallet?
In the free version, customers can only use their wallet balance to make purchases within your store — they cannot withdraw it as cash. Withdrawal functionality is available in the Pro version, where customers can request a payout to their bank or PayPal.
How does the WooCommerce wallet work at checkout?
At checkout, the wallet appears as a payment option. Customers with sufficient balance can select it and pay instantly. If their balance does not cover the full order total, they can pay partially with their wallet and cover the rest with another payment method like Stripe or PayPal.
Can I manually add credit to a customer’s wallet as the store admin?
Yes. From WP Swings > Wallet System in your WordPress dashboard, you can view all wallet users and manually credit or debit individual accounts. You can also use the bulk operations feature to add or subtract amounts from all user wallets at once.
Is the WooCommerce wallet plugin secure?
The Wallet System for WooCommerce plugin follows WordPress and WooCommerce security best practices. The admin can also restrict specific users from wallet features if needed, and KYC verification is available in the Pro version for stores that require identity checks before enabling full wallet access.
Can I use the wallet plugin with WooCommerce subscriptions?
Yes, the Wallet System for WooCommerce free plugin is compatible with WooCommerce Subscriptions and WP Swings’ own Subscriptions For WooCommerce plugin, allowing wallet funds to be used toward renewal payments.
Final Thoughts
Thanks for reading all the way through — I hope this tutorial gives you a clear picture of how to set up the free WooCommerce wallet plugin and start using it to build real customer loyalty on your store. If you want to see the full setup in action, make sure you watch my step-by-step video tutorial (linked above) where I walk through every screen from installation to the customer-facing wallet dashboard. It makes the whole process much easier to follow visually. If you have any questions about the setup or run into an issue on your specific site, drop a comment below — I read every one. And if you would rather have someone set this up for you properly, feel free to reach out to me directly through the contact page. I have helped hundreds of WooCommerce store owners get features like this running quickly and cleanly, and I would be happy to help you too.
I hope that this article on How to install Free WooCommerce Wallet plugin will help you. Read more articles on WooCommerce Tutorials.
Do not forget to subscribe to our Quick Tips Youtube Channel for upcoming videos on Website Design, WordPress Tutorials, Elementor, and WooCommerce tutorials.