If you have ever wanted to add a custom feature to your WordPress website but stopped short because you did not know how to code, the Elementor Angie AI plugin is about to change everything for you. Angie is a free agentic AI tool built natively into WordPress that lets you describe exactly what you want — in plain English — and then builds production-ready code right inside your dashboard. Whether you want to create custom Elementor widgets, build interactive front-end apps, automate site management tasks, or extend existing functionality, Elementor Angie AI makes it possible without hiring a developer. In this complete tutorial, you will learn what Angie is, how to install it, and how to use its most powerful features step by step.
Watch step by step video tutorial: https://youtu.be/TLmUoKEjme8
Table of Contents
What Is the Elementor Angie AI Plugin?
Elementor Angie AI is a free agentic AI WordPress plugin developed by Elementor, one of the world’s most popular website builder platforms powering over 15 million websites. Unlike standard AI writing assistants or chatbots, Angie operates as a true AI agent that understands your specific WordPress environment and takes real actions inside it.
The word “agentic” is the key distinction here. Angie does not just suggest things — it actually builds them. You give it a natural language instruction like “create a custom pricing table widget with three tiers” and Angie plans the work, writes the PHP, CSS, and JavaScript required, tests it in a sandboxed environment, and presents the result for your approval before anything touches your live site.
Angie was developed specifically for professional web creators, freelancers, and agencies who want to push beyond the limitations of existing templates and drag-and-drop tools without being dependent on developers. As of 2026, it is currently in public beta and available for free with daily AI credits included.
Why Angie Is Different from Other AI Tools
Most AI tools — including popular options like ChatGPT or GitHub Copilot — generate code without any awareness of your specific website environment. They do not know which plugins you have installed, what your theme configuration looks like, or how your content is structured. As a result, the code they produce often requires significant manual adjustment to actually work on your site.
Angie solves this fundamental problem by using the Model Context Protocol (MCP), which gives it direct access to your site’s real data — your installed plugins, active theme, custom post types, and Elementor settings — before it writes a single line of code. This context-awareness means the code Angie produces integrates correctly with your specific setup from day one.
Who Is Angie AI For?
- WordPress beginners who want to add custom features without learning to code
- Freelance web designers and developers looking to speed up project delivery
- Digital agencies managing multiple client websites
- WordPress consultants who want to offer more customization without outsourcing
- Business owners who want to build advanced website features independently
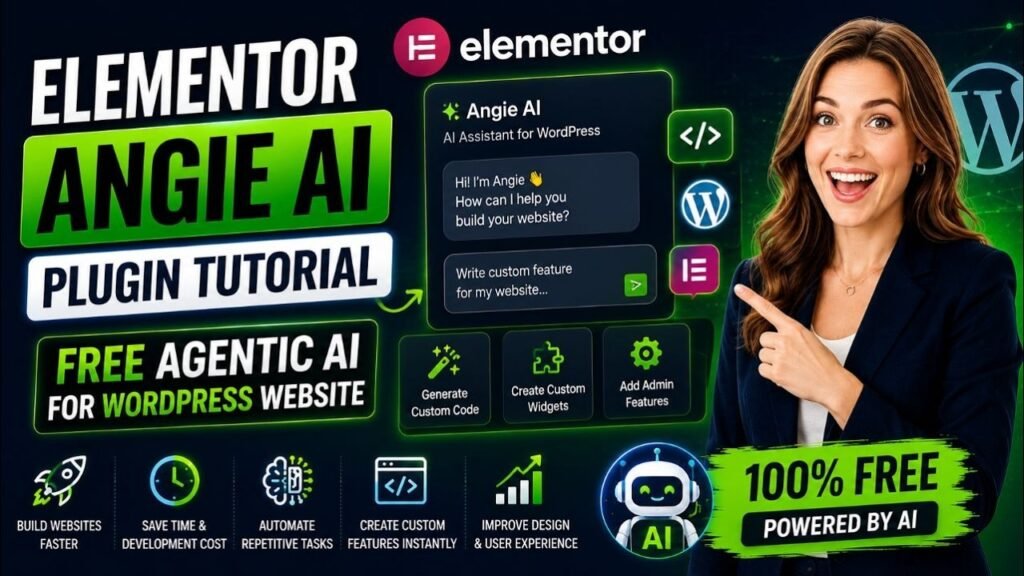
Key Features of Angie AI
The Elementor Angie AI plugin is not a one-trick tool. It comes packed with a range of powerful capabilities organized into two main areas: Angie Code for building, and Super Admin Mode for managing.
Angie Code: Build Anything You Can Imagine
Angie Code is the core building engine. It takes your natural language descriptions and turns them into fully functional, production-ready assets. Here is what you can build:
- Custom Elementor Widgets: Create entirely new widgets from scratch — complete with controls, responsive styles, and Elementor Editor compatibility. You can also extend existing Elementor widgets with additional settings and features.
- WordPress Admin Snippets: Customize your WordPress dashboard, add personalized admin views, create custom settings pages, implement hooks and filters, and even re-theme the entire admin interface.
- Website Snippets: Add sophisticated CSS animations, interactive JavaScript behaviors, custom mouse cursor effects, scroll-triggered events, and other front-end enhancements.
- Visual Front-End Apps: Build fully functional interactive applications like calculators, quizzes, trivia games for custom 404 pages, BMI calculators, mortgage calculators, and other engaging tools.
- Custom Post Types and Fields: Define and manage custom post types with their associated fields, giving you full control over how your content is structured and displayed.
- Complete Landing Pages: Generate entire landing pages with layouts, content, and styling for both the Elementor editor and the Gutenberg block editor.
Multi-Modal Input Methods
Angie is not limited to text prompts alone. You can interact with it in three powerful ways:
- Text Prompts: Describe what you need in plain, conversational English and Angie interprets your intent.
- Screenshot Uploads: Found a design you love on another website? Upload a screenshot and Angie will build a version of it for your site.
- URL References: Paste a URL and Angie will analyze the page and replicate or adapt its elements for your project.
Safe, Sandboxed Preview Environment
One of the most important features of Angie is its built-in safety net. Everything Angie builds is first created and tested in a completely isolated preview environment. You can see exactly how it looks and functions on your page before approving it. Nothing is added to your live site until you personally click approve. This gives you the freedom to experiment with confidence.
Cloud Library for Multi-Site Reuse
Once you create a widget, snippet, or app with Angie, you can save it to the Cloud Library and reuse it across multiple WordPress sites. This is a huge time-saver for agencies and freelancers who build similar features for different clients. Instead of rebuilding from scratch each time, you deploy saved assets in seconds.
Elementor Angie AI vs. Traditional Development and Generic AI Tools
To understand the real value of Angie, it helps to compare it against the alternatives most WordPress users currently rely on.
Feature | Angie AI | Generic AI (ChatGPT) | Traditional Dev |
Site Context Awareness | ✅ Auto-inherited | ❌ No awareness | ✅ Manual setup |
No-Code Required | ✅ Yes | ⚠️ Partial | ❌ Coding required |
Elementor Integration | ✅ Native | ❌ None | ⚠️ Manual |
Sandbox Testing | ✅ Built-in | ❌ No | ⚠️ Dev environment |
Custom Widget Builder | ✅ Yes | ❌ No | ✅ With code |
Cost | ✅ Free (beta) | ⚠️ Paid plans | ❌ Developer costs |
Production-Ready Code | ✅ Yes | ⚠️ Needs review | ✅ Yes |
As the comparison shows, Angie occupies a unique position. It delivers the power of professional development — production-ready, context-aware code — without the cost or technical barrier. For agencies and freelancers, this fundamentally changes the economics of custom WordPress development.
How to Install the Elementor Angie AI Plugin
Getting Angie up and running is straightforward. The entire setup takes less than five minutes. Here is how to do it step by step.
Requirements Before You Start
- A self-hosted WordPress website (WordPress.org, not WordPress.com free tier)
- WordPress 6.0 or higher
- PHP 7.4 or higher
- A free Elementor account (for accessing the AI credits)
Installation Method 1: Via WordPress Dashboard
- Log in to your WordPress admin dashboard
- Navigate to Plugins in the left sidebar, then click Add New
- In the search box at the top right, type “Angie”
- Find the plugin labeled “Angie – Agentic AI” developed by Elementor
- Click Install Now and wait for the installation to complete
- Click Activate to enable the plugin on your site
- You will see a new Angie menu item appear in your WordPress sidebar — click it to access the setup wizard and connect your Elementor account
Installation Method 2: Direct Download
- Visit the official Elementor Angie AI page at elementor.com/products/angie-ai-for-wordpress/
- Click the Download Free button to download the plugin ZIP file
- In your WordPress dashboard, go to Plugins, then Add New, then Upload Plugin
- Choose the downloaded ZIP file and click Install Now
- Activate the plugin and follow the setup wizard
Once installed, you will receive free daily AI credits that reset every 24 hours. This is more than enough for most regular use during the beta period. For heavier agency use, paid tiers will unlock higher credit limits when they become available.
How to Use Angie Code: Step-by-Step Tutorial
Now that you have Angie installed, let us walk through how to actually use it to build something useful. In this tutorial, we will create a custom Elementor pricing table widget — the kind of advanced UI component that would normally require a developer.
Step 1: Open the Angie Chat Interface
Click on Angie in your WordPress sidebar to open the main Angie chat interface. You will see a clean conversation window similar to a chat application. This is where all your interactions with Angie take place. At the top, you will notice the option to switch between Angie Code mode (for building) and Super Admin Mode (for managing).
Make sure you are in Angie Code mode for this tutorial.
Step 2: Describe What You Want to Build
In the chat input field, describe what you want in plain language. For our pricing table example, you might type something like:
Create a custom Elementor widget for a 3-tier pricing table. Each tier should have a plan name, price, list of features with checkmarks, and a CTA button. Make it responsive with a modern card design. Highlight the middle plan as recommended.
The more specific you are, the better the result. You can mention colors, fonts, hover effects, mobile behavior, and any other details that matter to you.
Step 3: Review Angie’s Plan
Before building, Angie will present a brief plan of what it intends to create. This might include the widget structure, the controls it will add, and any dependencies it will use. Review this plan and either confirm it or adjust your prompt if something does not look right.
Step 4: Let Angie Build in the Sandbox
Once you confirm, Angie gets to work. You will see the building process happen in real time. Angie writes the PHP class for the widget, the render function, the style definitions, and registers everything with Elementor — all in the sandboxed test environment. This typically takes between 30 seconds and 2 minutes depending on the complexity of what you requested.
Step 5: Preview and Refine
When Angie finishes, a live preview of your new widget appears. You can see it rendering on your page exactly as it will appear to visitors. At this stage, you can either:
- Approve it and add it to your live site
- Ask Angie to make changes using conversational follow-up prompts like “make the buttons green” or “add a money-back guarantee badge under each plan”
- Start over with a modified prompt if the result is not close to what you envisioned
Step 6: Publish to Your Live Site
When you are happy with the result, click Publish or Approve. Angie moves the widget from the sandbox to your live site. It now appears in your Elementor widget panel, ready to drag and drop onto any page. You can also further fine-tune it using Elementor’s visual controls for pixel-perfect adjustments without touching any code.
Step 7: Save to Cloud Library (Optional)
If you want to reuse this widget on other WordPress sites, click Save to Cloud Library. Give it a descriptive name and it will be accessible from any connected site. This is especially valuable for agencies building similar features across multiple client projects.
Angie Super Admin Mode: Manage Your Entire WordPress Site
Beyond building new features, Angie also functions as a powerful site management assistant through its Super Admin Mode. This is where Angie acts as your agentic site manager — reading your actual data and performing bulk operations through simple conversation.
Bulk Operations at Scale
Super Admin Mode excels at site-wide tasks that would normally take hours to complete manually. You can update product prices across an entire WooCommerce catalog, change user roles in bulk, modify custom field metadata across hundreds of posts, or update post statuses across entire categories — all with a single clear instruction.
Crucially, Angie always reads your actual data model before executing any bulk operation. It confirms the scope of what it is about to do and asks for your approval before running anything. You are always in full control.
Debug Errors Through Conversation
Troubleshooting WordPress errors is one of the most time-consuming parts of site management. Angie Super Admin Mode makes it dramatically faster. You can ask Angie to trace SMTP email delivery failures, identify PHP plugin conflicts, debug REST API connectivity issues, and analyze your WordPress debug log for recurring patterns. Angie can then deactivate conflicting plugins or modify the relevant hook to resolve the issue — while explaining what it found and what it is doing.
SEO and Site Maintenance at Scale
Managing SEO across a large website can be overwhelming. With Super Admin Mode, you can ask Angie to identify all posts missing meta descriptions and populate them automatically, create 301 redirect rules after a site restructure, standardize URL slugs to follow a consistent naming convention, and fix alt text missing on images. Tasks that would normally require dedicated SEO plugins or manual effort across hundreds of pages become conversational.
Real-World Use Cases for Angie AI
To give you a concrete sense of what is possible with Elementor Angie AI, here are some practical use cases that showcase its versatility across different types of WordPress projects.
Use Case 1: Build an Interactive Quiz Widget
A digital marketing agency wants to add a personality quiz to a client’s website to improve engagement and generate leads. Using Angie Code, they describe the quiz structure, the scoring logic, and the results display. Angie builds a fully functional quiz widget complete with progress tracking and results sharing, in under 10 minutes. This would traditionally require a custom development project or an expensive dedicated quiz plugin.
Use Case 2: Custom WooCommerce Admin Dashboard
An e-commerce store owner wants a customized order management dashboard in their WordPress admin that shows only the data fields relevant to their workflow. Using Angie’s WordPress admin snippet capability, they describe their ideal dashboard view. Angie creates a custom admin page that displays exactly the right information in the right format, without modifying core WooCommerce files.
Use Case 3: Animated Hero Section with Custom Cursor
A creative agency wants a website with a distinctive custom cursor effect and scroll-triggered animations on the hero section. Using Angie’s website snippet feature, they describe the desired behavior. Angie writes the CSS and JavaScript for the custom cursor and the GSAP-compatible scroll animations, then tests them in the sandbox before going live.
Use Case 4: Bulk SEO Fix After Site Migration
After migrating a 500-page website to a new domain structure, a web consultant uses Angie Super Admin Mode to automatically update all internal links, create the necessary redirect rules, and populate missing meta descriptions for every page — a process that would normally take days of manual work.
Use Case 5: Front-End Mortgage Calculator App
A real estate website owner wants to add an interactive mortgage calculator to help visitors estimate their monthly payments. With Angie Code, they describe the calculator inputs (loan amount, interest rate, term, down payment) and the output format. Angie builds a fully functional, styled calculator app that works entirely on the front end without any third-party plugin.
Tips and Best Practices for Getting the Most Out of Angie
Angie is powerful right out of the box, but a few simple practices will help you get dramatically better results, faster.
Write Specific, Detailed Prompts
The quality of what Angie builds is directly proportional to the clarity of your instructions. Instead of saying “create a contact form”, try “create a contact form widget for Elementor with fields for name, email, phone number, and message. Include a file attachment field. Style it with rounded inputs, a blue submit button, and a success message after submission.” The more detail you provide upfront, the fewer refinement cycles you need.
Use Visual References Whenever Possible
If you have seen a design you like — on a competitor’s site, in a design portfolio, or in a screenshot you saved — upload it. Angie’s ability to work from visual references means you can skip lengthy written descriptions entirely. Simply uploading a reference image often gets you to your desired result in a single generation.
Iterate Conversationally Rather Than Starting Over
When Angie produces something close to what you want but not exactly right, use follow-up prompts to refine it rather than starting a new build. Conversational refinement is faster and preserves the work already done. Examples of effective refinement prompts include: “make all the spacing tighter”, “change the font to match the rest of my site”, or “add a hover animation to the cards”.
Always Back Up Before Using Super Admin Mode
While Angie always confirms bulk operations before executing them, it is still best practice to take a full site backup before running any site-wide management task through Super Admin Mode. Elementor itself recommends this, and any responsible site management workflow should include it.
Save Your Best Creations to the Cloud Library
Every time Angie builds something you are proud of, save it. Your Cloud Library becomes a personal toolkit of reusable components that grows over time. For agencies, this is especially valuable — you build a library of proven, tested components that can be deployed to new client sites immediately.
Common Mistakes to Avoid When Using Angie AI
Being Too Vague in Your Prompts
The most common mistake new Angie users make is writing prompts that are too generic. “Create a slider” or “make a gallery” will produce generic results. Take an extra minute to describe the specific behavior, style, and function you need. The investment in a detailed prompt pays back multiple times in saved iteration cycles.
Skipping the Preview Before Publishing
Angie’s sandbox environment exists for a reason. Always review what Angie has built in the preview before approving it for your live site. Look at the mobile view, test any interactive elements, and check that it integrates well with your existing page design. Rushing to publish without reviewing is how small visual issues make it to production.
Using It Without an Elementor Account
Angie is developed by Elementor and the AI credit system is tied to an Elementor account. If you try to use it without connecting your account, you will run out of credits quickly or not be able to use it at all. Sign up for a free Elementor account and connect it during setup to ensure uninterrupted access.
Expecting Perfection on the First Try
Angie is extraordinarily capable, but for very complex custom builds, you may need two or three iterations to arrive at exactly the right result. This is normal and expected. The conversational refinement workflow is designed for this. Approach it as a collaborative build process rather than expecting a single prompt to produce final-ready output every time.
Ignoring the Prompt Library
Elementor provides a prompt library at prompts.elementor.com with dozens of tested, proven prompts for common use cases. New users especially should explore this library before writing prompts from scratch. Starting with a proven template and modifying it to your needs is faster than building prompts from zero.
Frequently Asked Questions
Is the Elementor Angie AI plugin really free?
Yes, Angie is completely free to download and use during the current beta period. You receive free daily AI credits that reset every 24 hours. For most regular users and small agencies, these daily credits are sufficient. Paid plans with higher credit limits are expected to be introduced once the beta phase concludes.
Do I need to have Elementor Pro to use Angie AI?
You do not need Elementor Pro to use Angie’s core features. Angie works as a standalone plugin and only requires a free Elementor account to access AI credits. However, if you want to use the Elementor widgets Angie creates inside the visual Elementor Editor, having Elementor (free or Pro) installed is necessary.
Does Angie AI require coding knowledge?
No coding knowledge is required to use Angie. The entire interaction happens through plain language prompts in a chat interface. Angie handles all the PHP, CSS, and JavaScript behind the scenes. That said, if you do know code, you can inspect and further modify Angie’s output for advanced customization.
What happens if Angie builds something that breaks my site?
Angie is designed with safety as a core priority. All code is built and tested in a completely isolated sandbox environment before it ever touches your live site. Nothing is deployed until you personally approve it. Additionally, Elementor recommends backing up your site before use, which adds an extra layer of protection.
Can I use Angie AI on any WordPress site, even without Elementor?
Some of Angie’s features — particularly the WordPress admin snippets, website snippets, and Super Admin Mode — work on any WordPress site regardless of which page builder you use. The Elementor-specific features like custom widget creation naturally require Elementor to be installed. For the best overall experience, having Elementor installed alongside Angie is recommended.
How does Angie AI know about my specific WordPress setup?
Angie uses the Model Context Protocol (MCP) to automatically read your WordPress environment when it activates. This includes your installed plugins, active theme, custom post types, Elementor configuration, and content structure. This context awareness is what allows Angie to produce code that actually integrates correctly with your specific site, rather than generic code that may conflict with your existing setup.
Can I reuse widgets and apps built by Angie on multiple sites?
Yes. Anything you create with Angie can be saved to the Cloud Library, which is accessible across all WordPress sites connected to your Elementor account. This makes Angie especially valuable for agencies and freelancers who build recurring components for multiple clients. You build once and deploy everywhere.
Conclusion
The Elementor Angie AI plugin represents a genuine step change in how WordPress websites are built and managed. By combining agentic AI with deep native integration into the WordPress and Elementor ecosystem, Angie eliminates the gap between what you can imagine and what you can actually build — without requiring you to write a single line of code.
From custom Elementor widgets and interactive front-end apps to bulk site management and automated SEO fixes, Angie handles the heavy technical lifting so you can focus on the parts of your work that actually require your creativity and judgment. The fact that all of this is currently available for free makes it one of the most compelling tools available to WordPress creators in 2026.
Whether you are a freelancer looking to deliver more custom features to clients, a business owner wanting to enhance your own site, or an agency trying to reduce development overhead, the Elementor Angie AI plugin is worth exploring today.